
A well-designed presentation captures attention, communicates ideas clearly, and enhances credibility. One of the most impactful yet underutilized tools in PowerPoint is background customization. The background sets the tone for your entire deck—subtle gradients can evoke professionalism, bold colors energize audiences, and custom images create emotional resonance. Yet many presenters rely on default templates or haphazard changes that undermine their message. Mastering how to change and optimize backgrounds in PowerPoint isn’t just about aesthetics; it’s about aligning visual design with purpose.
Why Backgrounds Matter in Presentation Design
The background of a slide operates like the foundation of a building—it supports everything else. Even with compelling content, poor background choices can make text hard to read, distract from key points, or project an unpolished image. According to research from the Society for Technical Communication, visuals processed 60,000 times faster than text, making background design a critical component of information delivery.
An effective background enhances legibility, reinforces branding, and creates visual continuity across slides. For example, a financial analyst using a clean navy gradient with subtle grid lines signals precision and structure. In contrast, a startup pitching innovation might use a dynamic abstract pattern to suggest creativity. When done right, background design works silently but powerfully behind the scenes.
“Design is not just what it looks like. Design is how it works.” — Steve Jobs
Step-by-Step Guide to Changing Slide Backgrounds
PowerPoint offers flexible options for modifying backgrounds at both the individual slide and global theme levels. Follow this structured process to ensure consistency and control.
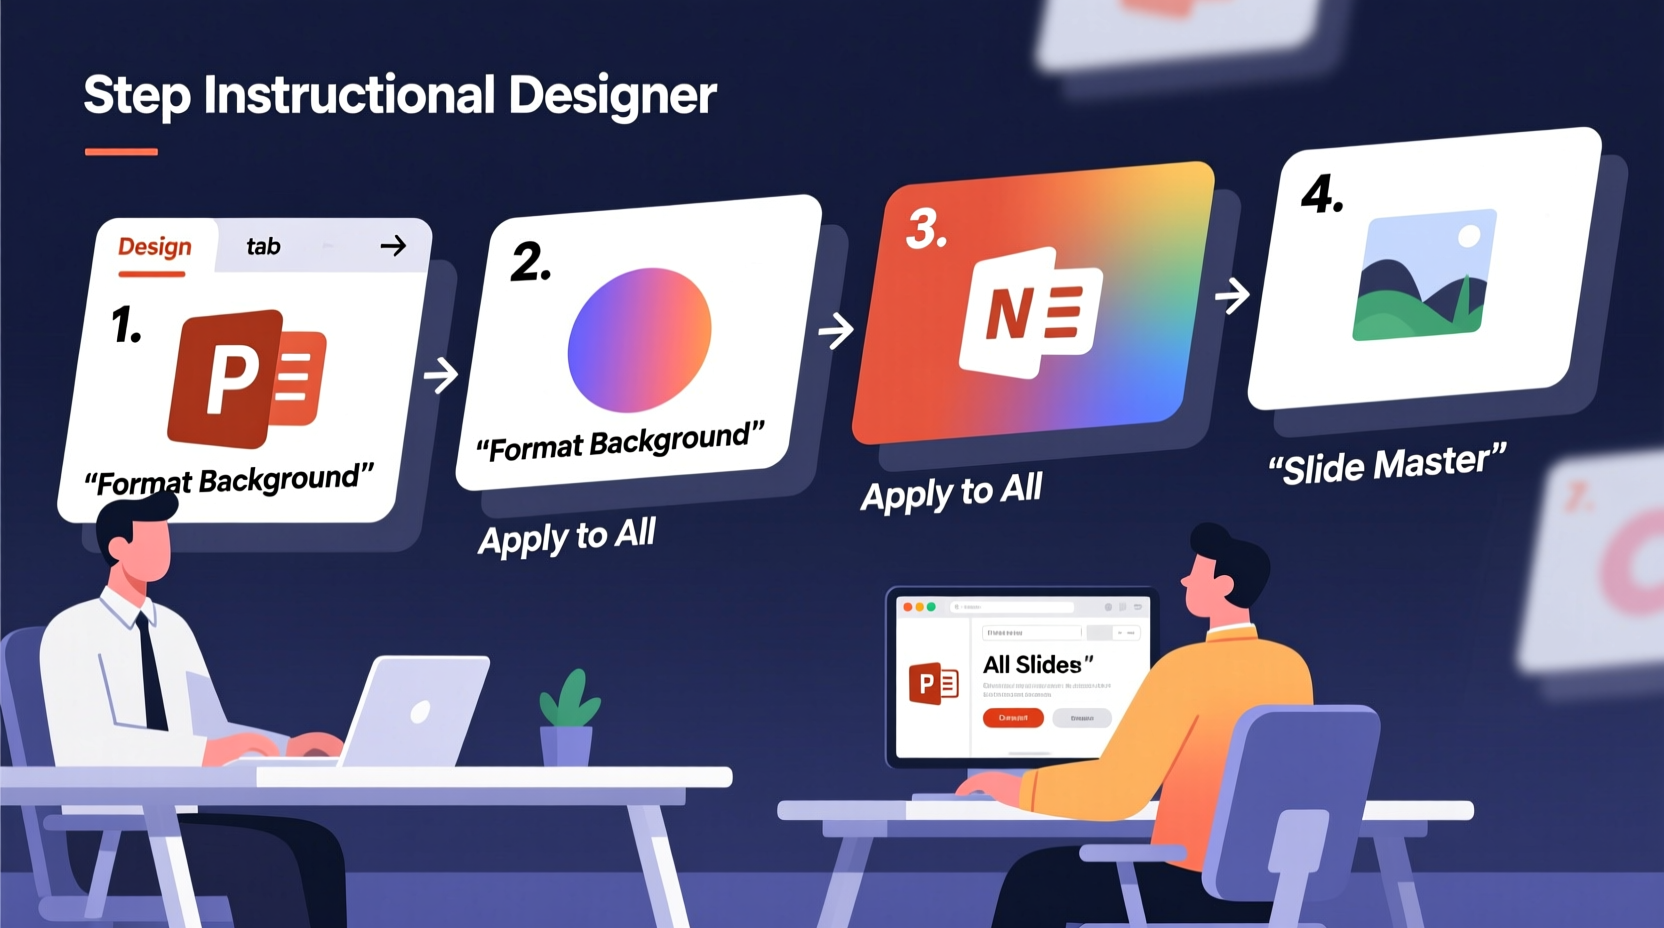
- Select the target slide(s): Click on the slide thumbnail in the left-hand pane. To apply changes to all slides, ensure no specific slide is selected or choose “Apply to All” later.
- Open Format Background: Right-click the slide and select “Format Background,” or go to the “Design” tab and click “Format Background” in the Customize group.
- Choose a background type: You’ll see several options:
- Solid fill – Choose a single color.
- Gradient fill – Apply smooth transitions between colors.
- Picture or texture fill – Insert images or preloaded textures.
- Pattern fill – Use geometric patterns over two colors.
- Customize your selection: Adjust transparency, direction, angle, or scale depending on the fill type. For images, consider cropping or adjusting brightness to improve text readability.
- Apply globally or locally: After setting the background, click “Apply to All” to standardize across the presentation, or close the pane to affect only the current slide.
Best Practices for Professional Background Design
Changing a background is simple; doing it effectively requires judgment. Avoid common pitfalls by adhering to these principles:
- Maintain contrast: Ensure text stands out clearly. Dark text on light backgrounds (or vice versa) improves readability.
- Limit visual noise: Busy backgrounds compete with content. Use subtle textures or blurred images instead of high-detail photos.
- Align with brand identity: Incorporate company colors, logos (as watermarks), or fonts to strengthen recognition.
- Preserve consistency: Use the same background logic throughout unless transitioning between sections (e.g., section dividers).
Using Master Slides for Uniformity
To enforce consistency, edit the Slide Master. Go to “View” → “Slide Master.” Here, you can define background styles once and propagate them across all layout variations. Any change made in the master—like adding a logo watermark or setting a corporate color gradient—automatically updates every linked slide. This method prevents accidental deviations and saves time during revisions.
Do’s and Don’ts of PowerPoint Backgrounds
| Do | Don't |
|---|---|
| Use high-resolution, properly licensed images | Stretch low-quality photos that appear pixelated |
| Apply subtle gradients for modern elegance | Overuse flashy animations or rainbow effects |
| Add a semi-transparent overlay under text areas | Place dark text on dark backgrounds |
| Save custom themes for future reuse | Rely solely on built-in templates without customization |
Real-World Example: Transforming a Corporate Deck
Consider Sarah, a marketing director preparing a quarterly review for executives. Her initial draft used a generic blue template with clipped corners and clip art icons. Feedback indicated the presentation felt outdated and lacked strategic clarity.
She revised it using background optimization techniques. First, she replaced the base color with a soft charcoal-to-slate gradient, projecting sophistication. Then, she applied a faint circuit-board texture at 15% opacity to reflect innovation—her team’s core theme. Each section began with a full-bleed background image related to the topic (e.g., data visualization for analytics), dimmed with a dark overlay to keep white headings visible.
The result? Executives noted the improved professionalism and focus. More importantly, engagement increased—the CFO asked follow-up questions on two initiatives highlighted in visually distinct sections. Sarah’s redesign didn’t change the data, but it changed how it was received.
Advanced Techniques for Impactful Results
Beyond basic fills, PowerPoint enables sophisticated background enhancements:
- Image masking: Combine shapes and pictures to create framed or shaped backgrounds. Use “Insert Shape” → “Format Shape” → “Fill Picture as Texture” with cropping.
- Transparency control: Adjust image transparency to balance visibility and subtlety, especially when overlaying text.
- Theme saving: After perfecting a background scheme, save it via “Design” → “Themes” → “Save Current Theme.” Reuse it across reports, pitches, or team decks.
Frequently Asked Questions
Can I remove the background from a picture used in the slide?
Yes. Select the image, go to “Picture Format” → “Remove Background.” PowerPoint will highlight areas to discard. Refine the selection manually, then confirm. Note: This affects the image itself, not the slide background.
How do I prevent background changes from affecting title slides?
Edit the Slide Master and customize layouts individually. The “Title Slide” layout often differs from “Title and Content.” Make sure background settings are applied only to intended layouts, or duplicate and modify them separately.
Is it possible to have different backgrounds for alternating slides?
Absolutely. Design two master layouts—one with a light background, another with a darker or textured variant. Assign them alternately during your presentation to create rhythm and visual pacing, especially useful in long decks.
Final Checklist: Optimizing Your Background Workflow
- Define the tone of your presentation (formal, creative, technical).
- Select a background type aligned with that tone.
- Ensure sufficient contrast between background and text.
- Edit the Slide Master for consistent application.
- Preview on the actual display device if presenting live.
- Save the theme for future use.
Conclusion
Mastering background design in PowerPoint transforms ordinary slides into powerful communication tools. It’s not about decorative flair, but intentional design that serves clarity, branding, and audience engagement. With precise control over colors, images, and layouts, you shape how your message is perceived before a single word is spoken. The next time you open PowerPoint, treat the background not as an afterthought, but as the first strategic decision in your presentation journey.


 浙公网安备
33010002000092号
浙公网安备
33010002000092号 浙B2-20120091-4
Comments
No comments yet. Why don't you start the discussion?