
Slim designer belts have become a staple in modern wardrobes—offering sleek lines, premium materials, and minimalist elegance. Whether paired with tailored trousers or smart-casual jeans, their refined profile elevates any outfit. However, even the most expertly crafted belt can fall short if it doesn’t fit properly. A loose, sliding belt or one that’s too tight defeats both function and form. Achieving a custom fit isn’t about guesswork; it’s about precision adjustment. This guide walks you through every stage of adjusting a slim designer belt strap to ensure lasting comfort, perfect alignment, and a polished appearance.
Why Proper Belt Fit Matters
A well-fitted belt does more than hold up your pants—it completes your silhouette. When a belt sits correctly, it aligns with your natural waistline, prevents bunching, and maintains consistent tension throughout the day. Slim designer belts, often made from fine leather, woven nylon, or technical fabrics, are designed to be low-profile and discreet. Because of their narrow width (typically 25–30mm), they offer less surface area for grip, making proper sizing even more critical.
An ill-fitting belt can cause discomfort, create unsightly gaps between the buckle and strap, or force you into awkward postures as you constantly reposition it. Over time, excessive strain on improperly adjusted holes can lead to tearing or stretching, especially in delicate leathers.
“Precision in fit is what separates a luxury accessory from a mere functional item. The right adjustment transforms a belt into an extension of personal style.” — Daniel Reyes, Accessory Designer & Craftsmanship Consultant
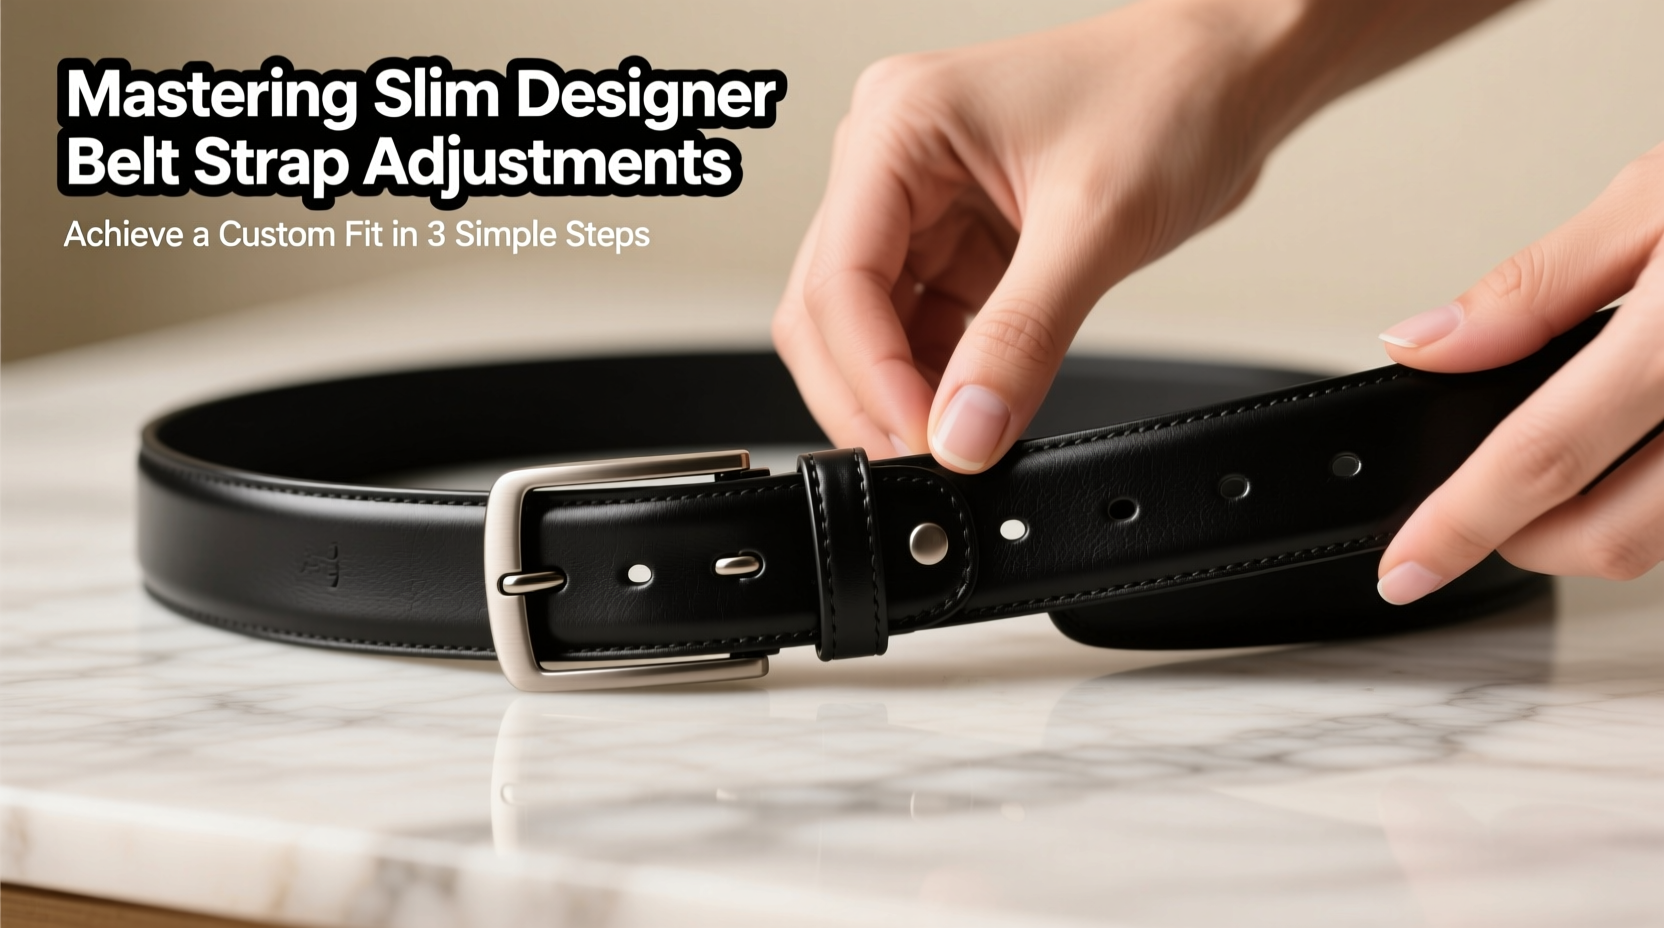
Step-by-Step Guide to Adjusting Your Slim Designer Belt
Adjusting a slim belt requires care and attention to detail. Unlike wider belts, there's little margin for error due to limited material around stitching and hole placement. Follow this timeline-tested process for optimal results.
- Evaluate Current Fit: Wear the belt with your most commonly used trousers. Note where the tongue sits in relation to the center hole. Ideally, the middle hole should be engaged when fastened comfortably—not at the end or beginning of the adjustment range.
- Determine Required Length Change: If the belt is too long, measure how many inches exceed the ideal fit. Use a soft tape measure along the outer edge of the strap from the buckle fold to the current use point.
- Mark the New Hole Position: Based on your measurement, mark the spot where a new hole should be added (or identify excess length needing removal). Ensure symmetry: the hole must align perfectly with the buckle prong and remain centered across the strap width.
- Add a New Hole (Non-Destructive Method): For minor adjustments (+/- ½ inch), add a new hole using a rotary punch or awl. Choose a tool size matching the existing holes. Support the belt over a wooden block to avoid warping the underside.
- Trim Excess Length (Permanent Adjustment): If the belt is significantly too long, trimming may be necessary. Cut no more than 1.5 inches beyond your final hole. Seal the cut edge with a heat source (lighter) for synthetic straps or edge paint for leather to prevent fraying.
- Reinforce Stitching (Optional but Recommended): On high-end belts with visible topstitching, consider reinforcing the end after trimming by restitching with waxed thread for durability and aesthetic continuity.
Do’s and Don’ts of Belt Adjustment
| Do’s | Don’ts |
|---|---|
| Use professional tools like hole punches, not scissors or knives | Don’t punch multiple trial holes—each weakens the strap structure |
| Test fit frequently during adjustment | Don’t trim more than 1.5 inches unless replacing the entire buckle system |
| Match hole diameter and spacing to original design | Don’t ignore grain direction when cutting leather—always cut parallel to fibers |
| Condition leather before and after modification |
Real Example: Tailoring a Minimalist Italian Leather Belt
James, a financial analyst based in Zurich, purchased a hand-stitched Italian calf leather belt online. While the craftsmanship was exceptional, the standard 36-inch length was too long for his 32-inch waist. Instead of returning it, he decided to customize the fit.
He followed the steps above: first wearing the belt daily for three days to confirm consistent looseness, then measuring a 2.2-inch excess. Rather than cutting immediately, he added two new holes closer to the buckle—extending the usable range inward. After testing, he trimmed 1.4 inches from the tail, sealed the edge with saddle paste, and buffed it to a soft sheen. The result? A belt that now fits seamlessly with all his suits and casual wear, appearing as though it was made specifically for him.
Tips for Maintaining Adjusted Belts
Once you’ve achieved the perfect fit, preserve it with regular maintenance:
- Rotate between two or more belts weekly to reduce stress on stitching and leather fatigue.
- Clean straps monthly with a damp cloth and appropriate conditioner—especially after exposure to sweat or humidity.
- Store flat or rolled loosely; never fold sharply, which causes permanent creases and cracking.
- Avoid leaving the belt buckled overnight, as constant tension distorts the shape near the hardware.
Frequently Asked Questions
Can I resize a belt with a hidden buckle or magnetic closure?
Yes, but extra caution is needed. Many slim designer belts with hidden buckles have internal mechanisms or stiff cores. Trimming too much can interfere with the locking system. Consult the manufacturer’s guidelines or a specialist before altering these styles.
Is it possible to lengthen a belt that’s too short?
Generally, no—unless the belt has a modular design. Some brands offer extension straps sold separately. Otherwise, adding material compromises structural integrity and aesthetics. It’s better to exchange for a longer size if available.
How do I know if my belt needs adjustment or replacement?
If the strap shows deep cracks, stretched holes, or separation near the buckle, replacement is safer. Minor fit issues are adjustable; major wear signals the end of life, regardless of sentimental value.
Checklist: Perfect Belt Adjustment in 7 Steps
- Wear the belt normally for 2–3 days to assess fit
- Measure excess length from buckle fold to current hole
- Determine whether to add holes or trim length
- Select appropriate tools: hole punch, ruler, rotary cutter, edge sealer
- Mark new hole or cut line precisely with a fine-tip pen
- Execute adjustment slowly, checking alignment continuously
- Finish edges and condition material post-adjustment
Final Thoughts: Elevate Your Style Through Precision
A slim designer belt is more than a functional accessory—it’s a statement of intentionality. Every element, from the choice of leather to the finish of the buckle, reflects attention to detail. That same rigor should extend to fit. Taking the time to adjust your belt ensures it performs flawlessly while enhancing your overall presence.
With the right approach, you can transform an off-the-rack accessory into a personalized piece that moves with you, not against you. Whether you're refining a recent purchase or restoring a favorite classic, mastering strap adjustments empowers you to wear your style with confidence.


 浙公网安备
33010002000092号
浙公网安备
33010002000092号 浙B2-20120091-4
Comments
No comments yet. Why don't you start the discussion?