
Smartwatches have become essential companions in daily life—tracking health, delivering notifications, and even guiding workouts. But no matter how advanced the technology, discomfort from a worn or faulty buckle can quickly turn convenience into irritation. Over time, buckles loosen, break, or simply fail to secure properly, compromising both fit and function. The good news? Replacing a smartwatch band buckle doesn’t require professional help or expensive tools. With the right approach, you can restore comfort and security in minutes.
Why Smartwatch Buckle Comfort Matters
A poorly fitting smartwatch isn’t just annoying—it can affect data accuracy. An unstable fit leads to inconsistent heart rate readings, inaccurate step counts, and interrupted sleep tracking. More importantly, constant readjustment distracts from focus and reduces wearability over long periods.
Buckles are among the most stressed components of a watch band. Whether it’s a traditional pin-and-loop closure on leather bands or a folding clasp on metal bracelets, repeated opening and closing wear down materials. Plastic degrades, metal springs weaken, and stitching loosens. Recognizing early signs of buckle fatigue—like slipping, resistance, or misalignment—can prevent sudden failure during critical moments.
Types of Smartwatch Band Buckles and Their Lifespan
Not all buckles are created equal. Understanding the type on your device helps determine replacement needs and compatibility.
| Type | Common Materials | Avg. Lifespan | Vulnerabilities |
|---|---|---|---|
| Pin-and-Loop (NATO, Leather) | Stainless steel, plastic, nylon | 1–3 years | Pin bending, loop tearing, strap fraying |
| Folding Clasp (Metal Bands) | Stainless steel, titanium | 2–4 years | Spring bar failure, latch mechanism wear |
| Magnetic Closure (Silicone, Fabric) | Neodymium magnets, polymer | 3+ years | Magnet weakening, fabric peeling |
| Adapter Buckle (Quick-Release Systems) | Aluminum, polycarbonate | 2–3 years | Adapter cracking, retention clip failure |
Lifespan varies based on usage intensity. Frequent swimmers, gym-goers, or those in humid climates may experience faster degradation due to moisture exposure and mechanical stress.
“Replacing a worn buckle isn’t just about aesthetics—it directly impacts sensor performance and user consistency.” — Dr. Lena Torres, Wearable Technology Researcher at MIT Media Lab
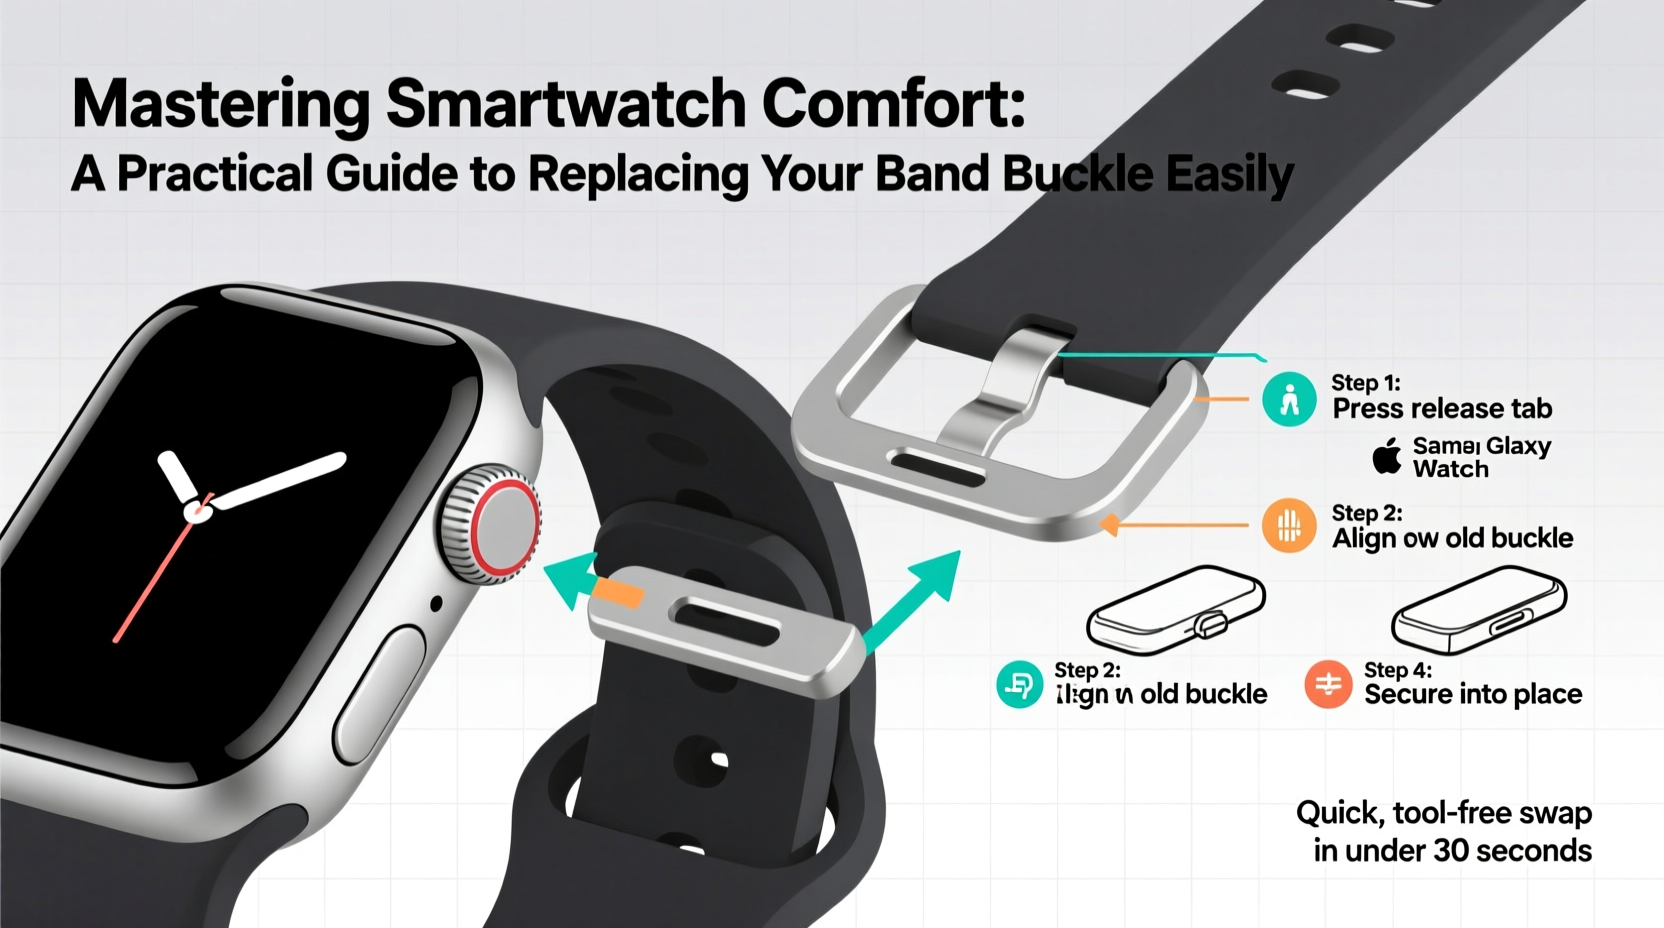
Step-by-Step Guide to Replacing Your Smartwatch Band Buckle
Before assuming your entire band needs replacement, consider that many designs allow buckle-only swaps. Follow these steps carefully to avoid damaging the strap or watch case.
- Identify the Band Type and Attachment Mechanism
Check whether your band uses quick-release pins, screws, or integrated buckles. Most modern bands (Apple Watch, Samsung Galaxy Watch, Fitbit) use spring bars, while premium third-party bands may feature screw-in buckles. - Gather Basic Tools
You’ll typically need:- Micro flathead screwdriver or spring bar removal tool
- Tweezers (for small parts)
- New buckle compatible with your band model
- Clean workspace with magnification (optional but helpful)
- Remove the Old Buckle
For spring bar systems:- Slide the band off the watch.
- Use the tool to depress the spring bar inside the buckle end.
- Gently pull the buckle away once the bar compresses.
- Unscrew the tiny fasteners securing the buckle.
- Preserve screws—they’re often non-standard size.
- Attach the New Buckle
Align the new buckle with the band’s attachment point. For spring bars, compress the bar slightly and insert it through both the band lug and buckle hole until it clicks. For screw models, reinsert screws and tighten gently—over-tightening strips threads. - Test Fit and Adjust
Reattach the band to your watch. Fasten the buckle and check for smooth operation. Ensure the fit is snug but not overly tight. Adjust positioning if needed.
Mini Case Study: Recovering Comfort After Daily Commute Damage
Jamal, a software engineer in Seattle, wore his stainless steel smartwatch daily—through commutes, meetings, and evening walks. After ten months, he noticed the clasp began opening unexpectedly during subway rides. At first, he dismissed it as user error. But when the watch slipped off mid-jog, he realized the buckle spring had fatigued.
Instead of buying a $120 replacement band, Jamal researched buckle-only replacements. He found a compatible stainless steel folding clasp online for $18. Using a $7 spring bar tool, he replaced the buckle in under 15 minutes. The restored tension and secure closure extended the life of his favorite band by another 18 months—saving money and reducing e-waste.
Common Mistakes to Avoid
- Forcing incompatible buckles: Not all buckles fit all bands—even if they look similar. Measure width (e.g., 20mm, 22mm) and attachment style before purchasing.
- Using excessive force: Spring bars and micro-screws are delicate. Apply steady pressure, not brute strength.
- Ignoring corrosion: Sweat and saltwater corrode metal buckles. Rinse after exposure and dry thoroughly.
- Skipping compatibility checks: Some brands (like Apple) have proprietary mechanisms. Third-party buckles must explicitly state compatibility.
FAQ
Can I replace a buckle on any smartwatch band?
Most bands with modular attachments allow buckle replacement, provided you have the correct tools and compatible parts. Integrated bands (e.g., some silicone models) may require full replacement.
Where can I buy replacement buckles?
Specialty retailers like Amazon, iFixit, or brand-specific stores (e.g., BandHut, ClockworkSynergy) offer individual buckles. Always verify model compatibility before ordering.
Is it worth replacing just the buckle instead of the whole band?
Absolutely—if the band material remains intact and comfortable, replacing only the buckle saves cost and reduces waste. It’s an eco-friendly and economical upgrade path.
Final Checklist Before You Begin
- ✅ Confirm your band type and buckle attachment method
- Check manufacturer specs or measure existing hardware.
- ✅ Purchase a compatible replacement buckle
- Match width, thickness, and mechanism (spring bar, screw, etc.).
- ✅ Prepare necessary tools
- Spring bar tool, micro screwdriver, tweezers, soft cloth.
- ✅ Work in a clean, well-lit area
- Prevents losing small parts and ensures precision.
- ✅ Test functionality post-installation
- Ensure secure closure and smooth release.
Conclusion
Smartwatch comfort hinges on more than screen brightness or app selection—it’s rooted in the smallest details, like a reliable buckle. A simple, timely replacement can transform a frustrating wearable into a seamless extension of your routine. By understanding your band’s design, recognizing wear patterns, and mastering basic buckle swaps, you take control of both comfort and longevity.


 浙公网安备
33010002000092号
浙公网安备
33010002000092号 浙B2-20120091-4
Comments
No comments yet. Why don't you start the discussion?