
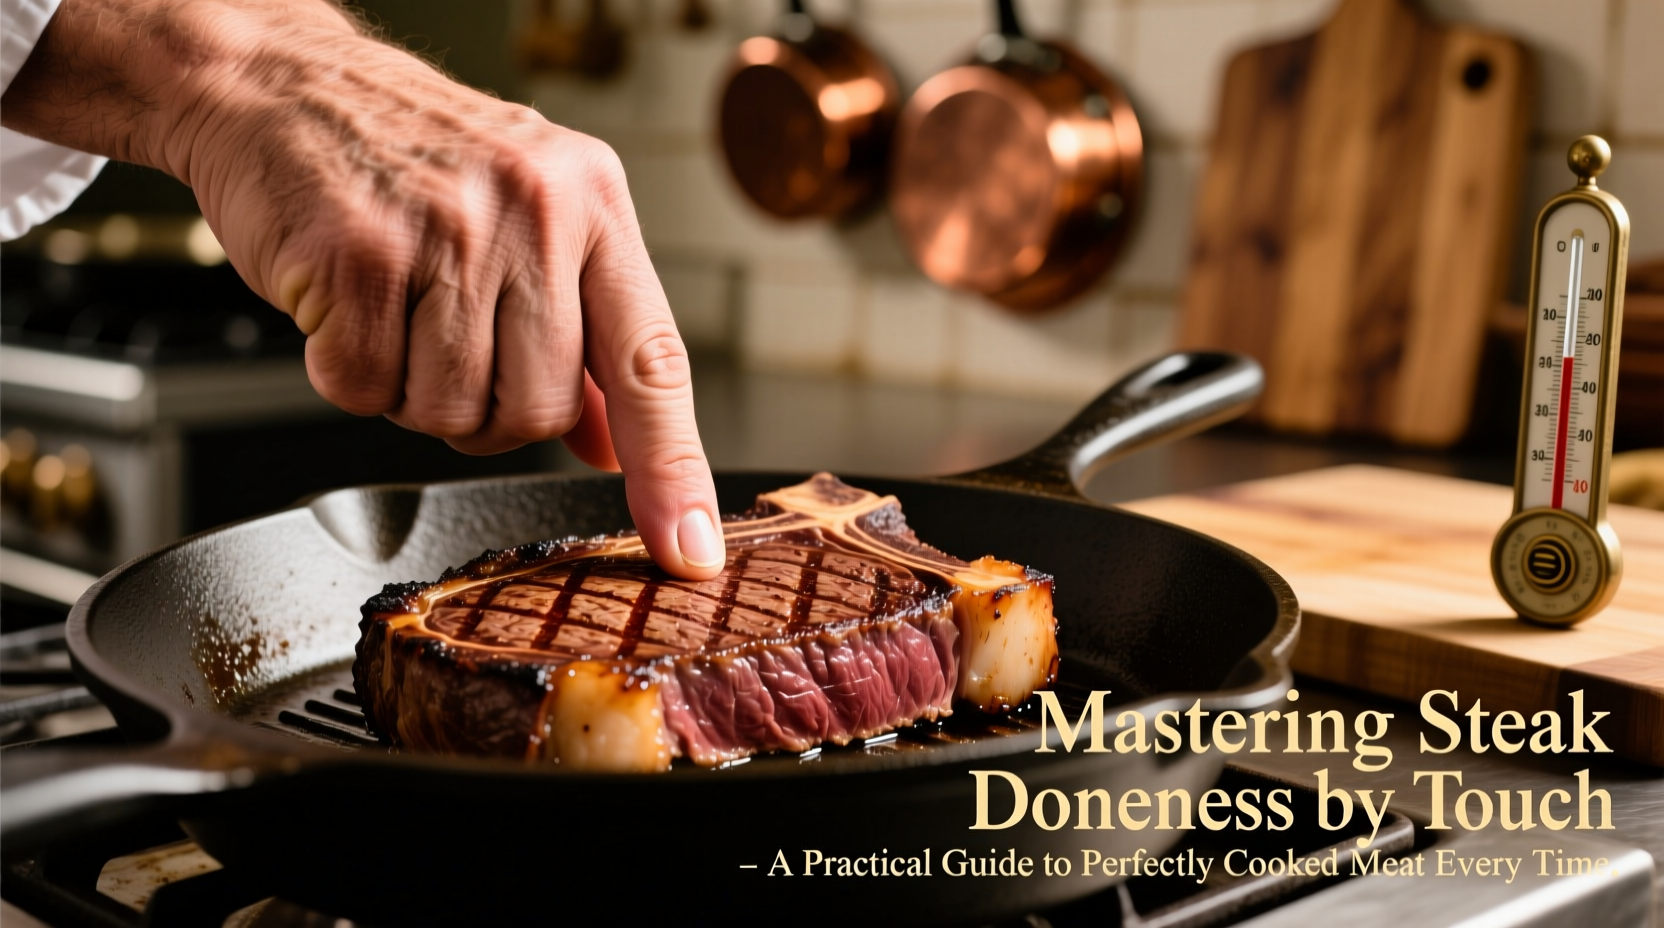
Cooking a steak to your preferred level of doneness is more than just timing or temperature—it’s about feel. While thermometers are precise, few skills in the kitchen are as empowering as knowing when a steak is perfectly cooked simply by pressing it with your finger. This tactile method, known as the \"hand test,\" has been used by chefs for generations. With practice, you can master steak doneness by touch and consistently serve flawlessly cooked meat without ever needing to cut into it.
The Science Behind Steak Texture and Doneness
As a steak cooks, its muscle fibers contract, moisture is expelled, and connective tissues begin to break down. These physical changes directly affect the firmness of the meat. A rare steak remains soft and yielding because proteins haven’t fully coagulated. As heat increases, the steak becomes firmer—medium is springy, while well-done feels tight and dense due to significant moisture loss and protein tightening.
Understanding this progression allows you to interpret what your fingers are telling you. The key is not just pressure, but elasticity. A properly cooked medium-rare steak will bounce back slightly when pressed, much like the fleshy base of your thumb when your hand is relaxed.
The Hand Test: Matching Finger Pressure to Steak Firmness
The hand test uses the natural tension in your palm to simulate different levels of steak doneness. Here's how it works:
- Hold your hand out flat, palm facing up, fingers together.
- Touch the fleshy area at the base of your thumb—the part that bulges when you make a loose fist.
- Now, touch your thumb to each fingertip one by one, comparing the firmness of that spot each time.
| Doneness | Finger to Touch | Palm Feel | Internal Temp (°F) |
|---|---|---|---|
| Rare | Thumb to Index Finger | Very soft, spongy, minimal resistance | 120–125°F |
| Medium Rare | Thumb to Middle Finger | Soft with slight springback | 130–135°F |
| Medium | Thumb to Ring Finger | Firm but yielding, moderate resilience | 140–145°F |
| Medium Well | Thumb to Pinky | Firm with little give | 150–155°F |
| Well Done | Tight fist | Very firm, almost hard | 160°F+ |
Practice this sequence slowly. The transition from medium-rare to medium may seem subtle at first, but repetition builds muscle memory. Over time, you’ll recognize the exact moment a steak hits its ideal doneness just by touch.
Step-by-Step Guide to Cooking and Testing Your Steak
Follow this proven process to apply the hand test effectively in real cooking situations:
- Choose the right cut: Ribeye, strip, or filet mignon respond best to touch testing due to consistent thickness and marbling.
- Preheat your pan or grill: High, even heat ensures a good sear and predictable cooking curve.
- Sear the steak: Cook 2–4 minutes per side depending on thickness, basting with butter and aromatics if desired.
- Begin checking at 6 minutes total: Use tongs to gently press the center of the steak.
- Compare to your palm: Recreate the hand positions and match the resistance.
- Adjust heat or time: If too soft, cook 30–60 seconds more. If close, remove and rest.
- Rest the steak: Let it sit 5–10 minutes. Carryover cooking will raise internal temp by 5–10°F.
Real Example: From Overcooked to Perfect in One Weekend
James, a home cook in Denver, had long struggled with inconsistent steaks. He relied on timers and often ended up with gray, dry results. After reading about the hand test, he decided to try it during a weekend dinner for friends. He prepped two ribeyes, brought them to room temperature, and seared them over high heat. At the 6-minute mark, he pressed one gently and compared it to his palm—thumb to ring finger. It felt close to medium. Wanting medium-rare, he pulled the steaks early and let them rest.
When sliced, both steaks revealed a warm red center with just a hint of pink at the edges. His guests were impressed. “I’ve never had such juicy steak at home,” one said. James now uses the method weekly and has taught it to his teenage son, who grills family dinners every Sunday.
“Touch is the most underrated tool in the kitchen. Temperature guides help, but true mastery comes from knowing what each stage *feels* like.” — Chef Rafael Mendez, Executive Chef at Ember & Vine
Avoiding Common Mistakes When Judging Doneness
Even experienced cooks can misjudge doneness if they overlook these pitfalls:
- Testing too early: Wait until at least halfway through the expected cook time to avoid cooling the steak or disrupting the crust.
- Pressing too hard: Excessive pressure can squeeze out juices and distort texture perception.
- Ignoring carryover cooking: Steaks continue to cook after removal from heat. Pull them 5°F below target doneness.
- Inconsistent thickness: Uneven cuts lead to uneven cooking. Consider butterflying thick areas or using a flat iron press.
- Using cold hands: Cold fingers reduce sensitivity. Warm your hands before testing if needed.
Checklist: Mastering Steak Doneness by Touch
Use this checklist each time you cook steak to build confidence and consistency:
- ✅ Bring steak to room temperature before cooking
- ✅ Preheat pan or grill to high, stable heat
- ✅ Sear undisturbed for a proper crust
- ✅ Begin touch test at midpoint of estimated cook time
- ✅ Compare firmness to hand reference points
- ✅ Remove steak slightly under target doneness
- ✅ Rest for 5–10 minutes before serving
- ✅ Reflect: Was the texture accurate? Adjust next time.
FAQ
Can I use the hand test with thinner cuts like skirt or flank steak?
Yes, but with caution. Thin cuts cook quickly and can go from rare to well-done in under a minute. Use visual cues (browning, edge curl) alongside touch, and consider cooking to medium-rare or less for best results.
Does the hand test work for other meats like chicken or pork?
Only to a limited extent. Poultry and pork lack the same textural progression as beef and require strict temperature safety standards. For chicken, always verify 165°F internally. Pork should reach at least 145°F. The hand test can support judgment but shouldn’t replace a thermometer here.
What if my steak feels right but looks overcooked inside?
This usually means you didn’t account for carryover cooking or rested the steak too long. Next time, pull the steak earlier—about 5–10°F below your desired final temperature—and shorten the rest period slightly.
Conclusion
Mastering steak doneness by touch transforms cooking from a series of guesses into a confident, intuitive practice. It connects you to the food in a way no gadget can replicate. While thermometers have their place, the ability to read a steak’s readiness through touch is a hallmark of skilled cooking. It saves time, preserves juiciness, and elevates your results from good to exceptional.


 浙公网安备
33010002000092号
浙公网安备
33010002000092号 浙B2-20120091-4
Comments
No comments yet. Why don't you start the discussion?