
Still life photography and art have long served as a powerful medium for exploring form, texture, light, and mood. From the richly detailed Dutch masters of the 17th century to modern minimalist compositions, the genre continues to captivate both creators and viewers. But crafting a compelling still life arrangement isn’t just about placing objects on a table—it’s an intentional process that blends aesthetic sensitivity with technical precision. Whether you're a photographer, painter, or digital artist, mastering the still life setup elevates your work from ordinary to extraordinary.
Selecting Your Objects with Purpose
The foundation of any strong still life begins with thoughtful object selection. Avoid random combinations; instead, choose items that share a visual or conceptual thread. This could be color harmony, material contrast (such as glass against wood), thematic relevance (a morning coffee scene), or symbolic meaning (an hourglass next to wilted flowers).
Consider how each object contributes to the narrative. A chipped teacup may suggest age and use, while a perfectly polished silver spoon introduces contrast in both texture and implication. The best still lifes tell stories without words—your choices in subject matter are the first lines of that story.
Composing for Impact
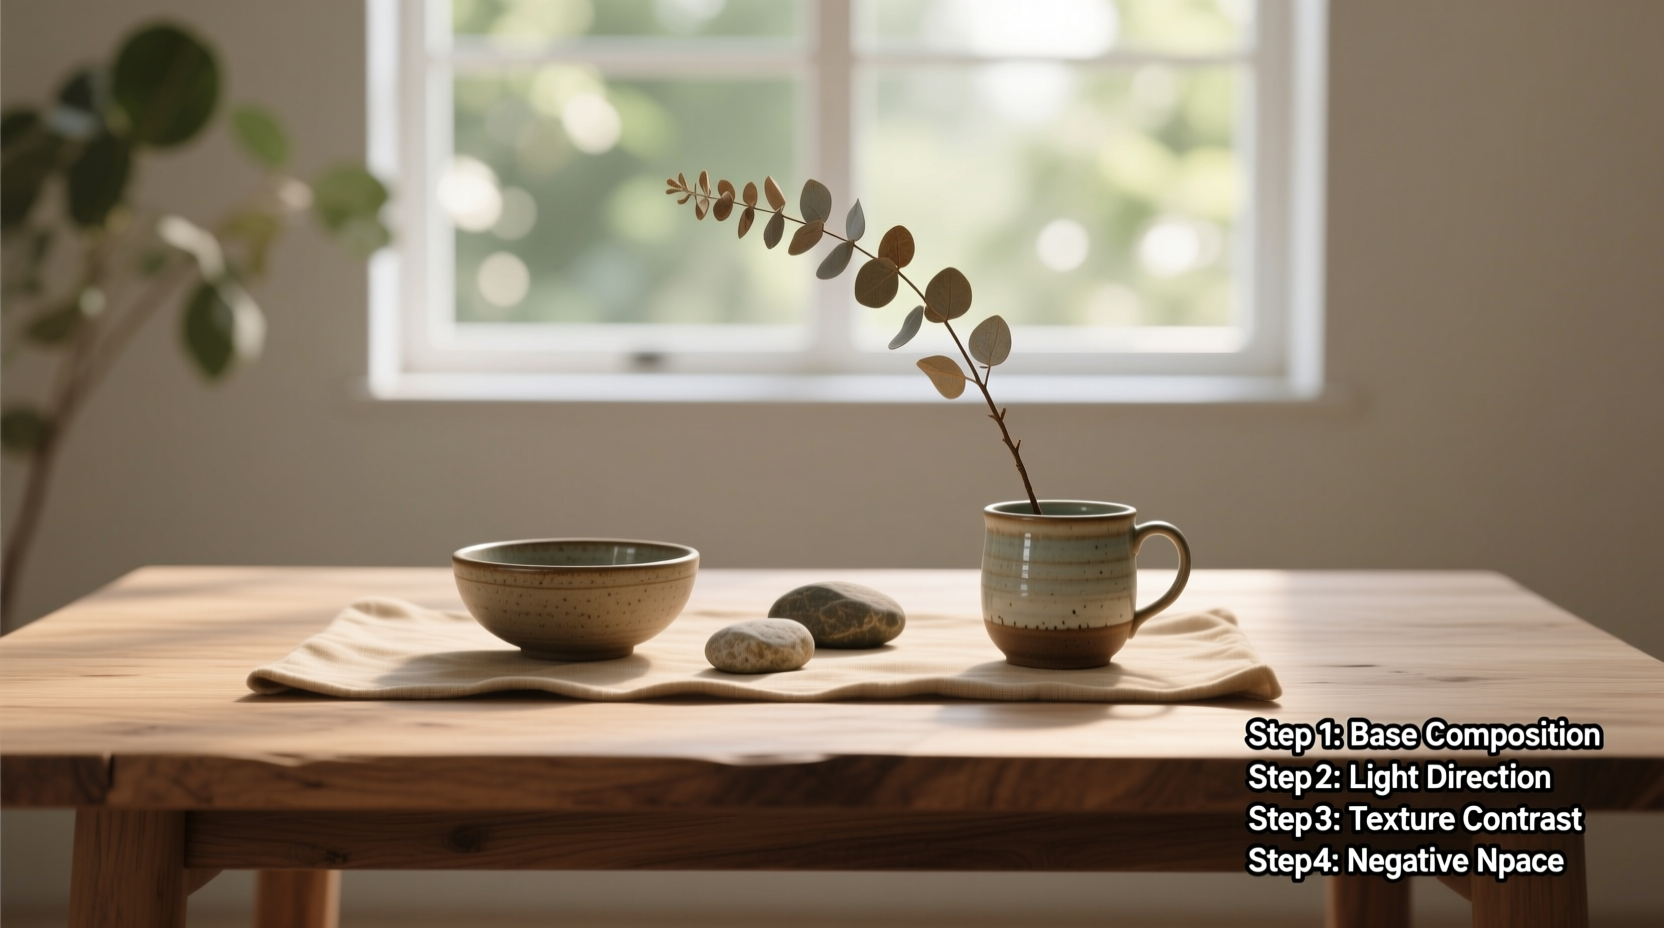
Composition determines how the viewer’s eye moves through your image. Use classic techniques like the rule of thirds, leading lines, or the golden ratio to structure your layout. Position your dominant object off-center for dynamic balance, and use secondary elements to guide attention toward it.
Pay close attention to negative space—the area around and between objects. Thoughtful use of empty space can amplify tension, highlight isolation, or create breathing room that lets the subject breathe. In minimalist still lifes, negative space often becomes a silent protagonist.
“Composition is not a formula—it’s a conversation between elements. Learn the rules so you know when to break them.” — Lila Monroe, Fine Art Photographer
Step-by-Step Guide to Building Your Still Life Setup
Creating a professional-quality still life is a methodical process. Follow this timeline to ensure consistency and creativity in every arrangement.
- Define the Theme: Decide on a mood or concept—nostalgia, abundance, decay, simplicity.
- Gather Props: Collect 3–5 primary objects and supporting textures (fabric, trays, backdrops).
- Choose a Background: Select a surface that complements but doesn’t compete—matte wood, textured paper, or neutral fabric.
- Arrange in Layers: Place larger items at the back, smaller ones in front. Overlap slightly to create depth.
- Test Angles: Shoot or sketch from multiple perspectives—eye level, overhead (flat lay), or low angle.
- Adjust Lighting: Start with soft, directional light and refine based on shadows and highlights.
- Refine Details: Remove dust, adjust tilts, tweak spacing. Even a millimeter shift can change balance.
- Capture and Review: Take test shots or make quick sketches. Iterate until the composition feels resolved.
Lighting: Shaping Mood and Dimension
No element transforms a still life more dramatically than lighting. Natural window light offers softness and authenticity, especially during early morning or late afternoon. Position your setup perpendicular to the light source for balanced illumination with gentle gradients.
For controlled environments, use a single key light at a 45-degree angle to create dimension. Add a reflector opposite the light to soften shadows. Avoid harsh overhead lighting—it flattens form and creates unflattering hotspots.
Different lighting setups evoke distinct emotions:
- Soft diffused light – Serenity, purity, minimalism
- Strong side lighting – Drama, mystery, texture emphasis
- Backlighting – Translucency, ethereal quality (ideal for glass or petals)
- Warm tones – Comfort, nostalgia, intimacy
- Cool tones – Modernity, detachment, clinical precision
Do’s and Don’ts of Still Life Arrangement
| Do | Don’t |
|---|---|
| Create depth with overlapping objects | Align all objects in a straight line |
| Use odd numbers of similar items (e.g., three apples) | Use symmetrical pairs unless intentionally formal |
| Vary heights and textures for visual interest | Combine too many reflective surfaces |
| Keep background simple and non-distracting | Allow clutter or unrelated items in frame |
| Adjust lighting gradually and observe changes | Rely solely on direct flash or ceiling lights |
A Real Example: The Morning Ritual Still Life
Jamal, a freelance product photographer, was commissioned to create a lifestyle image for a ceramic mug brand. His goal was to convey warmth, routine, and craftsmanship. Instead of photographing the mug alone, he built a narrative scene: a handmade mug beside an open notebook, a fountain pen, steam rising subtly, and a slice of lemon bread on a linen napkin. He used early morning light from a north-facing window, diffused slightly with a sheer curtain.
The composition placed the mug slightly left of center, with the notebook leading the eye diagonally into the background. The warm wood table added organic texture, while the soft shadows grounded the objects. After three iterations, Jamal adjusted the bread’s position to avoid visual competition with the mug’s handle. The final image resonated deeply with the client—users commented on feeling “invited into someone’s quiet morning.”
This success wasn’t accidental. It came from deliberate choices in theme, object relationship, and lighting control—proof that storytelling elevates still life beyond mere documentation.
Essential Checklist Before Shooting
Before finalizing your setup, run through this checklist to ensure technical and artistic readiness:
- ✅ Theme or mood clearly defined
- ✅ Number of main objects limited to 3–5
- ✅ Background is clean, complementary, and non-distracting
- ✅ Composition tested from multiple angles
- ✅ Lighting creates desired shadows and highlights
- ✅ Reflectors or diffusers in place if needed
- ✅ Surfaces cleaned (no fingerprints on glass, no dust on fabrics)
- ✅ Camera settings pre-adjusted (focus point, aperture, white balance)
- ✅ Tripod used for stability and consistent framing
- ✅ Test shot reviewed for balance and exposure
Frequently Asked Questions
How do I keep my still life from looking staged or artificial?
Introduce subtle imperfections: tilt a glass slightly, leave a page half-turned in a book, or show a spoon resting haphazardly. These human touches suggest use and lived experience, making the scene feel authentic rather than sterile.
What’s the best backdrop for beginner still life setups?
Start with neutral, matte-finish options: light gray cardstock, unfinished wood, or beige cotton fabric. These provide contrast without overwhelming the subject and are easy to light evenly.
Can I use artificial light effectively for still life?
Absolutely. LED panels with adjustable color temperature or strobes with softboxes offer excellent control. Pair with diffusion materials like tracing paper or umbrellas to soften the light and reduce harsh reflections.
Conclusion: Turn Practice into Mastery
Mastering still life setup is less about perfection and more about intention. Every choice—from the curve of a vase to the angle of a shadow—contributes to a visual language that speaks to emotion and memory. With practice, you’ll develop an instinct for balance, rhythm, and narrative subtlety.
Start small. Set up a weekly exercise: choose a theme, gather a few objects, and spend thirty minutes composing and refining. Review your work critically, noting what draws the eye and what distracts. Over time, your ability to see—and shape—compelling arrangements will grow exponentially.


 浙公网安备
33010002000092号
浙公网安备
33010002000092号 浙B2-20120091-4
Comments
No comments yet. Why don't you start the discussion?