
Whether you're hanging shelves, building a deck, or sewing curtains, the ability to accurately read a tape measure is fundamental. Yet, for many, the markings on a standard tape can look like cryptic symbols. Inches, fractions, half-inches, quarter-inches, and tiny lines between them—it’s easy to feel overwhelmed. The truth is, once you understand the logic behind the layout, reading a tape measure becomes second nature. This guide breaks down everything from basic markings to advanced reading techniques, so you can measure with precision and confidence every time.
Understanding the Anatomy of a Tape Measure
A typical tape measure consists of several key components: the blade (the long metal strip), the hook (the movable end), the case (the housing), and the lock mechanism. But what really matters when it comes to accuracy are the markings along the blade. These markings follow a standardized pattern based on either imperial (inches) or metric (centimeters) units—or often both.
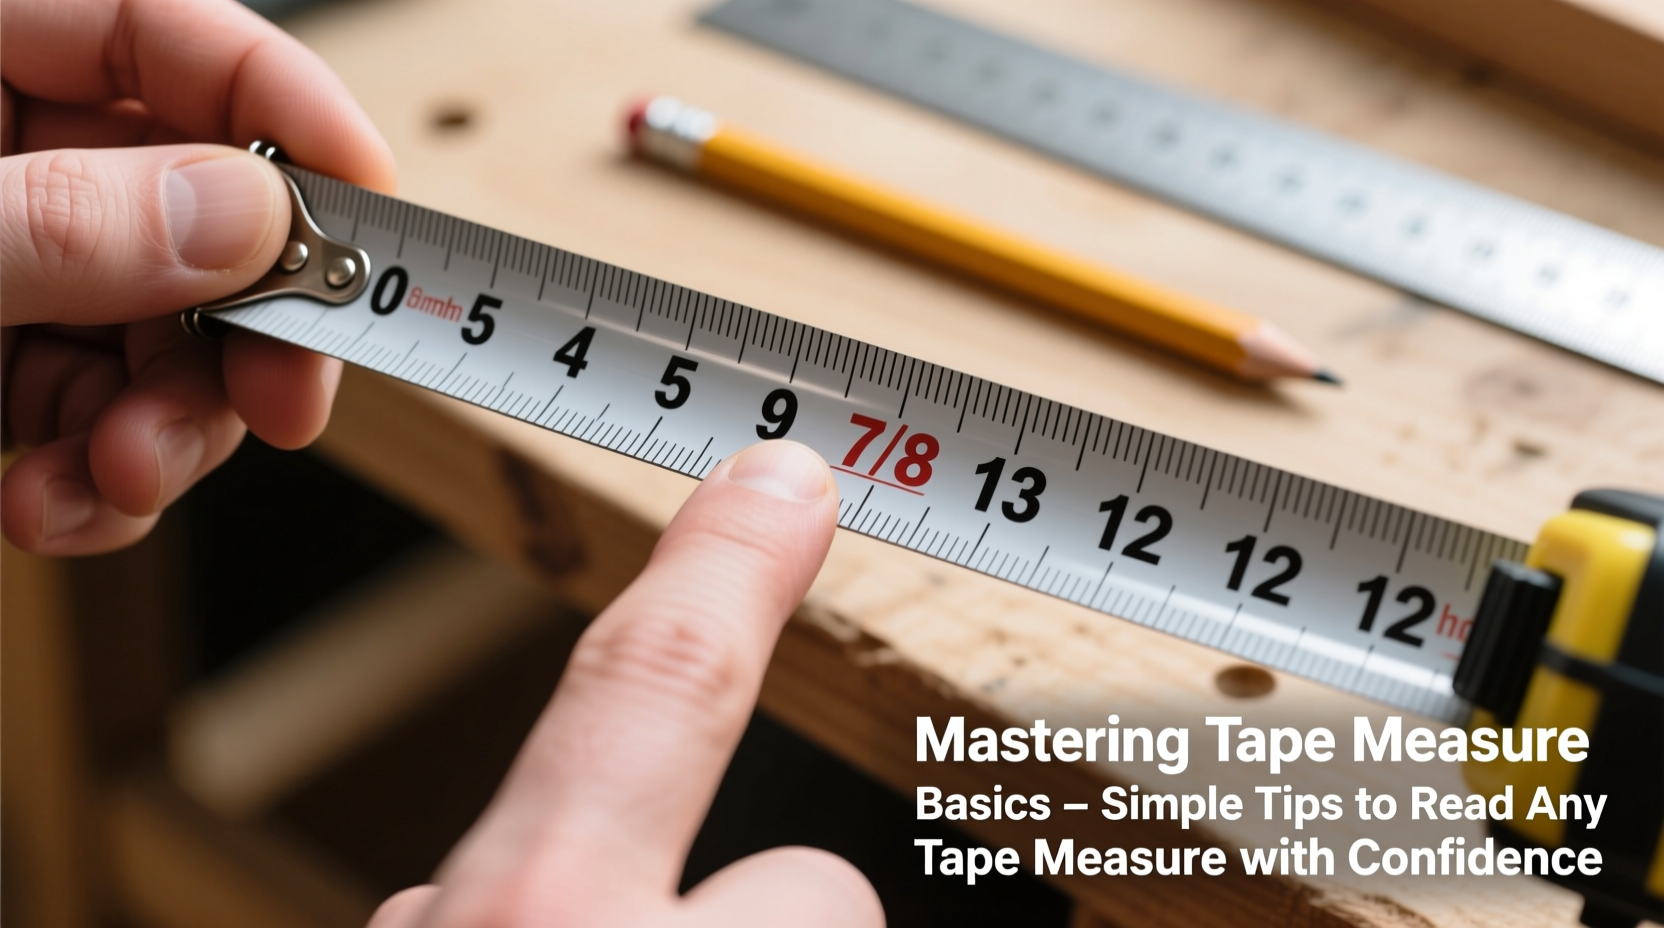
The blade is divided into major increments, usually inches or centimeters, with smaller subdivisions in between. On the imperial side, each inch is broken into fractions: halves, quarters, eighths, and sixteenths. On the metric side, each centimeter is subdivided into millimeters. The longest lines represent whole units, while progressively shorter lines indicate smaller divisions.
How to Read Imperial Measurements Step by Step
Imperial measurements dominate in the U.S. and are used in most home improvement projects. Learning to read them correctly prevents costly mistakes. Follow this sequence to interpret any inch-based marking:
- Identify the nearest whole inch before the measurement point.
- Count how many large marks (half-inch) have passed since that inch.
- Look at the next set of medium-length lines—these are quarter-inches.
- Shorter lines represent eighths, and the shortest are sixteenths.
- Add the fraction to the whole number for your total measurement.
For example, if your measurement falls at the third line after the 5-inch mark on a tape divided into sixteenths, count: first line = 1/16, second = 2/16 (or 1/8), third = 3/16. So the full measurement is 5 and 3/16 inches.
Some tapes include red numbers at every 16 inches—a critical feature for framing walls, as studs are typically spaced 16 inches apart. Recognizing these markers speeds up layout work significantly.
Decoding Metric Measurements with Ease
Metric systems simplify measurement through decimal logic. Each centimeter is divided into 10 millimeters, making calculations straightforward. Here’s how to read metric markings:
- The longest lines with numbers represent centimeters.
- The slightly shorter lines between them are unnumbered centimeters.
- The shortest lines are millimeters—there are 10 per centimeter.
To measure 23.7 cm, locate the 23 cm mark, then count seven small lines beyond it. No fractions needed—just add the decimal. This system reduces errors and is especially helpful when converting measurements or working with international plans.
“Most DIYers underestimate how much time they lose due to misreading their tape. A few minutes learning the scale pays off in hours saved.” — Carlos Mendez, Construction Foreman with 22 years of field experience
Common Mistakes and How to Avoid Them
Even experienced users make errors when rushing or working under poor lighting. Below is a checklist of frequent pitfalls and how to correct them:
- ✅ Always use the hook properly—remember it moves slightly to account for inside vs. outside measurements.
- ✅ Double-check whether you’re reading from the imperial or metric edge.
- ✅ Don’t stretch the tape; sagging causes inaccurate readings over distance.
- ✅ Keep the tape straight—bending introduces error, especially past 6 feet.
- ✅ Use consistent pressure when extending the blade to prevent slippage.
| Do | Don’t |
|---|---|
| Use the hook’s movement to your advantage for internal and external measurements | Assume the hook is fixed—its looseness is intentional for accuracy |
| Align the zero mark precisely with the edge of the material | Start measuring from the metal case instead of the hook |
| Lock the tape when reaching across long spans | Let the tape retract mid-measurement, risking inconsistency |
| Read measurements at eye level to avoid parallax error | Look down at an angle, which distorts alignment |
Real-World Example: Installing Floating Shelves
Imagine you're installing floating shelves in your living room. You need to drill pilot holes exactly 18 inches apart for proper support. You pull out your tape measure and mark the first hole at 18 inches from the corner. But when you go to mark the second, you accidentally start from the edge of the shelf bracket instead of the previous hole. Now your spacing is off by nearly two inches.
The fix? Use a story pole—a scrap piece of wood where you pre-mark all distances. Or, better yet, measure from the same reference point each time (e.g., always from the wall corner). This ensures consistency. Also, verify your measurement twice: once when marking, once before drilling. In carpentry, “measure twice, cut once” isn’t just a saying—it’s survival.
Frequently Asked Questions
Why does the metal hook on my tape measure wiggle?
The hook is designed to move slightly—about the thickness of the metal itself. This compensates for its own width, allowing accurate measurements whether you're pressing it against a surface (external) or hooking it over an edge (internal).
What does the black diamond symbol at 19.2 inches mean?
This marker appears every 19.2 inches on many tapes and is used in commercial flooring and I-joist spacing. Five of these segments equal 96 inches (8 feet), allowing evenly spaced supports without cutting panels.
Can I trust a tape measure in extreme temperatures?
Metal expands and contracts with temperature. In very hot or cold environments, especially during outdoor construction, slight inaccuracies may occur. For high-precision tasks, allow the tape to acclimate to the environment before use.
Pro Tips for Confident Measuring Every Time
Confidence with a tape measure grows with practice, but these strategies accelerate mastery:
- Practice reading fractions daily: Spend five minutes identifying random marks on your tape. Over time, 5/8\" or 11/16\" will become instantly recognizable.
- Use a highlighter trick: Mark frequently used measurements (like 16\", 24\") with colored tape or a fine-line marker for faster visual reference.
- Carry a pocket conversion chart: Know that 1 inch = 2.54 cm, and memorize common equivalents (e.g., 1/2\" ≈ 1.27 cm).
- Write measurements immediately: Don’t rely on memory. Jot them down right after taking them to avoid confusion later.
Conclusion: Measure with Confidence, Build with Precision
Mastering the tape measure isn’t about innate skill—it’s about understanding patterns, avoiding common traps, and practicing consistently. Whether you’re tackling a weekend project or managing a full renovation, precise measurement is the foundation of success. With the knowledge in this guide, you now have the tools to read any tape measure, imperial or metric, with clarity and assurance. Accuracy doesn’t come from expensive gear; it comes from attention to detail and knowing how to interpret what’s in front of you.


 浙公网安备
33010002000092号
浙公网安备
33010002000092号 浙B2-20120091-4
Comments
No comments yet. Why don't you start the discussion?