
Handcrafted accessories are more than functional—they’re personal expressions of creativity. Among the most charming and practical projects is the DIY keychain wallet: compact, stylish, and deeply satisfying to make. While many beginners start with basic folding or stitching, true artistry emerges in texture weaving. By mastering this technique, you can elevate a simple leather or fabric strip into a tactile masterpiece that stands out in both form and function.
Weaving adds structural integrity, visual depth, and a signature handmade quality that mass-produced items lack. Whether you're using paracord, waxed thread, leather lace, or nylon webbing, understanding how to manipulate these materials through deliberate patterns transforms your project from crafty to couture.
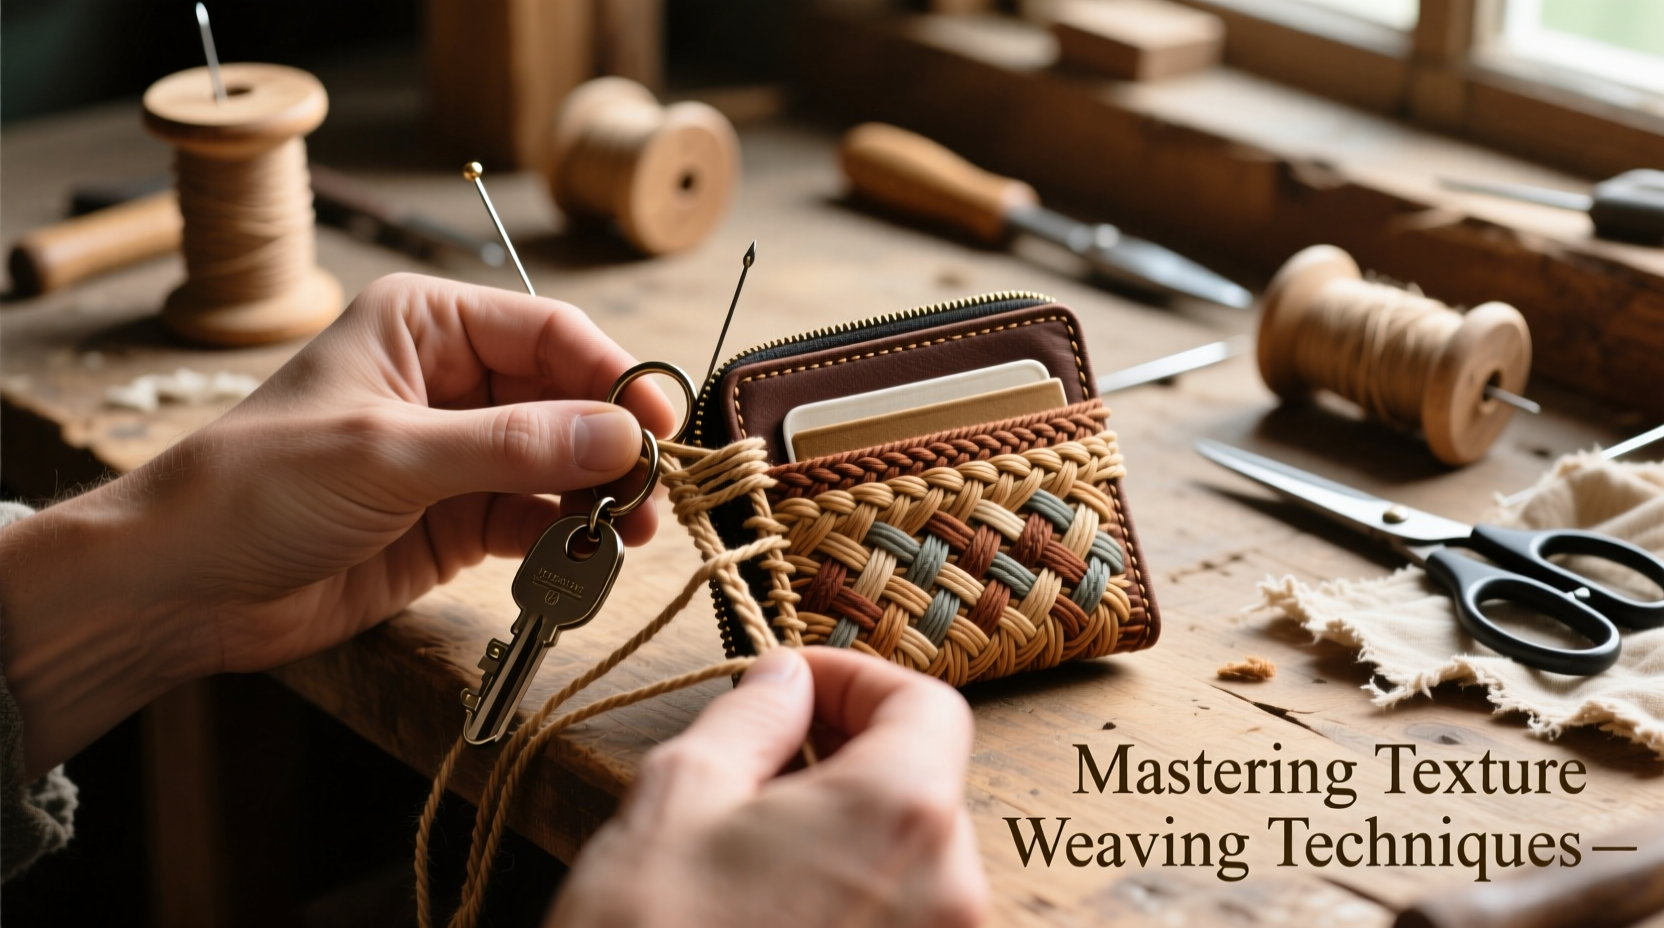
The Art and Utility of Texture Weaving
Texture weaving isn’t just about aesthetics—it serves a purpose. In small-format accessories like keychain wallets, woven sections reinforce stress points, prevent fraying, and distribute tension across multiple strands. This makes the final piece not only beautiful but also resilient enough to endure daily use.
Unlike flat stitching, which lies flush against the material, weaving builds dimension. A well-executed braid or interlaced pattern creates grip, making it easier to handle keys or retrieve folded bills. Moreover, textured surfaces resist slipping in pockets or bags, adding subtle utility to the design.
“Texture turns function into art. When you weave with intention, every knot becomes part of a story.” — Lila Torres, Craft Designer & Textile Educator
Essential Materials and Tools
Success begins with selecting the right components. The scale of a keychain wallet demands precision, so material choice directly impacts both workability and durability.
| Material | Best For | Recommended Gauge |
|---|---|---|
| Waxed Polyester Thread (e.g., Tex 90–135) | Fine hand-weaving, decorative borders | 0.6–1.0 mm |
| Paracord (Type I or II) | Durable straps, rugged textures | 2–4 mm diameter |
| Suede Lace or Leather Cord | Luxurious finish, soft hand-feel | 3–5 mm, round or flat |
| Nylon Webbing | Structural base layers | 1/4 inch width |
In addition to materials, equip yourself with:
- Beeswax (for thread conditioning)
- Needle-nose pliers (for tightening knots)
- Stitching awl (to pierce holes cleanly)
- Mini C-clamp or binder clips (for securing work)
- Ruler and rotary cutter (for precise cutting)
Step-by-Step Guide: Creating a Woven Accent Panel
This guide walks you through constructing a central woven panel for a minimalist keychain wallet using waxed thread and a simple over-under tabby weave—ideal for beginners yet customizable for advanced crafters.
- Prepare the Base: Cut a 2” x 3” rectangle from vegetable-tanned leather or heavy-duty synthetic fabric. Punch two parallel rows of six evenly spaced holes along the long edges, 1/4” apart.
- Anchor the Weft: Thread a needle with 36 inches of waxed polyester thread. Knot one end and pass it through the first hole on the left side, pulling tight so the knot rests beneath.
- Begin Weaving: Pass the needle over the top edge to the opposite side, inserting it into the first hole from back to front. Continue alternating under and over each vertical warp strand as you move across.
- Reverse Direction: At the end of the row, loop around the edge anchor point and return in the opposite pattern (under where you went over, over where you went under).
- Compact Rows: After every 2–3 passes, gently pull the thread taut and press down with a flat tool (like a bone folder) to eliminate gaps.
- Finish Securely: After completing 8–10 rows, run the needle through the backside loops several times, then trim excess.
Once complete, this panel can be stitched to a foldable bill compartment or sandwiched between outer layers for a seamless look.
Advanced Patterns for Visual Interest
Once comfortable with basic weaving, experiment with structured patterns that add complexity without compromising stability.
- Herringbone: Creates a zigzag effect by shifting the weave offset every other row. Best executed with contrasting thread colors.
- Diamond Twill: Uses four-shaft logic to produce diagonal motifs. Requires pre-planning but yields professional results.
- Spiral Braid: Applied along edges, this three-strand twist forms a raised ridge that protects corners from wear.
For those working with paracord, consider incorporating a cobra stitch border around the perimeter. It’s self-locking, weather-resistant, and adds military-grade toughness.
Mini Case Study: From Concept to Market
Jess Chen, a hobbyist in Portland, began making keychain wallets as gifts for friends. After experimenting with texture weaving, she introduced a line featuring asymmetrical herringbone accents in navy and rust threads. She used scrap leather from local upholstery shops, reducing costs while promoting sustainability.
Within three months, her Etsy shop gained traction. Customers specifically praised the “grippy texture” and “surprisingly sturdy” feel. Jess attributes her success not to complex machinery, but to meticulous hand-weaving. “People can tell when something is made with care,” she says. “The texture invites touch—and once someone holds it, they want to keep it.”
Do’s and Don’ts of Texture Weaving
| Do | Don’t |
|---|---|
| Test tension on scrap material first | Over-tighten, which can warp the base |
| Use consistent stitch length for uniformity | Mix incompatible materials (e.g., elastic + stiff cord) |
| Seal thread ends with a dot of clear nail polish | Weave too close to sharp metal key rings without protective sleeves |
| Plan symmetry if designing mirrored elements | Ignore wear zones—reinforce high-movement areas |
Checklist: Preparing Your First Woven Keychain Wallet
- Choose durable base material (leather, canvas, or synthetics)
- Select weaving medium based on desired texture and strength
- Mark and punch alignment holes precisely
- Condition thread with beeswax or sealant
- Weave test swatch to check tension and pattern accuracy
- Integrate keyring attachment point early in construction
- Trim and secure all loose ends
- Add a personal touch—initial stamp, color block, or emblem
FAQ
Can I wash a woven keychain wallet?
Spot clean only. Submerging can weaken adhesives and distort natural fibers. Use a damp cloth with mild soap, then air dry flat away from heat sources.
How long does it take to master basic weaving?
With regular practice, most beginners achieve clean, consistent results within 10–15 hours of hands-on work. Focus on tension control and pattern repetition.
What’s the most durable weaving method for daily carry?
The cobra stitch (using paracord) offers maximum abrasion resistance. Combined with UV-stable thread and sealed edges, it withstands years of use.
Craft With Confidence
Mastering texture weaving opens a world where utility and beauty coexist. Each knot, braid, and interlaced thread becomes a mark of craftsmanship—a quiet declaration that this object was made, not manufactured. The keychain wallet may be small, but in its details lies the soul of the maker.
Start simple. Refine your technique. Then push boundaries with color, contrast, and structure. There’s no single right way to weave—only your way. As you develop your signature style, remember that the most admired pieces aren’t flawless. They’re alive with intention, texture, and the human touch.


 浙公网安备
33010002000092号
浙公网安备
33010002000092号 浙B2-20120091-4
Comments
No comments yet. Why don't you start the discussion?