
There’s something deeply satisfying about creating a small handmade object that carries both charm and purpose. The acorn keychain has emerged as a favorite among knitters—not just for its whimsical design, but for its simplicity and portability. Whether you're new to knitting or looking for a quick project to refresh your skills, crafting an acorn keychain offers a delightful blend of creativity and practicality. This guide walks you through every stage, from selecting materials to finishing touches, so you can create a tiny treasure that fits in the palm of your hand.
Gathering Your Materials
Before casting on a single stitch, ensure you have the right tools and supplies. The beauty of the acorn keychain lies in its minimal material requirements—making it ideal for using up leftover yarn or experimenting with texture.
- Yarn: Worsted weight (category 4) is recommended for beginners. A small amount—about 20–30 yards—is sufficient. Wool blends offer durability; cotton adds structure.
- Knitting Needles: Size US 6 (4 mm) straight or double-pointed needles work best for this scale.
- Stitch Marker: Helps track rounds if knitting in the round.
- Tapestry Needle: For weaving in ends and sewing parts together.
- Fiber Fill or Polyester Stuffing: Gives the acorn cap its shape.
- Keychain Ring: Small metal split ring (1 inch diameter), available at craft stores.
- Scissors: Sharp fabric scissors for clean cuts.
Understanding the Structure
The acorn keychain consists of two main components: the nut (a small oval-shaped body) and the cap (a textured, flared top). These are typically knitted separately and then joined. Some patterns use short rows to shape the cap; others rely on increases and decreases for dimension.
The nut is usually worked flat and seamed, or knitted in the round using magic loop or double-pointed needles. It requires basic stockinette stitch and careful stuffing to achieve a smooth, plump look. The cap often uses basketweave or ribbed textures to mimic the ridged surface of a real acorn. Garter stitch or seed stitch variations add visual interest without complexity.
“Small projects like the acorn keychain build confidence. They allow beginners to practice shaping, seaming, and finishing—all within a few hours.” — Lila Monroe, Handmade Textile Instructor
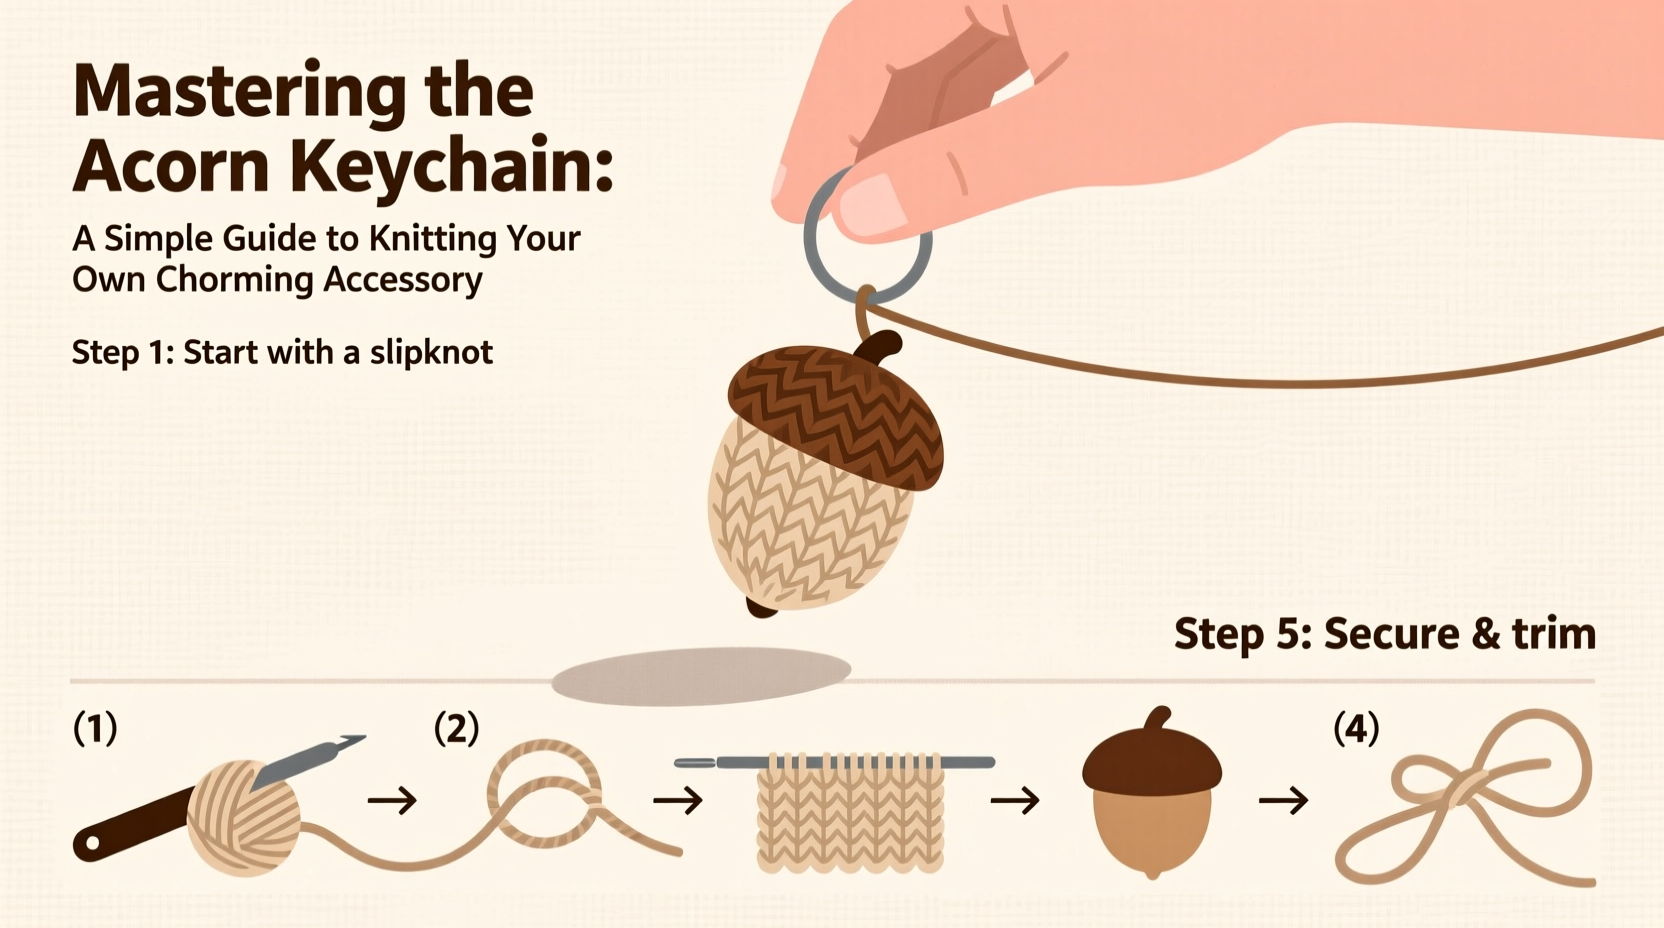
Step-by-Step Knitting Process
Follow this timeline to complete your acorn keychain in under three hours, even if you’re new to knitting.
- Casting On: Begin with the cap. Cast on 36 stitches onto double-pointed needles or circular needle for magic loop. Join in the round, placing a stitch marker.
- Ribbed Brim: Work 6 rounds of k2, p2 ribbing for a snug edge that mimics the base of an acorn cap.
- Body of the Cap: Switch to a basketweave pattern: *knit 6, purl 6* for 12 rounds, alternating by slipping first stitch of each block for texture. This creates raised panels.
- Shaping the Top: Begin decreasing evenly across 18 stitches every other round until 12 remain. Pull yarn through remaining loops and secure.
- Nut Construction: Cast on 18 stitches. Work in stockinette stitch (knit one row, purl one row) for 1.5 inches. Shape ends by decreasing 1 stitch at each end every 3rd row until 6 stitches remain. Bind off and seam sides.
- Assembly: Lightly stuff the nut. Sew the cast-on edge closed. Attach the cap to the top, concealing seams with whipstitch.
- Finishing: Thread keychain ring through the top of the cap before final stitching. Weave in all loose ends carefully.
Customization and Creative Variations
Once you’ve mastered the basic form, personalizing your acorn opens creative possibilities. Seasonal palettes—deep browns and moss greens for fall, pastel blues or pinks for spring—can shift the mood entirely. Try variegated yarns for natural-looking marbling in the nut.
For added flair, consider embroidery details: tiny French knots on the cap, or a subtle stem stitched in contrasting thread. Some crafters felt the inside of the cap for extra stiffness, while others attach a miniature leaf made from green wool.
| Variation | Technique Used | Best For |
|---|---|---|
| Felted Acorn | Wool yarn, machine-washed to shrink | Durable everyday use |
| Luxury Velvet Finish | Silk-blend yarn, tight gauge | Gifts or jewelry accents |
| Miniature Set | Reduced needle size, finer yarn | Bag charms or holiday ornaments |
| Glow-in-the-Dark Nut | Phosphorescent yarn accent | Novelty or kid-friendly versions |
Common Challenges and How to Solve Them
Even simple projects come with quirks. Here’s how to handle frequent issues:
- Holes at Raglan Joints: If joining cap sections causes gaps, twist the first stitch of each round or use a make-one increase technique.
- Uneven Stuffing: Overstuffing distorts shape; under-stuffing leaves a flat nut. Use small pinch portions of fiberfill and adjust before final closure.
- Loose Cast-On Edge: Try a smaller needle for casting on, or use a provisional method for a neater finish.
- Cap Won’t Sit Flat: Block gently with steam, pinning edges down until dry. Avoid soaking delicate fibers.
“Mistakes aren’t failures—they’re design choices waiting to be named.” — Anonymous knitting proverb
Checklist: Before You Begin Your Next Acorn
Use this checklist to streamline future projects and maintain quality:
- ✅ Choose yarn with good stitch definition
- ✅ Check tension on a swatch—even for small items
- ✅ Label parts during assembly (nut, cap, front/back)
- ✅ Keep a mini toolkit: tapestry needle, scissors, stitch markers
- ✅ Take a progress photo before seaming for reference
- ✅ Store finished pieces in breathable cotton bags
Real Example: Sarah’s First Knitting Gift
Sarah, a college student with no prior knitting experience, decided to make holiday gifts for her roommates. She found a free acorn pattern online and purchased affordable yarn in warm autumn tones. Her first attempt had uneven stuffing and a slightly lopsided cap, but after watching a tutorial on neat seaming, her second piece was noticeably better. She added tiny embroidered initials inside each cap. Her roommates loved them—not because they were perfect, but because they were thoughtful. Within a month, Sarah had taught two friends how to knit the same design. “It felt like passing on a little piece of calm,” she said. “And now we all have our keys sorted by color.”
FAQ
Can I knit the acorn keychain on straight needles?
Yes. The nut can be worked flat and seamed. The cap is trickier but possible by working back and forth and sewing the edge into a circle after shaping.
How do I make the acorn water-resistant?
While knitting isn’t inherently waterproof, you can lightly spray finished pieces with fabric protector spray. Avoid submerging in water. For outdoor use, consider crocheting a plastic-coated yarn version instead.
Is this suitable for children to make?
With supervision, yes. Use larger needles and bulky yarn to speed up the process. Skip small rings for safety; tie a ribbon loop instead.
Final Thoughts
The acorn keychain is more than a craft project—it’s a gateway to mindfulness, gifting, and the joy of making something tangible with your hands. Its compact size belies its impact: a reminder that small efforts accumulate into meaningful results. Whether you knit one or a dozen, each carries the imprint of patience and care. As seasons change and keys pile up, these tiny tokens endure as quiet symbols of creativity.


 浙公网安备
33010002000092号
浙公网安备
33010002000092号 浙B2-20120091-4
Comments
No comments yet. Why don't you start the discussion?