
Curing salmon at home is a time-honored technique that transforms fresh fish into a rich, silky delicacy with deep umami flavor. Unlike smoking or cooking, curing relies on salt, sugar, and time to preserve and enhance the natural qualities of the fish. When done correctly, the result rivals what you’d find in high-end delis or Scandinavian kitchens. The process is surprisingly simple, but precision matters—especially when balancing flavors, managing moisture, and ensuring food safety. This guide walks you through every stage, from selecting the right salmon to slicing and serving with confidence.
The Science Behind Curing Salmon
Curing works by drawing moisture out of the salmon through osmosis, while simultaneously infusing it with salt, sugar, and aromatics. Salt inhibits bacterial growth, effectively preserving the fish, while sugar balances the saltiness and adds depth. Optional ingredients like dill, citrus zest, or juniper berries contribute complexity without overpowering the delicate flesh.
The process changes the protein structure of the salmon, firming the texture and giving it a smooth, almost buttery mouthfeel. Properly cured salmon—often called gravlax when made with dill and sugar—is not raw in the traditional sense; enzymatic and chemical changes during curing alter its composition, making it safe and stable for consumption if handled correctly.
“Curing is as much about patience as it is about ingredients. The best results come from attention to detail and respect for timing.” — Henrik Larsen, Nordic Food Preservation Specialist
Essential Ingredients and Equipment
Success begins with quality. Use only the freshest, highest-grade salmon available—preferably sushi-grade or labeled “safe for raw consumption.” Farmed Atlantic salmon is ideal due to its higher fat content, which yields a richer texture after curing.
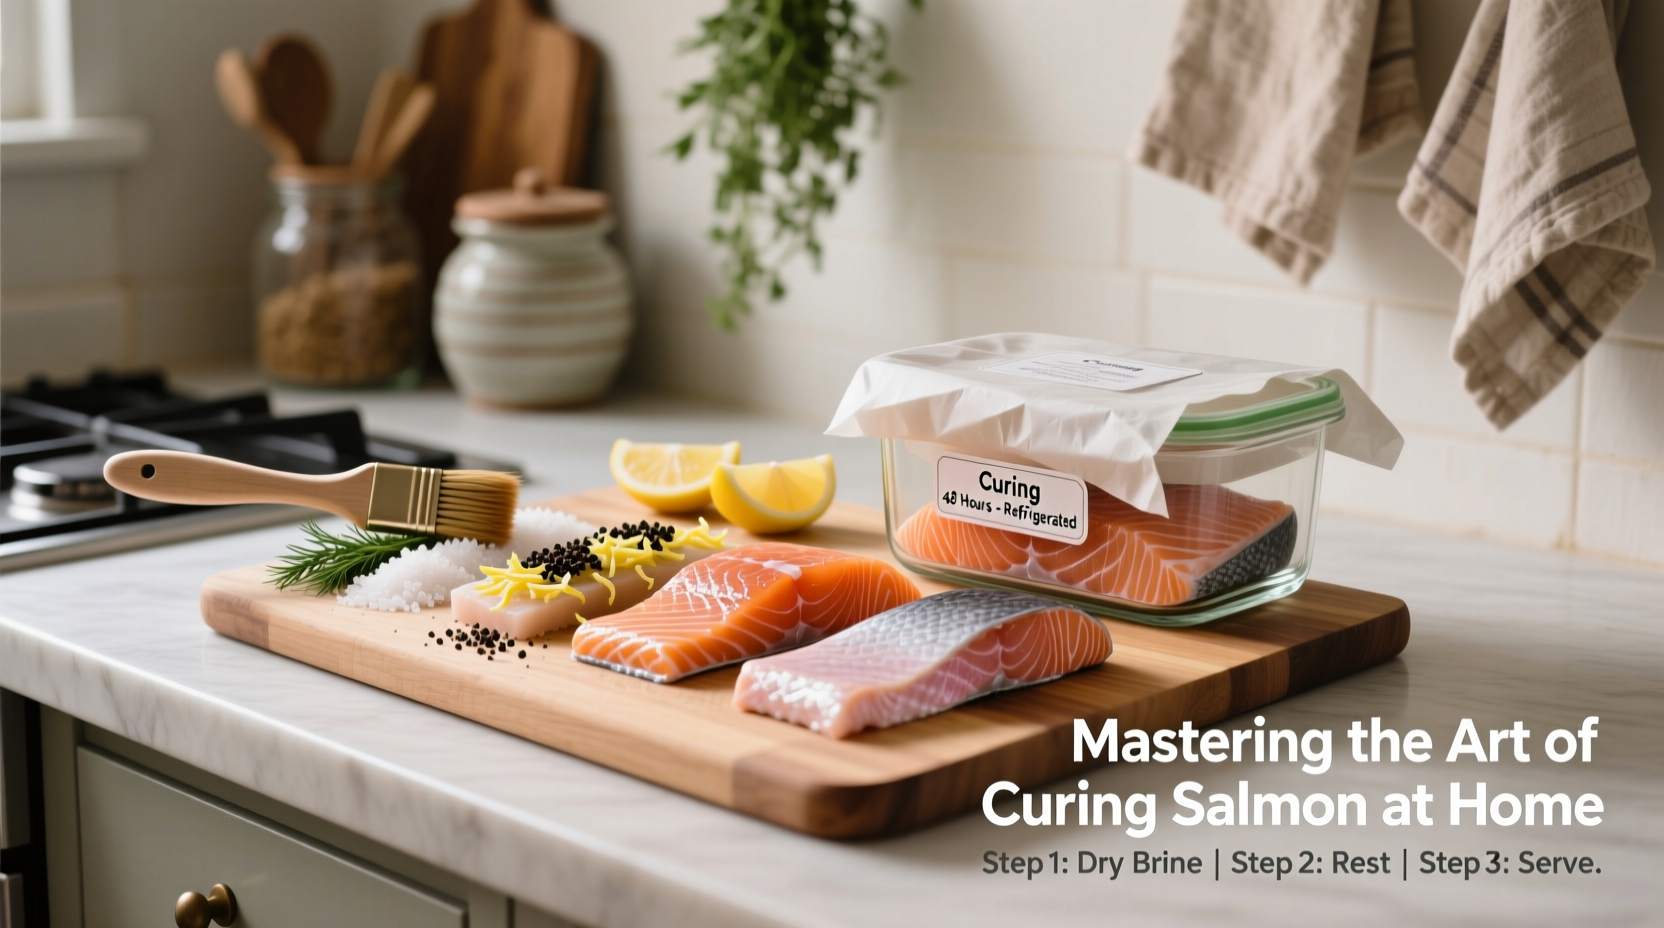
What You’ll Need:
- Fresh salmon fillet (skin-on, center-cut, approx. 1.5–2 lbs)
- Kosher salt (non-iodized)
- Granulated sugar or brown sugar
- Fresh dill (½ bunch, loosely packed)
- Lemon or orange zest (from one fruit)
- Freshly ground black pepper (optional)
- Plastic wrap or vacuum-seal bags
- A rimmed baking tray or shallow dish
- A small weight (like a sealed bag of rice or a clean brick)
Step-by-Step Guide to Perfectly Cured Salmon
- Prepare the Salmon: Rinse the fillet under cold water and pat dry thoroughly with paper towels. Leave the skin on—it protects the flesh during curing and helps hold the fillet together.
- Make the Cure Mixture: In a bowl, combine ¼ cup kosher salt, ⅓ cup sugar, 1 tablespoon coarsely ground black pepper, the zest of one lemon, and half the dill (roughly chopped). Mix well.
- Apply the Cure: Place a large piece of plastic wrap on a tray. Sprinkle a thin layer of cure mixture on the wrap. Lay the salmon flesh-side up on top. Cover generously with the remaining cure, pressing it gently into the surface. Scatter the rest of the fresh dill over the top.
- Seal and Weight: Wrap the salmon tightly in the plastic, forming a snug parcel. Place it on a tray and set a light weight on top—this ensures even pressure and consistent texture.
- Refrigerate: Cure in the refrigerator for 48 to 72 hours. Flip the salmon every 12 hours to redistribute moisture and cure evenly. After 24 hours, you’ll notice liquid pooling—that’s the extracted moisture, a sign the process is working.
- Rinse and Dry: After curing, unwrap the salmon and rinse under cold water to remove all traces of the cure. Pat dry and lay on a wire rack for 15–20 minutes to form a pellicle—a slightly tacky surface that improves sliceability.
- Slice and Serve: Using a sharp, thin-bladed knife, slice thinly at a slight angle against the grain. Serve immediately or store properly (see below).
Do’s and Don’ts of Home Curing
| Do’s | Don’ts |
|---|---|
| Use sushi-grade salmon from a trusted source | Use previously frozen or low-quality fish |
| Keep everything refrigerated (below 40°F / 4°C) | Leave salmon at room temperature for more than 10 minutes |
| Flip the fillet every 12 hours during curing | Forget to flip—uneven curing leads to inconsistent texture |
| Rinse and dry thoroughly before slicing | Serve without rinsing—excess salt can overwhelm flavor |
| Store cured salmon wrapped in parchment, then foil | Store uncovered or in airtight plastic long-term (promotes moisture buildup) |
Tips for Flavor Variations and Creative Twists
While classic dill-citrus gravlax is timeless, experimenting with the cure opens doors to exciting flavor profiles. The base ratio of salt to sugar (1:1.3) should remain consistent, but aromatics can vary widely.
- Smoky Maple Cure: Replace half the sugar with maple syrup and add a teaspoon of smoked paprika.
- Asian-Inspired Cure: Use brown sugar, grated ginger, star anise, and a splash of soy sauce (reduced salt accordingly).
- Herbes de Provence: Mix in dried lavender, thyme, and rosemary for a floral, earthy note.
Always adjust salt if adding salty ingredients (e.g., soy sauce, miso). When in doubt, taste a tiny amount of the cure mix on your fingertip—adjust sweetness or herbs as needed.
Real Example: A Weekend Experiment That Became a Tradition
When Sarah Thompson first tried curing salmon, she followed a recipe blindly and left her fillet in for five days. Expecting disaster, she was surprised to find it deeply flavored but still moist and tender. After trimming the outer edges, which were slightly firmer, she served it at a brunch with homemade mustard-dill sauce. Guests assumed she’d bought it from a specialty market. Now, she cures a batch every two months, experimenting with seasonal ingredients—blood orange zest in winter, fresh tarragon in summer—and always uses the same ceramic dish passed down from her grandmother.
Her key insight? “The fridge isn’t just cold—it’s a curing chamber. Consistent temperature and airflow matter more than people think.”
Storage and Shelf Life
Properly cured and stored salmon lasts 5–7 days in the refrigerator. For longer storage, vacuum-seal and freeze for up to 3 weeks. Thaw slowly in the fridge before serving.
To maintain quality:
- Wrap slices in parchment paper, then foil.
- Store in the coldest part of the fridge, not the door.
- Minimize exposure to air to prevent oxidation and drying.
FAQ
Can I cure frozen salmon?
Yes, but only if it was frozen at peak freshness and labeled safe for raw consumption. Thaw it slowly in the refrigerator overnight before curing. Avoid refreezing after curing.
Is cured salmon safe to eat without cooking?
Yes, when prepared correctly using fresh, high-quality fish and proper sanitation. The salt and time combination inhibits harmful bacteria. However, pregnant individuals and immunocompromised people should consult a physician before consuming raw or cured fish.
Why is my cured salmon too salty?
Overcuring or using table salt (which is denser than kosher salt) can lead to excess saltiness. Stick to the recommended time (max 72 hours) and measure salt carefully. Rinsing thoroughly and a brief soak in cold water can help rescue an overly salty batch.
Conclusion
Curing salmon at home is a rewarding culinary skill that elevates everyday ingredients into something extraordinary. With minimal tools and a few days of patience, you can create restaurant-quality gravlax that impresses guests and enhances breakfasts, salads, and appetizers. The balance of salt, sugar, and aromatic elements allows for endless creativity, while the technique itself connects you to centuries of preservation wisdom.


 浙公网安备
33010002000092号
浙公网安备
33010002000092号 浙B2-20120091-4
Comments
No comments yet. Why don't you start the discussion?