
Fabric bows are more than just decorative accents—they’re timeless embellishments that elevate everything from gift wrapping to children’s clothing, hair accessories, and home décor. When crafted with care, a well-made fabric bow adds charm, sophistication, and a handmade touch that store-bought versions rarely match. While they may seem simple at first glance, mastering the art of fabric bows involves understanding materials, proportions, and techniques that ensure durability and visual appeal. This guide walks you through every essential element, offering practical advice, expert insights, and clear instructions to help you create beautiful, professional-quality bows at home.
Choosing the Right Fabric
The foundation of any great fabric bow is the material itself. Not all fabrics behave the same when folded, tied, or cut, so selecting the right one is critical for achieving crisp, long-lasting results.
Cotton and cotton blends are excellent for beginners. They hold shape well, are easy to sew or glue, and come in endless prints and colors. Satin and silk offer a luxurious sheen and smooth drape, ideal for formal occasions—but they can be slippery and require extra pinning during construction. For stiffer, structured bows, consider using taffeta or organza. These fabrics maintain volume and resist fraying, making them perfect for headbands or statement hairpieces.
Avoid overly stretchy knits or loosely woven materials unless you're aiming for a soft, ruffled effect. These fabrics tend to lose definition quickly and are harder to control during assembly.
Essential Tools and Materials
Before cutting any fabric, gather the tools that will make your process efficient and precise. Having the right supplies on hand reduces frustration and improves the quality of your finished product.
- Sharp fabric scissors or rotary cutter
- Measuring tape or ruler
- Pins or fabric clips
- Hot glue gun and glue sticks (or needle and thread for sewing)
- Wire-edged ribbon (optional, for shaping)
- Center cover piece (a small rectangle of contrasting fabric or a button)
- Clip, headband, or pin backing (depending on intended use)
Using a self-healing cutting mat and a rotary cutter allows for clean, straight edges—especially helpful when cutting multiple strips. A low-temp glue gun gives you more control and reduces the risk of burns while still providing strong adhesion.
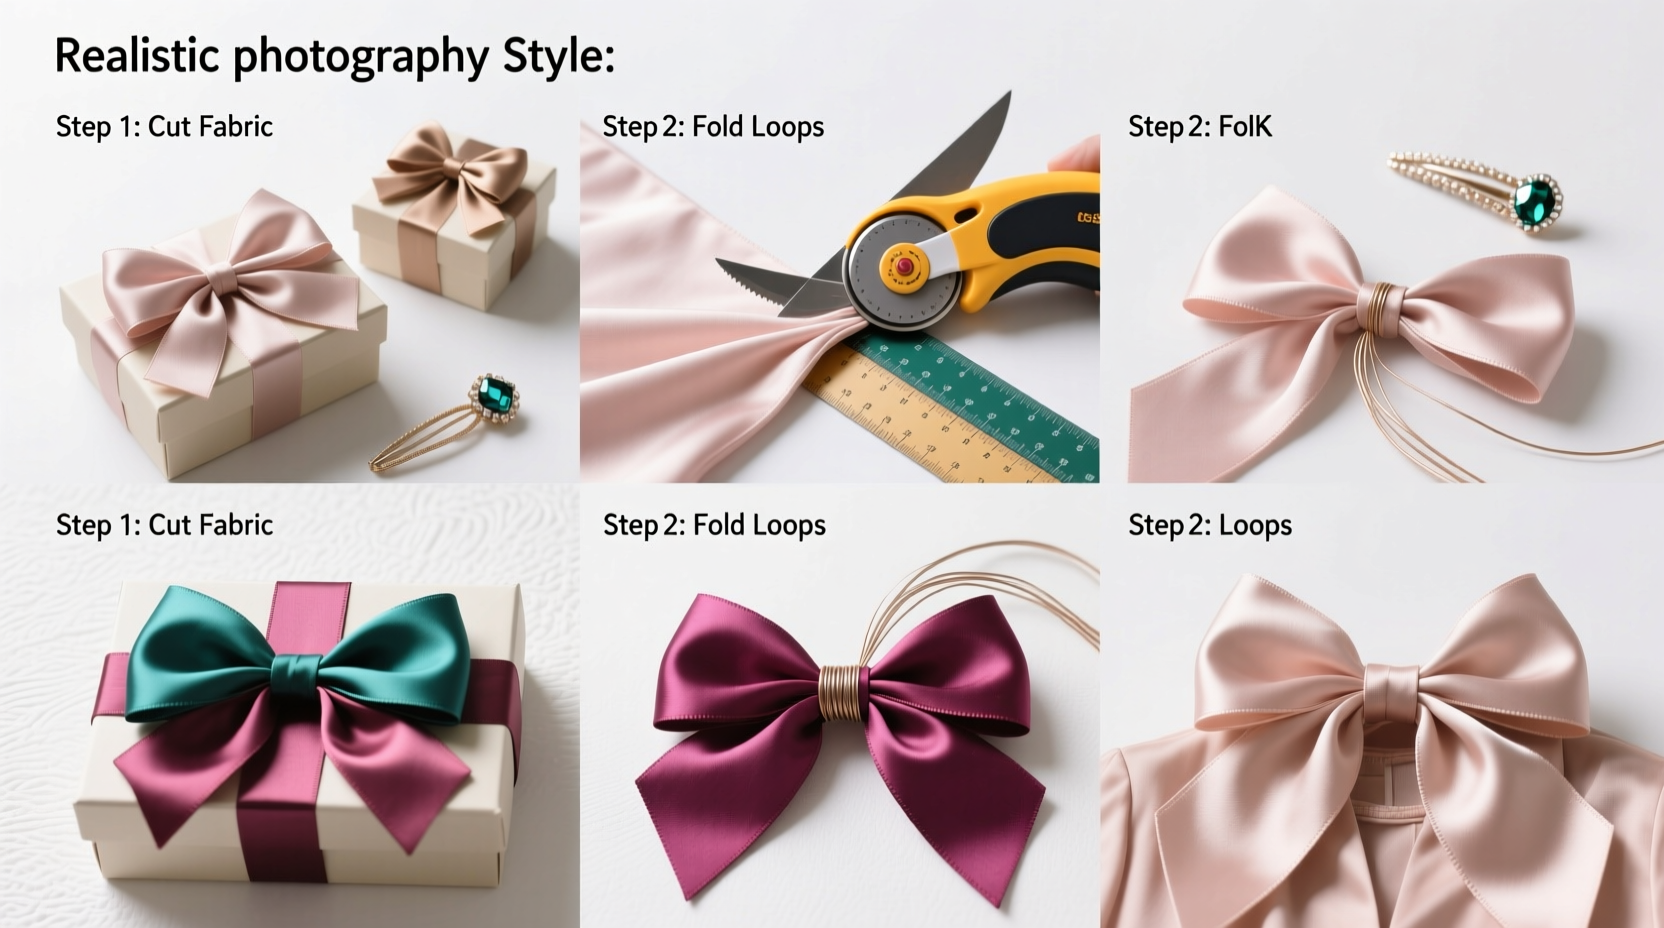
Step-by-Step Guide to Creating a Classic Fabric Bow
Follow this detailed sequence to make a full, professional-looking fabric bow suitable for gifts, hair accessories, or garment embellishment.
- Cut the fabric strip: Choose a width between 2” and 4” and a length of 18” to 24”, depending on desired size. For example, a 3” x 20” strip creates a medium-sized bow ideal for hair clips.
- Create the center loop: Fold the strip in half with the right side facing out. Pinch the center to form two loops, leaving about 2” of tail at the back for securing later.
- Form the outer loops: Twist the fabric slightly and bring both ends around to meet at the center, forming symmetrical loops on each side. Adjust tension to balance fullness.
- Secure the center: Wrap a thin strip of fabric, wire, or elastic tightly around the middle where all pieces converge. Knot securely or glue in place.
- Add a cover: Cut a small rectangle (1” x 2”) or use a button to conceal the wrapped center. Attach it over the knot to give a polished finish.
- Attach a backing: Glue or sew on a clip, headband, or safety pin depending on how the bow will be used.
For added dimension, incorporate multiple layers—such as an underskirt of contrasting fabric or a smaller inner bow. This technique is commonly used in boutique hair accessories and gives a custom, high-end appearance.
Do’s and Don’ts of Fabric Bow Making
| Do’s | Don’ts |
|---|---|
| Use fabric with minimal stretch for defined shapes | Use thick, bulky fabric that won’t lie flat |
| Pre-cut all pieces before assembly for consistency | Rush the shaping process—take time to adjust loops evenly |
| Seal raw edges with fray check or stitching when using silk or satin | Leave exposed edges that can unravel over time |
| Add wire to ribbon tails for adjustable flair | Overtighten the center, which can flatten the bow |
Expert Insight: The Designer’s Perspective
“Precision in symmetry and attention to edge finishing separate amateur bows from those that look store-bought. Even small details like matching pattern direction across loops make a visible difference.” — Lena Torres, Boutique Accessory Designer
Torres, who has designed handmade hair accessories for specialty retailers, emphasizes consistency in loop size and tension. She recommends practicing with inexpensive muslin before moving to premium fabrics, allowing crafters to refine their technique without waste.
Real Example: A Mother’s Custom Hair Bows
Sarah, a stay-at-home mom from Portland, began making fabric bows for her daughter’s daycare outfits after struggling to find durable, washable options in stores. Using cotton quilting fabric and alligator clips, she developed a simple template that ensured uniformity across dozens of bows. She later started selling them locally, incorporating reversible designs and seasonal patterns. Her success stemmed not from complex methods but from consistent execution and thoughtful material choices—proof that mastery begins with fundamentals.
Advanced Techniques for Stylish Variations
Once comfortable with the classic bow, experiment with variations to expand your creative range.
- The layered bow: Stack two or three differently sized bows vertically, securing them off-center for dynamic texture.
- The rosette bow: Spiral a long, narrow strip (1” x 36”) into a tight coil, gluing as you go, then flatten slightly for a floral effect.
- The crisscross bow: Use two separate strips crossed at the center before wrapping, creating a double-knot illusion.
- The scrunch bow: Gather a long strip by pulling a threaded center cord, producing a ruffled, bohemian look.
These styles work beautifully in mixed-media projects—combine lace overlays with satin bases, or add beads and embroidery for personalized flair.
Checklist: Before You Finish Your Bow
- Are all loops symmetrical and evenly spaced?
- Are raw edges sealed or hidden?
- Is the center wrap secure and concealed with a cover piece?
- Is the attachment method appropriate for its use (e.g., clip vs. sew-on)?
- Have you tested durability by gently tugging on the loops?
Frequently Asked Questions
How do I prevent my satin bow from slipping during assembly?
Use fine pins or fabric clips to hold loops in place before securing the center. Work slowly and avoid stretching the fabric. Applying a tiny dot of fabric glue at stress points can also stabilize slippery materials.
Can I wash fabric bows?
It depends on the materials. Cotton bows can typically be hand-washed and air-dried. Avoid submerging glued elements or wire-edged ribbons. For delicate bows, spot clean only. Sewn bows without glue tend to be more wash-resistant.
What’s the best way to store fabric bows?
Store them flat in compartmentalized boxes or on dowels to preserve shape. Keep away from humidity and direct sunlight to prevent fading and mildew. Place tissue paper between stacked bows to avoid color transfer.
Final Thoughts and Call to Action
Creating fabric bows is more than a craft—it’s a blend of precision, creativity, and personal expression. Whether you're enhancing a gift, designing children’s accessories, or adding flair to a sewing project, the skills you develop here are both practical and rewarding. With the right materials, attention to detail, and a bit of patience, anyone can produce bows that look professionally made.


 浙公网安备
33010002000092号
浙公网安备
33010002000092号 浙B2-20120091-4
Comments
No comments yet. Why don't you start the discussion?