
Hand embroidery is more than just stitching fabric—it’s a meditative craft that turns thread and needle into storytelling tools. With roots stretching back thousands of years, embroidery remains a timeless way to personalize textiles, express creativity, and slow down in a fast-paced world. For beginners, the process can seem intimidating, but with the right guidance, anyone can learn to create elegant, handmade designs. This guide walks you through every stage, from selecting your first hoop to completing your debut project with confidence.
Gathering Your Essential Tools
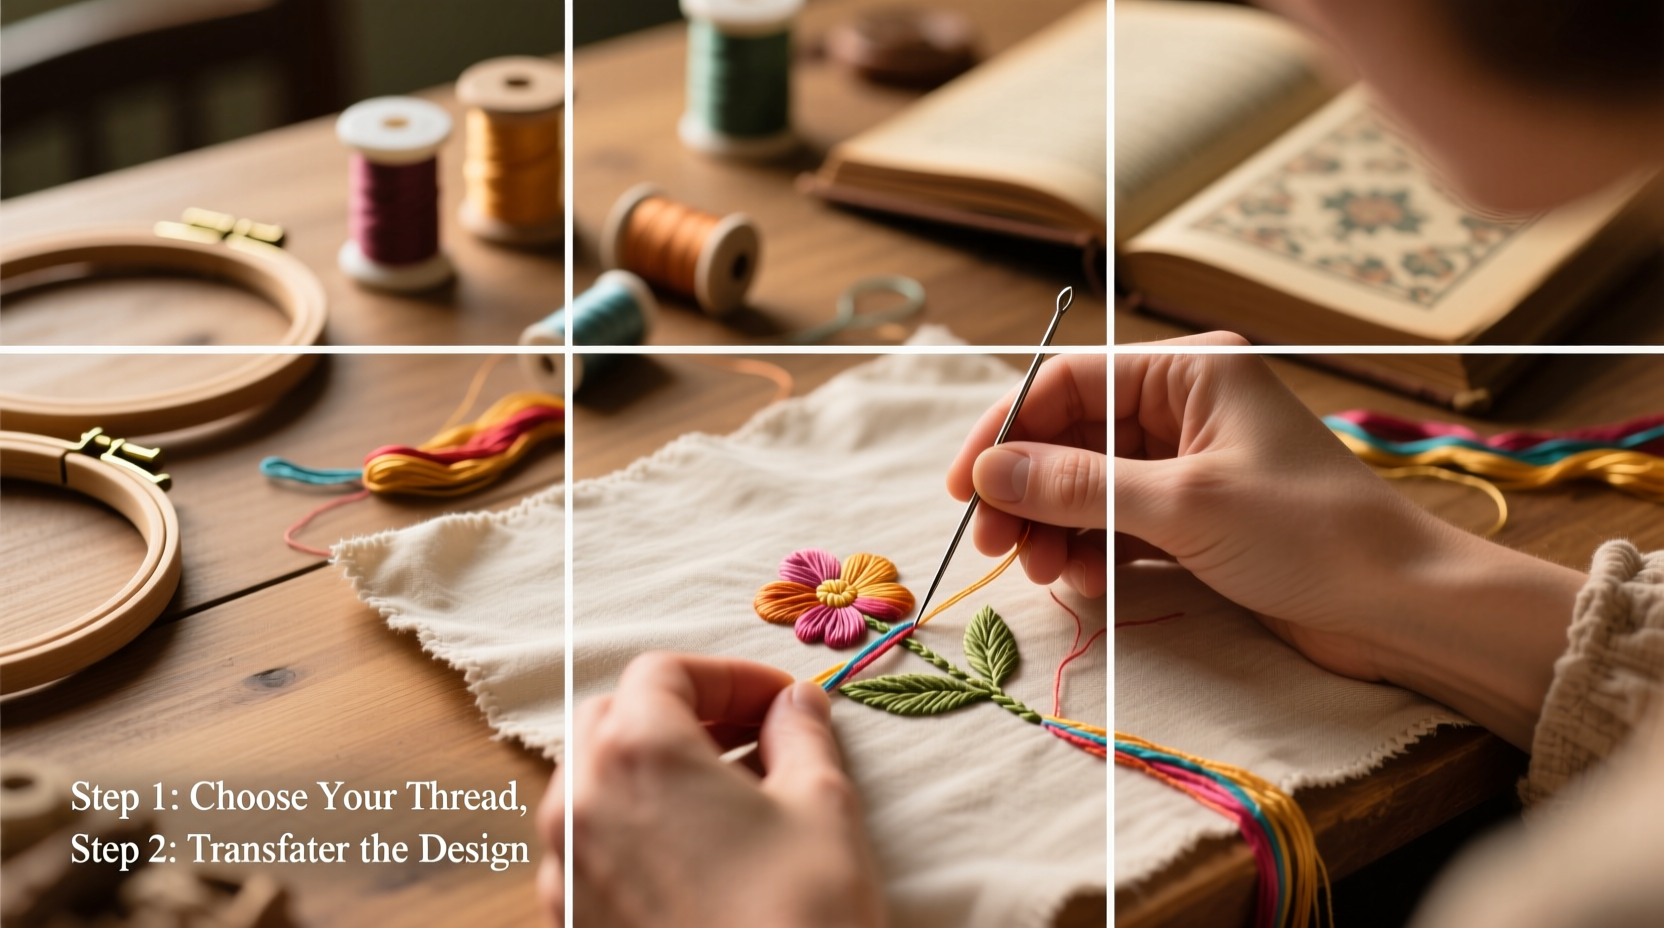
Before you begin stitching, it's important to assemble the basic tools of hand embroidery. Unlike machine embroidery, handwork requires minimal equipment, making it accessible and affordable. The foundation of your toolkit includes a needle, thread, fabric, and an embroidery hoop.
- Embroidery Hoop: A wooden or plastic ring that holds fabric taut while you stitch. Choose a 6-inch hoop for most beginner projects.
- Fabric: Start with tightly woven cotton or linen. Avoid stretchy or loosely woven materials until you gain experience.
- Needles: Use embroidery (or crewel) needles with sharp tips and large eyes to accommodate multiple thread strands.
- Thread: Embroidery floss—typically six-strand cotton—is standard. Brands like DMC offer vibrant, colorfast options.
- Scissors: Small, sharp scissors ensure clean cuts without damaging surrounding stitches.
- Pattern Transfer Tools:
- Pencil or water-soluble pen
- Tracing paper or transfer pens
Understanding Basic Stitches
The beauty of embroidery lies in its variety of stitches, each offering unique textures and effects. Mastering a few foundational stitches opens the door to countless design possibilities.
- Running Stitch: The simplest stitch, formed by small, even dashes. Ideal for outlines and geometric patterns.
- Backstitch: Creates a solid, continuous line. Perfect for lettering and fine details.
- Satin Stitch: Fills shapes with smooth, flat coverage. Best used on small areas to avoid bulk.
- French Knot: Adds dimension with tiny raised dots. Great for flower centers or textured backgrounds.
- Stem Stitch: Produces a twisted rope-like line, excellent for curved stems and borders.
Practice these stitches on a scrap piece of fabric before starting a full project. Consistency in tension and spacing improves with repetition. Aim for uniform stitch length and neat transitions between movements.
Step-by-Step Guide to Your First Embroidery Project
Starting your first piece doesn’t require complex designs. Follow this clear sequence to build confidence and skill.
- Choose a Simple Pattern: Select a design with clear lines and minimal detail—a heart, star, or basic flower works well.
- Transfer the Design: Place tracing paper under your pattern, position it on the fabric, and trace with a pencil. Alternatively, use a lightbox or window to trace directly.
- Secure Fabric in the Hoop: Loosen the screw, place the inner hoop on a flat surface, lay the fabric over it, press the outer hoop down, and tighten gently. Ensure the fabric is drum-tight but not stretched.
- Thread the Needle: Cut about 18 inches of floss, separate the desired number of strands, and thread them through the needle. Knot the end securely.
- Begin Stitching: Start from the back of the fabric, leaving a small tail. Secure it with your first few stitches. Work from top to bottom and left to right if you're right-handed.
- Finish Each Thread: On the back side, run the needle under existing stitches to secure the end. Trim excess carefully.
- Remove and Display: Once complete, remove the fabric from the hoop, press lightly on the reverse side with a warm iron, and consider framing your work.
“Embroidery teaches patience and precision. The rhythm of the needle becomes a form of mindfulness.” — Clara Nguyen, Textile Artist & Educator
Common Mistakes and How to Avoid Them
Even experienced embroiderers encounter challenges. Recognizing common pitfalls early helps maintain both quality and motivation.
| Mistake | Why It Happens | How to Fix It |
|---|---|---|
| Fabric puckering | Thread too tight or hoop too loose | Loosen tension slightly; ensure fabric is taut in hoop |
| Inconsistent stitch length | Lack of practice or rushing | Work slowly; mark guidelines with transfer pen |
| Knots and tangles in thread | Using overly long thread or incorrect floss handling | Use shorter lengths (18 inches); let needle dangle to untwist |
| Faded or bleeding colors | Low-quality floss or washing too soon | Use reputable brands; spot-test if washing is needed |
A Beginner’s Success Story
Sophie, a graphic designer from Portland, picked up embroidery during a period of burnout. With no prior sewing experience, she began with a simple floral template downloaded from a free online resource. Her first attempt had uneven French knots and a slightly skewed stem, but she finished the piece and framed it above her desk. Over the next three months, she completed five more projects, gradually incorporating new stitches and custom color palettes. What started as a curiosity became a therapeutic ritual—she now gifts embroidered bookmarks to colleagues and teaches mini-workshops at her local library.
Sophie’s story reflects a common truth: progress in embroidery isn’t about perfection. It’s about showing up, stitching one line at a time, and allowing room for growth.
Checklist: Launch Your Embroidery Journey
Use this checklist to stay organized and focused as you begin:
- ☐ Purchase a beginner embroidery kit or gather individual tools
- ☐ Select a simple, downloadable pattern (preferably with color guides)
- ☐ Pre-wash and iron your fabric to prevent future shrinkage or wrinkles
- ☐ Practice all basic stitches on a sampler swatch
- ☐ Transfer your chosen design accurately onto the fabric
- ☐ Work in a well-lit area with comfortable seating
- ☐ Set aside 20–30 minutes per session to build consistency
- ☐ Photograph your finished piece to track progress
Frequently Asked Questions
Can I wash embroidered pieces?
Yes, but with care. Hand wash in cool water with mild detergent if necessary. Avoid wringing or twisting. Lay flat to dry and press from the back to protect stitches. For display-only pieces, cleaning is usually unnecessary.
What fabric is best for beginners?
Cotton quilting fabric or plain linen are ideal. They’re stable, easy to hoop, and accept needle penetration smoothly. Avoid knits, silks, or very thin materials until you’ve built control.
How do I keep my thread from fraying?
Fraying often results from using too many strands or dragging the thread across rough fabric. Use fewer strands (2–3), wax the thread lightly with beeswax, and replace thread every 15–20 minutes of stitching.
Keep Stitching, Keep Creating
Embroidery is not just a craft—it’s a quiet rebellion against mass production, a return to slowness, and a celebration of imperfection. Every loop, knot, and stitch carries the imprint of your hands and attention. As you grow more confident, experiment with mixed textures, layered colors, and original designs. There’s no single “right” way to embroider; there’s only your way.


 浙公网安备
33010002000092号
浙公网安备
33010002000092号 浙B2-20120091-4
Comments
No comments yet. Why don't you start the discussion?