
Lattice puff pastry is a showstopper in any baker’s repertoire—delicate layers, golden crispness, and an intricate woven design that signals both elegance and skill. While it may seem intimidating, mastering this technique is within reach with the right approach, tools, and timing. Whether you're crafting a fruit tart, savory galette, or holiday centerpiece, understanding how to work with puff pastry effectively transforms good bakes into extraordinary ones. This guide breaks down the process into manageable steps, shares insider tips, and offers creative ways to elevate your presentation.
The Foundation: Choosing and Preparing Puff Pastry
Puff pastry is a laminated dough made from hundreds of alternating layers of butter and dough. When baked, steam lifts these layers apart, creating a light, flaky texture. You can use store-bought or homemade, but consistency in thickness and temperature is key.
- Store-bought: Look for all-butter varieties (avoid margarine-based options) for better flavor and structure.
- Homemade: Requires time and patience but offers superior control over texture and taste.
- Thawing: If frozen, thaw puff pastry in the refrigerator overnight. Never rush at room temperature—it risks melting the butter and compromising layer separation.
Step-by-Step Guide to Creating a Lattice Top
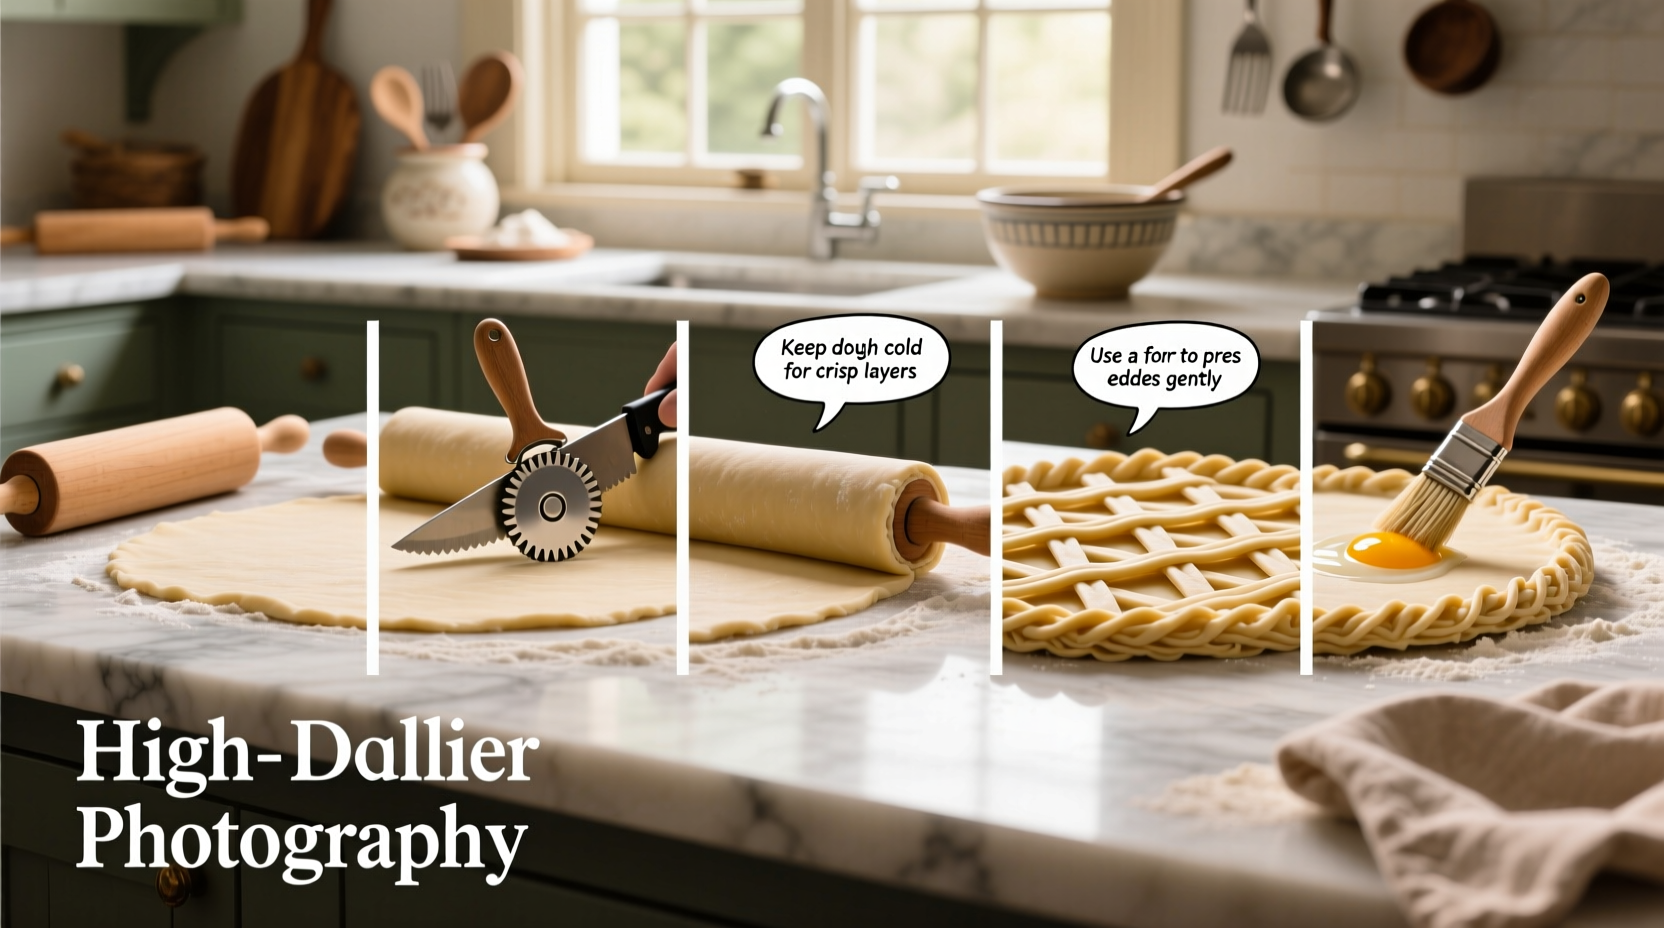
- Roll out the base: On a lightly floured surface, roll the puff pastry to about 1/8 inch (3 mm) thick. Transfer it gently to your baking tray or dish, pressing edges slightly if needed. Trim excess if necessary.
- Prepare the filling: Add your chosen filling—fruit compote, custard, cheese mixture—leaving a ½-inch border around the edge to prevent overflow.
- Cut strips: Roll out the second sheet of puff pastry to the same thickness. Use a sharp knife or pizza cutter to slice even strips, typically ½ to ¾ inch wide. For precision, use a ruler and lightly score the dough before cutting.
- Weave the lattice: Begin by laying alternate strips vertically across the filled base, spacing them evenly. Fold back every other strip halfway, place a horizontal strip across, then unfold the folded strips. Repeat, alternating folds, adding one strip at a time. Rotate the pan 90 degrees to continue weaving in the opposite direction if desired.
- Seal and chill: Press the edges lightly to secure the lattice. Brush with egg wash for shine and color. Chill the assembled tart for 15–20 minutes before baking to stabilize the butter and maintain shape.
- Bake: Preheat oven to 400°F (200°C). Bake for 20–25 minutes, until deep golden brown and puffed. Rotate the pan halfway through for even browning.
“Lattice work isn’t just decorative—it controls moisture release and allows heat to circulate evenly, preventing soggy bottoms.” — Chef Laurent Moreau, Pastry Instructor at Le Cordon Bleu Paris
Tips for Flawless Weaving and Baking
Even experienced bakers face challenges like collapsing strips or uneven browning. These practical tips help ensure success:
- Uniform strip width: Consistency ensures even cooking and balanced visual appeal.
- Egg wash wisely: Apply after weaving with a soft brush, avoiding pooling on the filling, which can inhibit rising.
- Support delicate fillings: For juicy fruits, pre-cook or thicken with cornstarch to reduce moisture and prevent sogginess.
- Use parchment paper: When transferring fragile lattices, assemble on parchment, then slide the whole piece onto the filled base.
Creative Variations and Presentation Ideas
Once you’ve mastered the classic lattice, experiment with designs and flavors to personalize your creations.
| Variation | How to Achieve It | Ideal For |
|---|---|---|
| Double-layer lattice | Weave one lattice, brush with water, add a second perpendicular layer | Festive pies, showpiece desserts |
| Colored pastry | Mix natural powders (matcha, beet, turmeric) into dough | Seasonal tarts, kids’ treats |
| Twisted strips | Roll each strip between palms before placing | Rustic galettes, artisan breads |
| Open-weave diamond pattern | Cut diagonal strips and weave at 45-degree angles | Modern plating, dinner party centerpieces |
For holidays, consider using heart-shaped cutters along the border or stamping initials into corner strips. A sprinkle of coarse sugar before baking adds crunch and sparkle.
Mini Case Study: The Farmers Market Raspberry Tart
Sophie, a home baker in Portland, struggled with her summer raspberry tarts weeping and losing shape. Her first attempts resulted in collapsed centers and pale crusts. After researching moisture control, she adjusted her method: she lightly tossed fresh raspberries with 1 tablespoon of tapioca starch and let them sit for 10 minutes. She then drained excess liquid before spreading them over a thin layer of almond cream on the base. Using ½-inch strips and a tight weave, she chilled the tart for 20 minutes before baking at 400°F on a preheated baking stone. The result? A glossy, golden lattice with vibrant berries held firmly in place—no sogginess, no slumping. At the farmers market pop-up, her tarts sold out in under an hour.
Do’s and Don’ts of Lattice Puff Pastry
| Do’s | Don’ts |
|---|---|
| Chill pastry before and after assembly | Work in a hot kitchen without air conditioning |
| Use sharp tools for clean cuts | Stretch the pastry strips when placing them |
| Pre-bake high-moisture fillings slightly | Overfill the tart, risking spillage |
| Rotate the pan mid-bake | Open the oven door during the first 15 minutes of baking |
FAQ
Can I make lattice puff pastry ahead of time?
Yes. Assemble the tart, wrap tightly in plastic, and refrigerate for up to 24 hours before baking. For longer storage, freeze the unbaked tart on a tray, then transfer to a container. Bake from frozen, adding 5–10 minutes to the baking time.
Why did my lattice shrink or curl during baking?
This usually happens when the pastry warms up too much before baking or is stretched during placement. Always handle gently, avoid stretching, and chill thoroughly before baking.
Can I reuse trimmed puff pastry scraps?
You can re-roll scraps once, but no more. Multiple re-rolls break down the layered structure, leading to dense, uneven baking. Keep pieces cold and press them together gently—don’t knead.
Essential Checklist for Success
- ☐ Thaw puff pastry in the fridge overnight
- ☐ Pre-chill tools and work surface if kitchen is warm
- ☐ Cut even, straight strips with a sharp knife
- ☐ Weave carefully, alternating folds for clean intersections
- ☐ Seal edges and chill before baking
- ☐ Preheat oven and use a baking tray or stone
- ☐ Brush with egg wash for golden finish
- ☐ Cool slightly before serving to set filling
Conclusion
Mastering lattice puff pastry blends technical precision with artistic expression. With attention to temperature, texture, and timing, you can create stunning desserts that impress both visually and gastronomically. Each successful bake builds confidence—and opens the door to greater creativity. Whether you're preparing a simple berry tart for family dinner or an elaborate centerpiece for a celebration, the skills you develop here will serve you well across countless recipes.


 浙公网安备
33010002000092号
浙公网安备
33010002000092号 浙B2-20120091-4
Comments
No comments yet. Why don't you start the discussion?