
The round capitone puff is a hallmark of classic, luxurious upholstery. Found in vintage Chesterfield sofas, tufted headboards, and high-end lounge seating, this design element combines deep, evenly spaced button tufts with a plush, rounded profile that exudes elegance and comfort. Achieving a professional-quality round capitone puff isn't just about pushing fabric through— it's a precise craft that balances tension, symmetry, and material knowledge. Whether you're restoring antique furniture or creating custom pieces from scratch, mastering this technique elevates your work from amateur to artisan.
Understanding the Round Capitone Puff
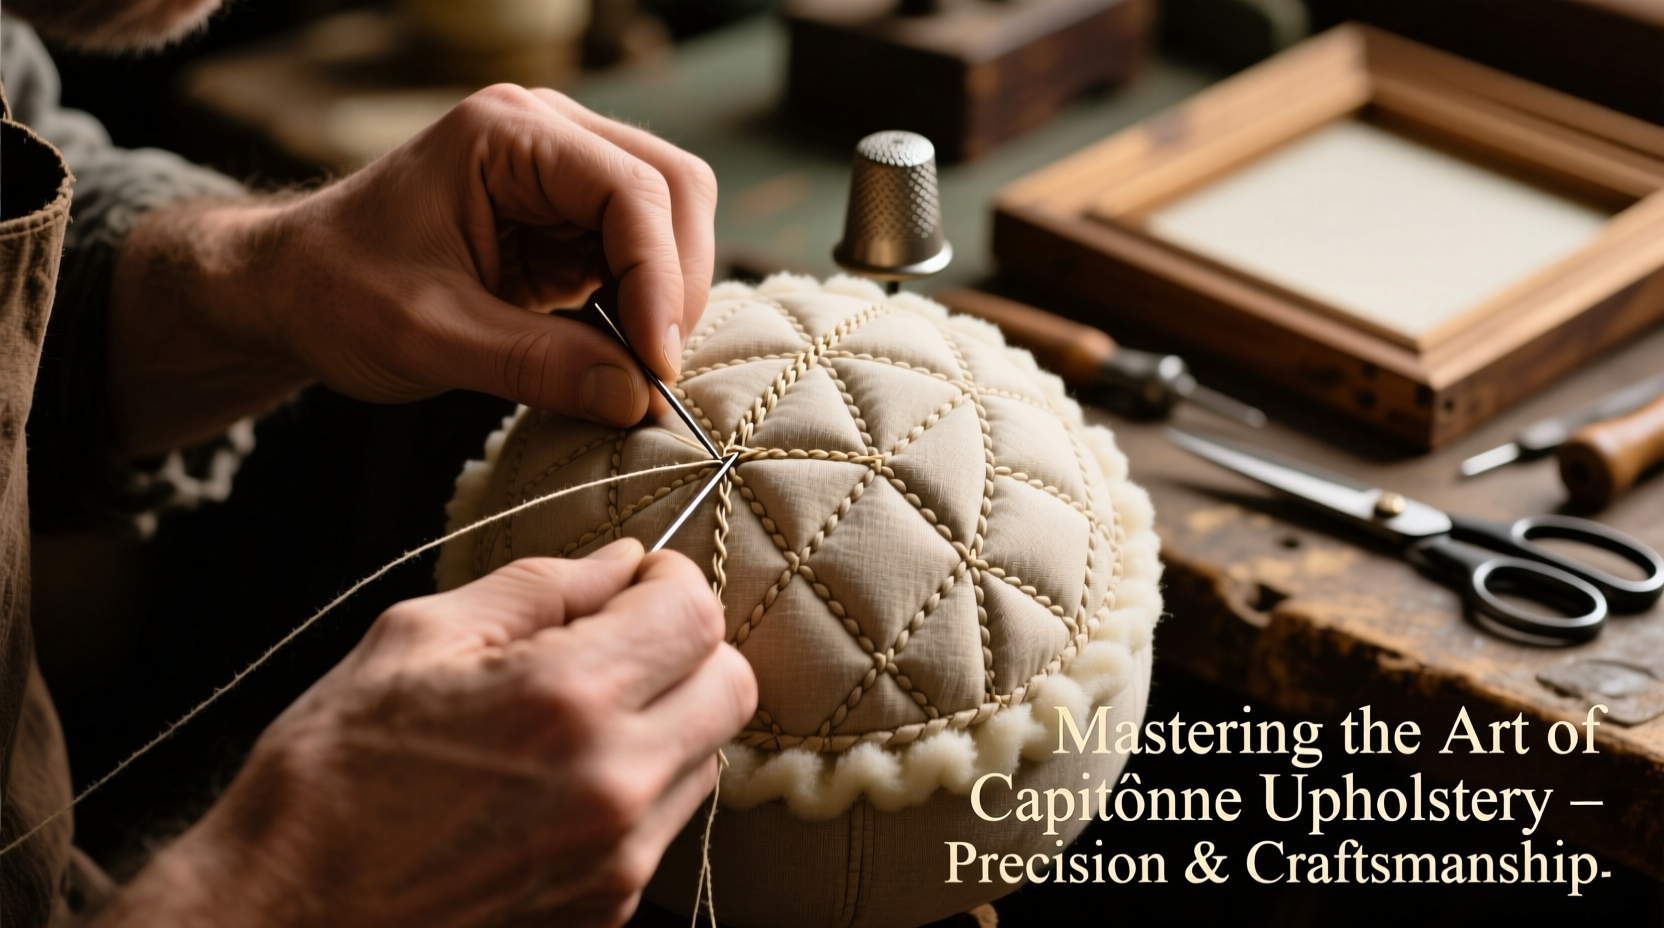
Unlike standard tufting, where buttons are stitched directly into the padding and secured at the back, capitone tufting (also known as \"blind tufting\") involves pulling the fabric down through a hole in the frame, securing it beneath, and allowing the button to sit atop a raised, domed cushion. The result is a smooth, uninterrupted back or underside and a perfectly rounded puff on the front. This method requires careful planning, durable materials, and consistent handwork.
The visual impact comes from uniformity: each puff should be identical in height, diameter, and spacing. Deviations become glaringly obvious over large surfaces. Precision begins long before needle meets thread—it starts with design, material selection, and structural preparation.
Essential Materials and Tools
Success in capitone work depends heavily on using the right components. Substituting lower-grade materials may save money upfront but leads to sagging, uneven puffs, or premature wear.
| Material/Tool | Purpose | Recommended Type |
|---|---|---|
| Fabric | Covers the surface; must withstand tension without tearing | Heavy-duty linen, velvet, or leather |
| Padding | Creates the puff’s volume and resilience | High-density foam (2–3 inches) + dacron wrap |
| Buttons | Anchor points and decorative finish | Solid shank buttons with reinforced backs |
| Thread | Holds tension over years | Waxed polyester or upholstery-grade nylon |
| Tufting Needle | Reaches through deep layers | Curved, 6–8 inch industrial needle |
| Frame | Supports tension underneath | Wood with pre-drilled holes aligned to pattern |
Avoid stretchy or loosely woven fabrics—they distort under tension. Similarly, low-resilience foam flattens quickly, ruining the puff’s shape within months.
Step-by-Step Guide to Creating the Perfect Capitone Puff
- Design the Layout: Decide on puff size (typically 3–5 inches in diameter) and spacing (6–8 inches apart). Use a grid system to map out button locations evenly across the panel.
- Prepare the Frame: Drill small holes at each marked point, ensuring they’re clean and slightly larger than the thread bundle to allow smooth passage.
- Layer the Padding: Cut high-density foam to fit the panel exactly. Wrap it in dacron batting to soften edges and create a smooth dome when compressed.
- Attach Fabric: Stretch and staple the fabric tightly to the back of the frame, leaving slack only at tufting points. Too much initial tension prevents proper puff formation.
- Insert Buttons: Thread a curved needle with double-strand waxed thread. Pass it through the front of the button, then push the needle down through the fabric and foam into the frame hole.
- Pull and Secure: From behind, pull the thread taut until the fabric dips smoothly into a circular indentation. Tie securely to a cleat, washer, or metal clip anchored to the frame.
- Shape the Puff: Gently coax the fabric around the button into a symmetrical dome using fingers or a soft tool. Avoid creasing.
- Repeat and Adjust: Work outward from the center to maintain balance. After completing all tufts, inspect from multiple angles and adjust tension if needed.
Common Pitfalls and How to Avoid Them
- Inconsistent Tension: Leads to lopsided puffs. Always tie off with equal force and check alignment mid-process.
- Incorrect Foam Density: Soft foam collapses; too firm resists shaping. Test samples first.
- Misaligned Holes: Even a 1/8-inch offset disrupts symmetry. Double-check measurements before drilling.
- Over-tightening: Can cause fabric to tear or create sharp indentations instead of soft domes.
- Ignoring Pile Direction: On napped fabrics like velvet, inconsistent nap makes buttons appear different shades.
“The beauty of capitone lies in its rhythm. When done right, the eye moves seamlessly across each puff like notes in a sonata.” — Rafael Mendez, Master Upholsterer & Furniture Restorer
Real-World Example: Restoring a 1940s Tufted Headboard
A client brought in a vintage walnut bed frame with a damaged leather headboard. The original capitone puffs had flattened, buttons were missing, and the backing was torn. The restoration began with removing old staples and assessing the frame integrity. New 2.5-inch HR36 foam was cut to match the original curvature, then wrapped in 1-inch dacron for added loft.
Leather posed a challenge—its lack of stretch meant minimal forgiveness during tensioning. A template ensured button placement matched the original factory layout. Using hand-cut cowhide buttons threaded with waxed linen cord, each puff was pulled gradually, allowing the leather to settle. By working in a heated studio (to increase leather pliability), the final result achieved a soft, even dome across all 28 puffs—indistinguishable from the original craftsmanship.
Pro Tips Checklist for Flawless Results
- Use a grid template for consistent button placement
- Select high-resilience foam (HR36 or higher)
- Wrap foam in dacron for smoother puff contours
- Pre-thread all buttons before starting
- Work from center outward to maintain symmetry
- Check puff shape from multiple angles during tying
- Use curved needles designed for deep upholstery work
- Secure threads with metal clips or cleats, not knots alone
- Match fabric pile direction across all tufts
- Allow 24 hours for materials to settle before final inspection
Frequently Asked Questions
Can I use synthetic leather for capitone tufting?
Yes, but with caution. Synthetic leathers often have less breathability and elasticity than genuine leather. Choose high-quality, flexible variants and avoid over-tightening to prevent cracking around the button base.
How do I fix a puff that’s too flat or too tight?
If too flat, loosen the thread slightly from behind and re-tie with more tension. If too tight, carefully unpick the knot, let the fabric relax for a few minutes, then re-secure with less force. Always test on scrap first.
Is machine tufting suitable for capitone?
While some modern workshops use pneumatic tools for speed, true round capitone puffs require hand control for nuanced shaping. Machines risk damaging delicate fabrics or creating rigid, unnatural forms.
Final Thoughts and Call to Action
Mastering the round capitone puff is more than a technical skill—it’s an expression of patience, precision, and respect for tradition. Each perfectly domed tuft reflects hours of thoughtful labor, a quiet testament to craftsmanship in an age of mass production. Whether you're refinishing heirloom furniture or designing bespoke interiors, this technique adds depth, texture, and timeless appeal.
The difference between good and exceptional upholstery lies in the details. Now that you understand the structure, materials, and rhythm of capitone tufting, it’s time to apply it. Start small—a bench cushion or ottoman—and refine your touch. Share your progress, ask questions, and join a community of artisans who value quality over convenience.


 浙公网安备
33010002000092号
浙公网安备
33010002000092号 浙B2-20120091-4
Comments
No comments yet. Why don't you start the discussion?