
Candlestick making is more than a craft—it’s a blend of science, patience, and creativity. Once reserved for artisans and apothecaries, the practice has seen a resurgence as people seek handmade, sustainable alternatives to mass-produced goods. Whether you're drawn to the meditative process or the satisfaction of lighting a candle you made yourself, beginning this journey requires clarity, preparation, and attention to detail. This guide walks through every essential phase, from gathering materials to pouring your first perfect candlestick.
Gathering Essential Materials and Tools
The foundation of any successful candle-making project lies in using the right supplies. Beginners often underestimate how much material quality affects burn time, scent throw, and overall appearance. Start with a basic toolkit that can grow as your skills develop.
- Wax: Soy wax, beeswax, paraffin, or coconut blends—each offers different textures and melting points.
- Wicks: Cotton, wood, or paper-core wicks; size matters based on candle diameter.
- Molds: Metal, silicone, or glass containers suitable for candlesticks or pillars.
- Dyes and Fragrances: Use candle-safe dyes and fragrance oils (not essential oils unless properly tested).
- Double Boiler or Wax Melter: Ensures even heating without scorching.
- Thermometer: Crucial for monitoring wax temperature.
- Pouring Pitcher and Stirring Utensils: Heat-resistant containers and spoons simplify transfer.
- Wick Centering Device or Chopsticks: Keeps wicks straight during cooling.
Choosing the Right Wax for Your Candlesticks
Not all waxes behave the same. The type you choose influences hardness, opacity, scent retention, and drip control—key factors when crafting structured candlesticks.
| Wax Type | Pros | Cons | Best For |
|---|---|---|---|
| Soy Wax | Renewable, clean-burning, excellent scent throw | Can soften in heat, prone to frosting | Container candles, eco-conscious users |
| Beeswax | Natural honey scent, long burn time, dripless | Expensive, high melting point | Tapered candlesticks, natural purists |
| Paraffin Wax | Inexpensive, easy to color and scent, holds shape well | Derived from petroleum, may produce soot | Decorative candlesticks, beginners |
| Coconut-Blend Wax | Excellent scent throw, smooth finish | Limited availability, higher cost | Luxury candles, gift-making |
“Wax selection isn’t just about preference—it determines the candle’s performance. Test small batches before scaling.” — Lila Monroe, Artisan Candlemaker & Educator
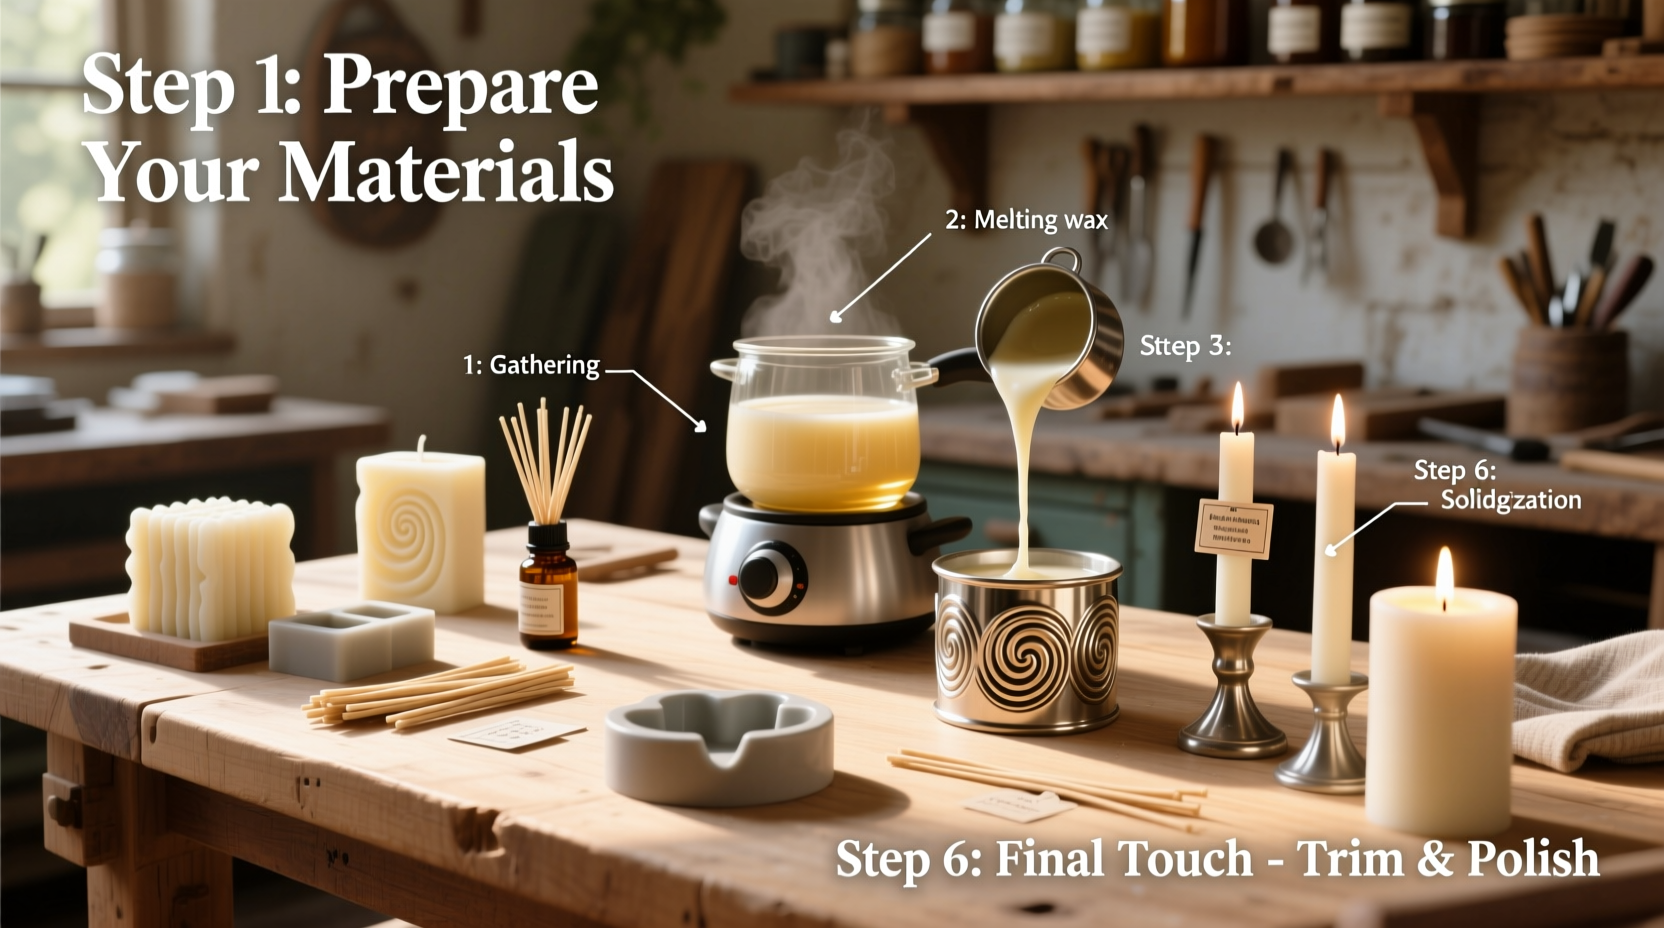
Step-by-Step Guide to Making Your First Candlestick
Follow this methodical process to create a classic pillar-style candlestick. Precision in temperature and timing ensures a clean, crack-free result.
- Prepare Your Workspace: Cover surfaces with newspaper or silicone mats. Ensure good ventilation and keep flammable materials away.
- Secure the Wick: Place the wick through the mold’s pre-drilled hole or attach it to a wick pin. Use a dab of hot glue or melted wax to anchor it at the base.
- Melt the Wax: Using a double boiler, heat wax slowly to its recommended melting temperature (typically 160–185°F depending on type). Stir gently.
- Add Color and Scent (Optional): Once melted, remove from heat. Add dye chips or liquid dye, then fragrance oil (6–10% of wax weight). Stir for two minutes to ensure even distribution.
- Check Temperature: Allow wax to cool slightly—to around 135–145°F—before pouring. This reduces sinkholes and cracking.
- Pour Into Mold: Slowly pour wax into the mold, avoiding splashes. Leave about ½ inch at the top.
- Center the Wick: Use a clothespin or centering device across the mold’s top to hold the wick upright.
- Cool Gradually: Let the candle set at room temperature for 12–24 hours. Avoid moving it or exposing it to drafts.
- Fix Sinkholes (if needed): If a depression forms, reheat leftover wax and top off the surface.
- Unmold Carefully: Gently twist or flex silicone molds. For metal molds, warm the exterior slightly with a hairdryer to release the candle.
- Trim the Wick: Cut to ¼ inch for optimal burning.
Avoiding Common Beginner Mistakes
New candle makers often encounter issues that stem from overlooked details. Awareness prevents frustration and wasted materials.
- Overheating wax: Can degrade fragrance and discolor the final product.
- Ignoring wick sizing: Too small = tunneling; too large = smoking and soot.
- Pouring too hot: Leads to cracks and poor adhesion to the mold.
- Rushing cooling: Fast cooling causes uneven contraction and surface flaws.
- Using non-candle-safe fragrances: Perfumes or essential oils not designed for candles can clog wicks or become flammable.
Real Example: From Kitchen Experiment to Home Business
Jenna, a teacher from Vermont, started making candlesticks as a winter hobby. Her first attempts were lopsided and smoky, but after researching wick calibration and proper cooling, she began producing consistent, elegant tapers. She used repurposed tin cans as molds and sourced local beeswax. Within six months, friends requested custom orders for weddings and holidays. Today, she runs a small Etsy shop specializing in hand-poured, unscented candlesticks inspired by colonial designs. Her success came not from perfection at the start, but from documenting each batch and adjusting one variable at a time.
Essential Safety Practices
Candle making involves heat and flammable materials. Respect these risks with disciplined habits.
“Fire safety isn’t optional. Never leave melting wax unattended, and always have a fire extinguisher nearby.” — Fire Marshal Daniel Ruiz, Home Craft Safety Initiative
- Work in a clutter-free area away from children and pets.
- Never pour water on a wax fire—use baking soda or a Class B fire extinguisher.
- Use oven mitts when handling hot containers.
- Keep a lid nearby to smother accidental flames in the melting pot.
Frequently Asked Questions
How long should I let my candlestick cure before burning?
Most wax types benefit from a curing period of 3–7 days. This allows fragrance molecules to bind fully with the wax, improving scent throw and burn consistency. Beeswax and soy especially perform better after a full week.
Why does my candlestick tunnel instead of burning evenly?
Tunneling usually indicates an undersized wick or insufficient initial burn time. Always allow the first burn to last until the entire top layer melts to the edges—typically 1 hour per inch of diameter.
Can I reuse old candle wax?
Yes, but only if it’s clean and free of debris or foreign wicks. Melt it down carefully, strain through cheesecloth, and combine only with the same wax type. Avoid mixing unknown fragrances.
Conclusion: Light Your Creative Flame
Mastering candlestick making begins with curiosity and grows through careful repetition. Each pour teaches something new—about materials, timing, and personal style. What starts as a simple craft can evolve into a meaningful expression of artistry and self-reliance. There’s quiet pride in shaping light with your own hands, knowing every flicker originated from intention and care.


 浙公网安备
33010002000092号
浙公网安备
33010002000092号 浙B2-20120091-4
Comments
No comments yet. Why don't you start the discussion?