
The Dala horse, or Dalahäst, is more than just a Swedish folk art icon—it’s a symbol of heritage, craftsmanship, and creative expression. Originating from the Dalarna region, these hand-carved wooden horses have been painted in vibrant red with intricate white and green patterns for centuries. Today, crafting your own Dala horse offers a rewarding blend of tradition and personalization. Whether you're a beginner or an experienced hobbyist, painting and customizing a Dala horse allows you to explore color theory, brush control, and design composition while creating a meaningful keepsake.
Understanding the Dala Horse Tradition
The Dala horse dates back to the 17th century when woodcarvers in the village of Rättvik began crafting toy horses from leftover pine. Over time, the designs evolved, incorporating bright paint inspired by local church frescoes. By the 20th century, the red-painted Dala horse became a national emblem of Sweden, often gifted as a token of affection or cultural pride.
Modern kits typically come pre-carved from basswood or birch—woods chosen for their smooth grain and ease of painting. While traditional designs follow strict color schemes (primarily Falu red with stenciled floral motifs), contemporary artists embrace bold palettes, metallic finishes, and abstract themes. This flexibility makes the Dala horse an ideal canvas for self-expression.
“Painting a Dala horse isn’t about replicating perfection—it’s about honoring history while leaving your own artistic fingerprint.” — Lena Andersson, Nordic Craft Historian
Materials You’ll Need
Before beginning, gather all necessary supplies. A well-prepared workspace ensures smoother execution and reduces interruptions mid-project.
| Item | Purpose | Recommended Type |
|---|---|---|
| Unpainted Dala horse blank | Base for painting | Basswood or birch, sanded smooth |
| Acrylic paints | Vibrant, water-based color | Artist-grade, opaque pigments |
| Paintbrushes (various sizes) | Detail work and base coating | #0, #2 round; 1/4\" flat |
| Palette or mixing tray | Color blending | Ceramic or disposable paper |
| Water container & paper towels | Brush cleaning and drying | Two jars recommended |
| Sandpaper (220–400 grit) | Surface smoothing | Fine-grit for final prep |
| Clear sealant (matte or gloss) | Protection and finish | Water-based polyurethane |
| Pencil and stencil (optional) | Design transfer | Light-touch pencil, reusable mylar |
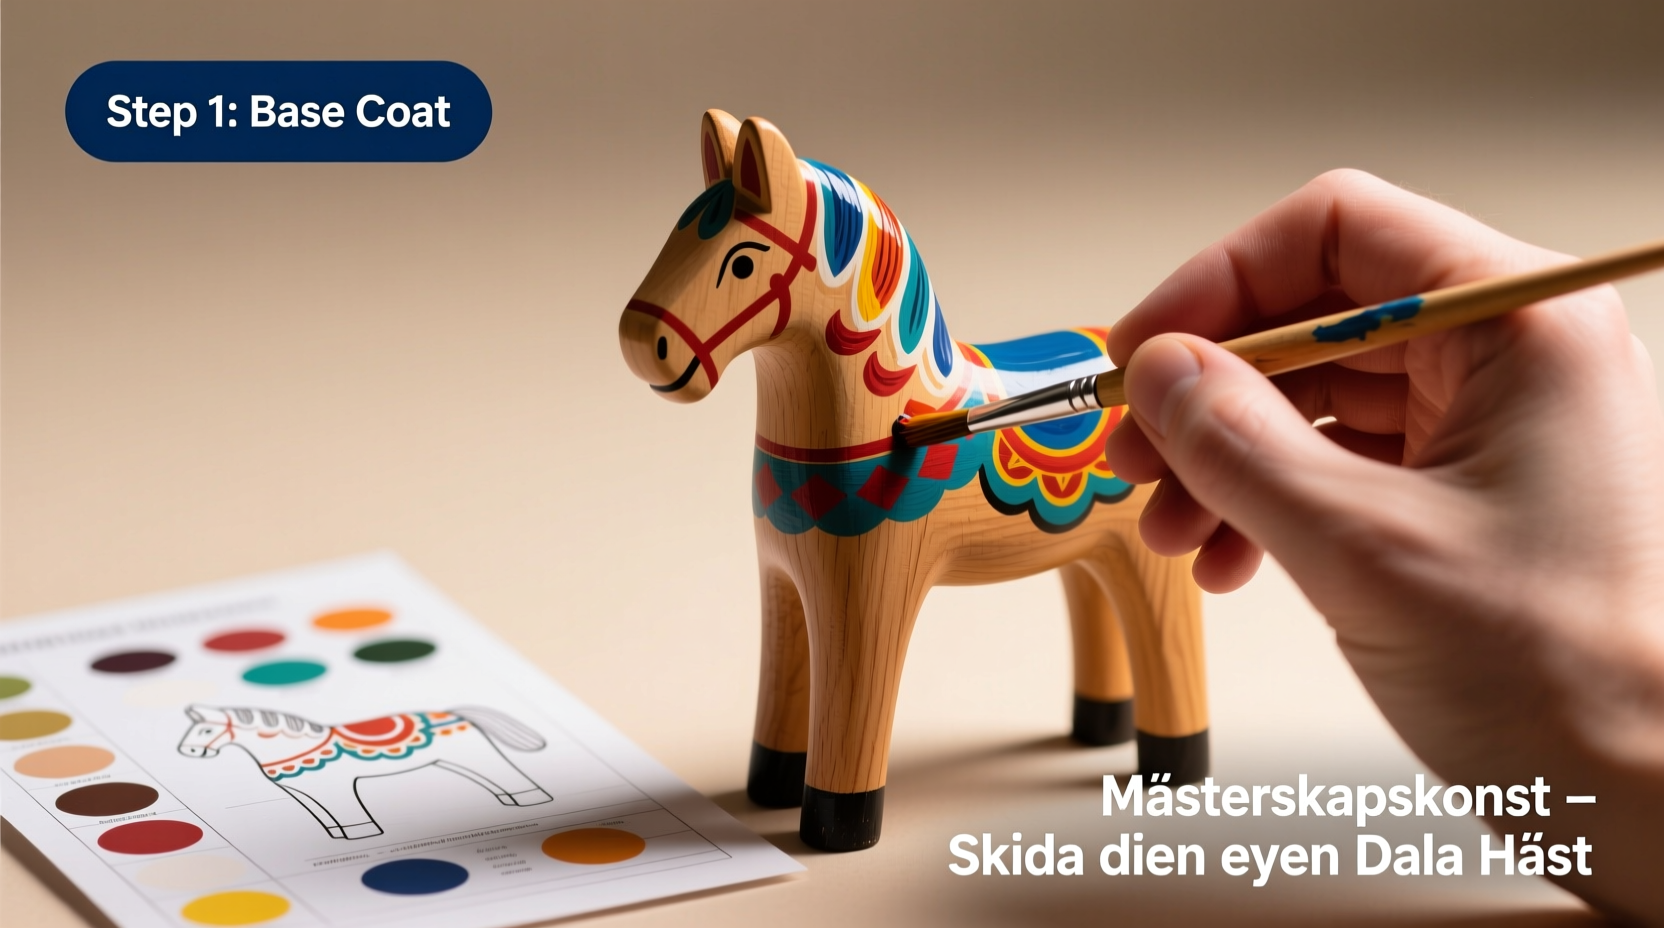
Step-by-Step Painting Process
Follow this structured sequence to achieve clean lines, even coverage, and professional results.
- Prepare the surface: Lightly sand any rough spots on the figurine. Wipe away dust with a dry cloth. Avoid touching the surface with bare hands after cleaning to prevent oil transfer.
- Apply a primer (optional): For deeper color saturation, especially with light paints over wood, apply a thin layer of white acrylic gesso. Let dry completely.
- Paint the base coat: Use a flat brush to apply your primary color (traditionally red). Work in the direction of the grain. Allow 2–4 hours drying time, then apply a second coat if needed.
- Sketch your design: Lightly draw floral motifs, borders, or geometric patterns with a pencil. Traditional placements include the saddle area, legs, neck, and face.
- Paint details: Switch to a fine round brush (#0 or #2). Load minimal paint to avoid bleeding. Start with larger elements before refining edges. Let each section dry before adjacent areas are painted.
- Add highlights and shading: Mix white into your base color for highlights; add a touch of black or gray for depth. Subtle gradients bring dimension to flat surfaces.
- Seal the finish: Once fully dry (wait at least 24 hours), apply 2–3 thin coats of clear sealant, sanding lightly between layers with 400-grit paper for ultra-smoothness.
Customization Ideas Beyond Tradition
While classic red-and-white designs remain popular, many artists now reinterpret the Dala horse through modern aesthetics. Consider these creative variations:
- Seasonal themes: Paint winter scenes with snowflakes, autumn leaves in burnt orange, or spring blossoms in pastel pink.
- Metallic accents: Use gold or copper paint for manes, hooves, or decorative borders to elevate elegance.
- Personalization: Add initials, names, or significant dates in cursive script along the base or flank.
- Abstract expression: Try gradient ombre effects, splatter techniques, or geometric symmetry inspired by modern art.
- Natural finishes: Stain the wood instead of painting—walnut or cherry tones highlight grain while preserving rustic charm.
Mini Case Study: Emma’s Wedding Keepsake Dala Horse
Emma, a graphic designer from Portland, wanted a unique guest favor for her Scandinavian-themed wedding. She purchased 30 unpainted Dala horses and spent weekends hand-painting each one with a soft blue base and delicate silver vines. On the bottom, she added the couple’s initials and wedding date in tiny script. Guests were moved by the personal touch, and several later displayed them in their homes as art pieces. “It wasn’t just a party favor,” she said. “It was a shared story.”
Avoiding Common Mistakes
Even experienced crafters can fall into pitfalls that compromise quality. Be mindful of these frequent errors:
| Do | Don’t |
|---|---|
| Work in a well-lit, ventilated space | Rush drying times between coats |
| Wash brushes immediately after use | Use excessive water, which warps wood |
| Test colors on scrap wood first | Press too hard with the brush, causing fraying |
| Store paints capped tightly in a cool place | Ignore manufacturer instructions on sealants |
| Practice strokes on paper before applying | Touch wet paint with fingers |
“Patience is the most important tool in your kit. Let each layer breathe, and your horse will shine.” — Henrik Mårtensson, Folk Art Instructor
FAQ
Can I use oil paints instead of acrylics?
Yes, but with caution. Oil paints take much longer to dry (up to days) and may seep into soft woods, altering texture. Acrylics are preferred for their quick drying, non-toxic nature, and compatibility with wood sealants.
How do I fix a painting mistake?
If the paint is still wet, gently wipe it with a damp cotton swab. For dried errors, carefully sand the area with 400-grit paper, reapply base coat, and repaint. Small mistakes can also be incorporated into the design—turn a blob into a flower center or star.
Is sealing really necessary?
Absolutely. Unsealed paint is vulnerable to chipping, fading, and moisture damage. A quality sealant protects your work and enhances color vibrancy, especially if the piece will be handled or displayed near windows.
Final Thoughts and Call to Action
Creating a Dala horse is more than a craft project—it’s a meditative journey connecting you to centuries of artisan legacy. With each brushstroke, you’re not only decorating wood but also preserving a cultural narrative. Whether you stick to tradition or forge a new path with bold colors and personal flair, the process cultivates mindfulness, creativity, and pride in handmade beauty.


 浙公网安备
33010002000092号
浙公网安备
33010002000092号 浙B2-20120091-4
Comments
No comments yet. Why don't you start the discussion?