
A well-set table does more than serve food—it sets the tone for connection, celebration, and elegance. Whether hosting an intimate dinner or a formal gathering, the way you arrange your table speaks volumes about thoughtfulness and attention to detail. Mastering the art of table setting is not just about following rules; it’s about understanding balance, etiquette, and aesthetics to create a welcoming environment. This guide walks you through every element of a polished place setting, offering practical advice, real-world examples, and expert insights to elevate your dining experience.
The Foundation: Understanding the Place Setting Layout
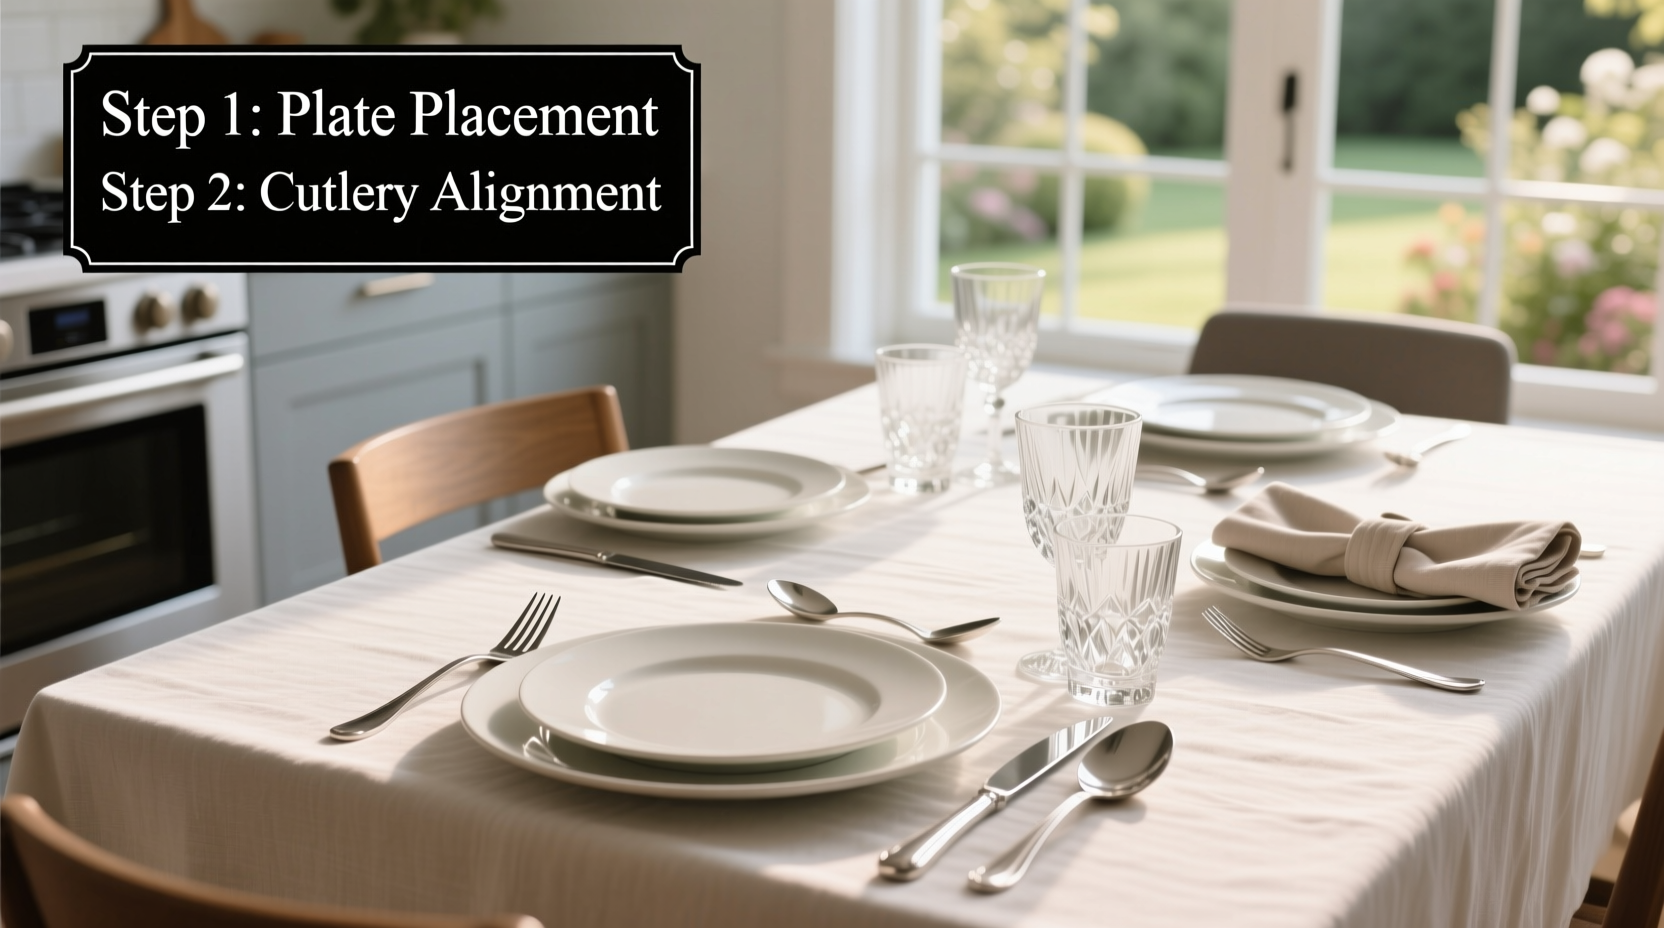
The standard place setting follows a logical, easy-to-remember structure known as the “dinner plate rule.” Imagine the dinner plate as the centerpiece. Forks go to the left, knives and spoons to the right, with utensils arranged in the order they will be used—outside in. Glassware sits above the knife, and napkins are either placed to the left of the forks or elegantly folded on the plate.
This basic layout adapts depending on the formality of the meal. A casual brunch might include only a fork, knife, and water glass, while a five-course dinner could feature multiple forks, dessert utensils, wine glasses, and decorative elements like charger plates or bread plates.
Step-by-Step Guide to Building the Perfect Place Setting
- Start with a clean tablecloth or runner. Choose a neutral or complementary color that enhances your dinnerware without overwhelming it.
- Place the dinner plate in the center. Leave about 1 inch from the edge of the table for comfort and ease.
- Add the charger (if using). A decorative base plate adds elegance but should be removed before serving the main course in formal settings.
- Arrange flatware. Left to right: salad fork, dinner fork, then butter knife (on bread plate), dinner knife, soup spoon. Dessert utensils can be placed above the plate.
- Position glassware. Above the knife, align water glass first, followed by red and white wine glasses to the right.
- Set the bread plate. Top left of the place setting, with a small butter knife laid diagonally across it.
- Place the napkin. Fold neatly on the plate, tucked into a glass, or set beside the forks for a modern touch.
- Add name card or menu card (optional). Enhances personalization and guides guests during multi-course meals.
Spacing is crucial—leave at least 24 inches between place settings to avoid crowding. Walk around the table once complete to check symmetry and flow.
Essential Table Setting Elements: Do’s and Don’ts
| Element | Do | Don't |
|---|---|---|
| Utensil Placement | Order them by course sequence, outside-in | Crowd too many utensils; limit to what’s needed |
| Napkin Style | Fold neatly or use a simple ring | Use overly complex folds that distract |
| Glassware | Align vertically above the knife | Overload with unused glasses |
| Centerpiece | Keep low so guests can see each other | Use tall arrangements that block views |
| Dinnerware | Mix textures (matte, gloss) for depth | Mismatch patterns unless intentional |
Real Example: Hosting a Spring Dinner Party
Sophia planned a six-person spring dinner featuring seasonal vegetables, herb-crusted salmon, and lemon tartlets. She wanted a refined yet approachable atmosphere. Using ivory linen, she layered white porcelain with sage green charger plates. To the left of each plate, she placed a salad fork and dinner fork. On the right: knife, soup spoon, and dessert spoon aligned above. Bread plates sat top-left with mini butter knives.
Water and wine glasses were arranged in a gentle arc above the knife. Linen napkins were folded into rectangles and tucked into gold napkin rings engraved with guests’ initials. A low ceramic vase with tulips and eucalyptus ran down the center, allowing clear sightlines. The result? Guests felt welcomed and impressed—many commented on how “effortlessly elegant” the table looked.
“A properly set table isn’t about perfection—it’s about intention. When guests see care in the details, they feel valued.” — Clara Bennett, Etiquette Consultant & Author of *The Thoughtful Host*
Checklist: Your Table Setting Success Plan
- Choose a theme or color palette (e.g., rustic, modern, seasonal)
- Select appropriate dinnerware, glassware, and flatware
- Measure table space to ensure adequate seating distance
- Lay tablecloth or runner evenly
- Place dinner plates centered with consistent margins
- Arrange flatware in order of use (outside-in)
- Set glassware in proper alignment above the knife
- Add bread plate and butter knife to top-left
- Incorporate napkin with subtle styling
- Include optional name cards or menus
- Install centerpiece no taller than 12 inches
- Walk around the table to verify balance and accessibility
Adapting for Different Occasions
Not every meal requires a full formal setting. Flexibility is key. For breakfast, simplify: use only a fork and teaspoon, with juice and coffee cups replacing wine glasses. Buffet-style dinners allow for pre-set basics—plate, napkin, utensils—with glassware added once guests choose drinks.
Children’s settings can include smaller utensils and unbreakable glasses. For outdoor events, consider durable melamine dishes and weighted napkin holders to resist wind. Always match the setting to the event’s mood—relaxed, celebratory, or ceremonial.
FAQ: Common Table Setting Questions
How far in advance should I set the table?
For most events, setting the table 1–2 hours before guests arrive is ideal. This allows time for final touches without risking spills or dust accumulation. For elaborate designs, prepare components (folded napkins, labeled cards) the day before and assemble shortly before the event.
What if I don’t have enough matching silverware?
Mixing metals or styles can work if done intentionally. Try uniform handles with different finishes, or embrace a curated eclectic look. Avoid mismatched sizes or worn pieces that appear neglected. When in doubt, simplify—fewer, high-quality items often make a stronger impression.
Where does the dessert spoon and fork go?
Dessert utensils are typically placed horizontally above the plate, with the fork handle pointing right and the spoon handle pointing left. Alternatively, bring them out with the dessert course to reduce clutter during earlier dishes.
Conclusion: Elevate Every Meal with Intentional Design
Mastering the art of table setting transforms everyday meals into memorable experiences. It’s not about rigid rules, but about creating harmony, clarity, and warmth at the heart of your home. With practice, assembling a flawless place setting becomes second nature—allowing you to focus on what matters most: sharing time with loved ones.


 浙公网安备
33010002000092号
浙公网安备
33010002000092号 浙B2-20120091-4
Comments
No comments yet. Why don't you start the discussion?