
Drawing doesn’t require natural talent—it requires practice, patience, and the right approach. Flowers, with their delicate symmetry and organic shapes, are among the most rewarding subjects for beginner artists. Whether you're sketching for relaxation, journaling, or building artistic skills, learning to draw a flower can open the door to greater creative expression. This guide breaks down the process into manageable steps, equipping you with practical techniques and insights to create a beautiful flower drawing—easily and confidently.
Why Drawing Flowers Matters
Flowers appear in countless art forms, from botanical illustrations to fashion design. Beyond aesthetics, they offer ideal training for understanding curves, proportions, and negative space. Drawing flowers helps develop hand-eye coordination and strengthens observational skills. Unlike geometric shapes, flowers invite creativity—each petal can vary slightly, allowing room for personal style while still adhering to structure.
“Drawing nature trains the artist to see not just what is there, but how it grows.” — Lila Monroe, Botanical Illustrator & Educator
Essential Tools You’ll Need
You don’t need an expensive toolkit to begin. Start simple and upgrade as your skills grow. Here’s what works best for beginners:
- Pencil: A standard HB pencil for light sketching; a 2B for darker lines and shading.
- Eraser: A kneaded eraser lifts graphite gently without damaging paper.
- Paper: Any smooth notebook or printer paper is sufficient at first.
- Ruler (optional): Useful for creating a central guideline, especially for symmetrical blooms.
- Blending stump or tissue: For soft shading effects on petals.
Step-by-Step Guide to Drawing a Simple Flower
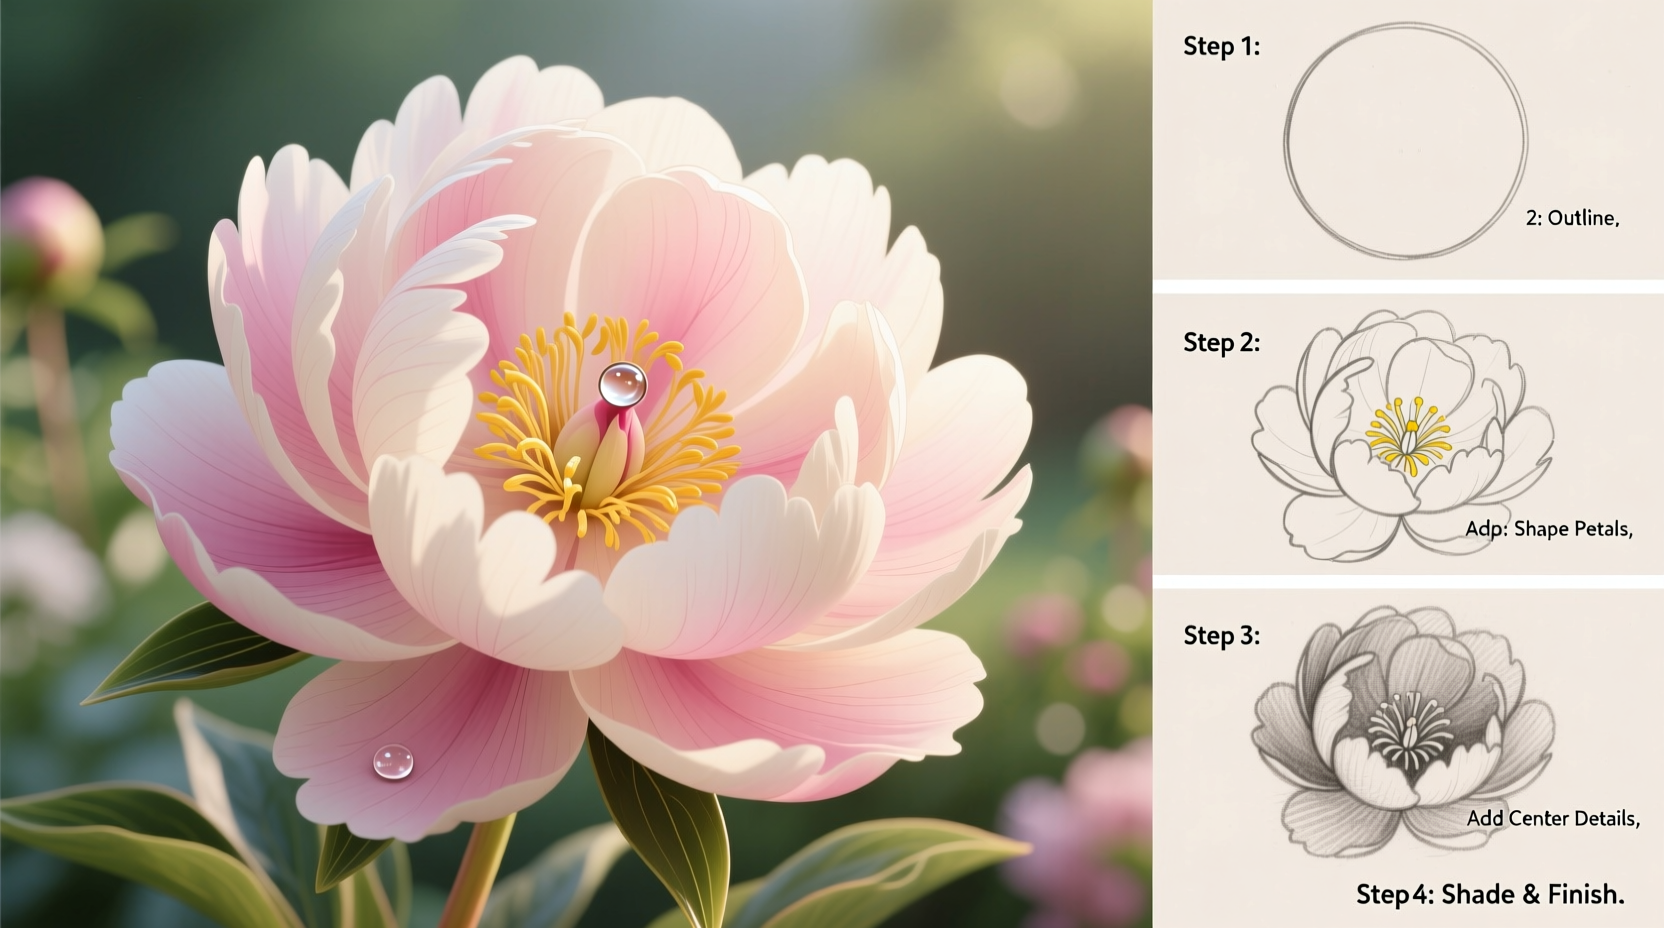
This timeline walks you through drawing a classic five-petal flower, like a wild rose or cherry blossom. Follow each phase carefully, allowing time to refine lines before moving forward.
- Draw the center circle: Lightly sketch a small circle in the middle of your page. This will be the flower’s core where petals converge.
- Add a vertical guideline: Draw a faint line upward from the center. It acts as a symmetry reference.
- Sketch the first petal: Begin with one teardrop-shaped petal extending from the circle, aligned with the guideline.
- Place the opposite petal: Directly across, draw a mirrored petal to establish balance.
- Fill in side petals: Add two more petals at roughly 90-degree angles, slightly overlapping the center.
- Add depth with layering: Draw smaller inner petals behind the front ones, partially hidden for realism.
- Draw the stem: Extend a straight or gently curved line downward from the center.
- Add leaves: Sketch two oval-shaped leaves with pointed tips branching off the stem—one on each side.
- Refine outlines: Go over your favorite lines with slightly more pressure, erasing unnecessary guides.
- Shade for dimension: Use soft pencil strokes to add shadows where petals overlap or curve away from light.
Avoiding Common Mistakes: Do’s and Don’ts
Even skilled artists make errors when rushing. The following table highlights frequent pitfalls and how to correct them.
| Common Mistake | Do This Instead | Why It Matters |
|---|---|---|
| Pressing too hard on initial sketch | Use light, ghost lines first | Allows easy corrections without indentations |
| Making all petals identical | Vary petal size and curve slightly | Creates natural, organic appearance |
| Neglecting the stem thickness | Taper stem from thick near base to thin at top | Mimics real plant structure |
| Forgetting shadow direction | Pick one light source and stay consistent | Unifies the drawing and adds realism |
| Overworking the details early | Build layers: shape → outline → shade → texture | Prevents muddiness and maintains clarity |
Real Example: From Frustration to First Success
Sophie, a high school student with no formal art training, tried drawing flowers for her science journal. Her first attempts looked lopsided and stiff. She followed this guide, starting with light construction lines and focusing on one petal at a time. After three tries, she noticed her second flower had balanced symmetry and gentle curves. By the fourth attempt, she added subtle shading beneath overlapping petals. Within a week, her teacher asked to display her work. “I didn’t think I could draw,” she said, “but breaking it down made it possible.”
Advanced Touches for Realism
Once you’ve mastered the basic form, elevate your drawing with these refinements:
- Texture strokes: Use tiny parallel lines along petals to mimic veining in real blossoms.
- Curved shading: Follow the contour of each petal—darker at the base, lighter at the tip.
- Background hints: Add a faint horizon line or distant grass to ground the flower in space.
- Variety in bloom: Try drawing buds, half-open flowers, or wilted ones for emotional depth.
“The beauty of a flower isn’t in perfection—it’s in its asymmetry, its slight tilt toward the sun.” — Rafael Jin, Contemporary Nature Artist
Checklist: Your Flower Drawing Roadmap
Keep this checklist handy each time you draw to ensure consistency and progress:
- ☑ Choose reference (real flower or photo)
- ☑ Gather tools: pencil, eraser, paper
- ☑ Start with light center circle and guide lines
- ☑ Place primary petals evenly around center
- ☑ Add secondary and inner petals for depth
- ☑ Draw stem with natural curve
- ☑ Attach leaves with visible veins
- ☑ Refine outlines using varied line weight
- ☑ Shade based on a single light source
- ☑ Step back and assess balance and flow
Frequently Asked Questions
Can I draw a flower without any prior experience?
Absolutely. This method is designed for absolute beginners. As long as you can hold a pencil and follow steps, you can create a recognizable and pleasing flower drawing. Practice improves accuracy and confidence over time.
How long does it take to learn to draw a realistic flower?
With consistent practice, most people produce a satisfying result within 3–5 sessions of 20 minutes each. Mastery takes longer, but enjoyment begins immediately. Focus on progress, not perfection.
What if my flower looks uneven or messy?
Imperfections are normal. Use a kneaded eraser to lift stray marks. Analyze what feels off—often it’s spacing or petal alignment. Redraw just that section. Every “mistake” teaches visual judgment.
Conclusion: Start Blooming Today
Drawing a beautiful flower isn’t about replicating a photograph—it’s about capturing life, movement, and grace through simple lines. With the right guidance, anyone can transform a blank page into a moment of quiet beauty. The steps outlined here remove guesswork and build confidence through repetition. Pick up your pencil today, even if only for ten minutes. Let your hand learn the rhythm of petals unfolding, stems reaching, and nature’s elegance taking shape—one stroke at a time.


 浙公网安备
33010002000092号
浙公网安备
33010002000092号 浙B2-20120091-4
Comments
No comments yet. Why don't you start the discussion?