
The barbell hip thrust has emerged as one of the most effective exercises for building strong, powerful glutes. Unlike traditional lower-body movements such as squats or deadlifts, the hip thrust isolates hip extension under high load, making it ideal for developing posterior chain strength, improving athletic performance, and enhancing functional mobility. Yet, despite its popularity, many lifters perform the movement incorrectly—robbing themselves of gains and increasing injury risk. Mastering the barbell hip thrust requires attention to detail, proper setup, and consistent practice of correct mechanics.
Why the Barbell Hip Thrust Matters
The gluteus maximus is the largest muscle in the human body, yet it’s frequently underutilized due to sedentary lifestyles and poor movement patterns. Weak glutes can contribute to lower back pain, knee instability, and inefficient force production during athletic activities. The barbell hip thrust directly targets this powerhouse muscle group through a full range of motion while allowing progressive overload over time.
Research supports its effectiveness: A 2015 study published in the Journal of Strength and Conditioning Research found that athletes who incorporated hip thrusts into their training showed greater improvements in sprint speed and vertical jump compared to those using only traditional lifts. This makes the hip thrust not just a bodybuilding favorite but also a critical tool for athletes across disciplines.
Step-by-Step Guide to Proper Barbell Hip Thrust Form
Executing the barbell hip thrust correctly ensures optimal muscle engagement and joint safety. Follow these steps precisely:
- Set Up the Bench and Barbell: Position a flat bench so that the top of your shoulder blades rests against the padded edge when seated on the floor. Place a loaded barbell over your hips. Use a padded barbell or wrap a towel around it to reduce discomfort.
- Sit with Feet Flat: Sit on the ground with knees bent at approximately 90 degrees. Feet should be flat on the floor, positioned slightly ahead of your body, about hip-width apart.
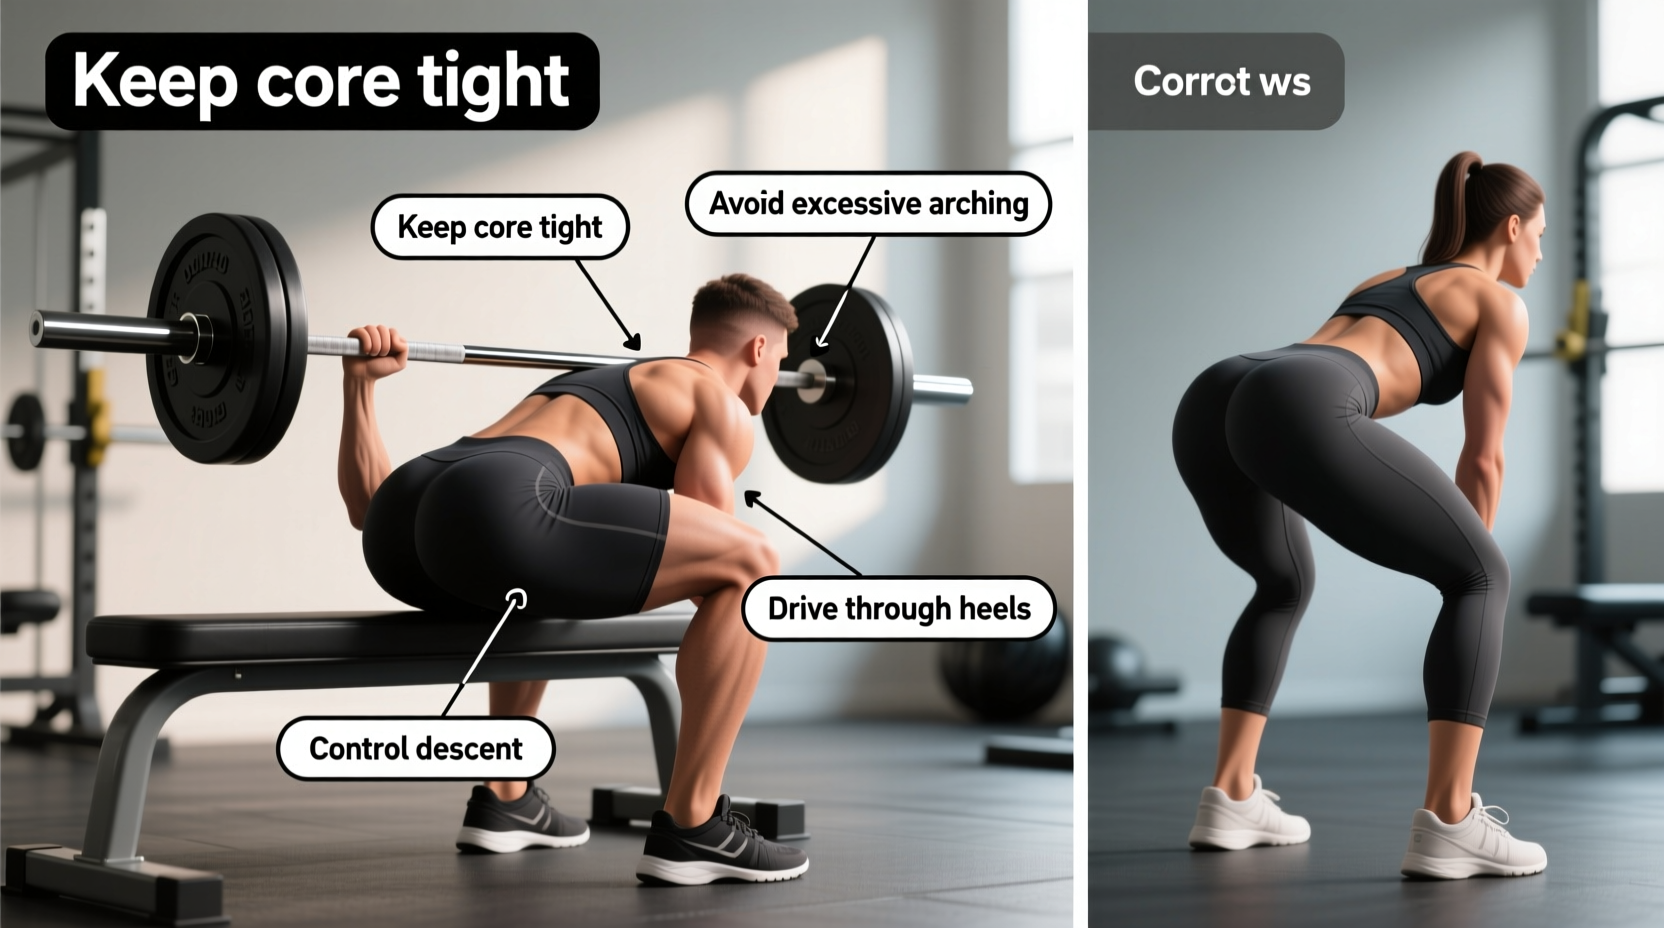
- Brace Your Core and Grip the Bar: Hold the barbell tightly above your hips. Engage your core by drawing your ribs down and tightening your abdominal muscles as if preparing for a punch.
- Lift Off the Floor: Drive through your heels and extend your hips upward. Keep your head and shoulders stable against the bench throughout the movement.
- Reach Full Hip Extension: Continue pushing until your torso forms a straight line from shoulders to knees. At the top, your glutes should be fully contracted—squeeze them hard for a brief pause.
- Lower Under Control: Reverse the motion slowly, lowering your hips toward the floor without letting the bar roll or your back arch excessively. Stop just short of touching the ground to maintain tension.
- Repeat with Consistency: Perform each rep with the same controlled tempo—typically 2 seconds up, 1-second squeeze, 2 seconds down—for best results.
Common Mistakes and How to Fix Them
Even experienced lifters fall into technical traps that diminish the exercise’s effectiveness. Recognizing and correcting these errors is essential.
| Mistake | Why It’s Problematic | How to Correct It |
|---|---|---|
| Hyperextending the Lower Back | Shifts stress from glutes to lumbar spine, increasing injury risk | Focus on driving through heels and engaging glutes; avoid pushing pelvis too far forward at the top |
| Lifting Shoulders Off the Bench | Reduces stability and transfers load to neck and upper traps | Keep upper back and shoulders anchored; only hips move |
| Knees Caving Inward | Compromises knee alignment and reduces glute activation | Cue “knees out” slightly throughout the movement |
| Using Too Much Weight Too Soon | Encourages momentum and poor control | Prioritize form over load—start light and build gradually |
| Incomplete Range of Motion | Limits muscle fiber recruitment and growth stimulus | Ensure hips rise to full extension and lower under control without bouncing |
“Most people think they’re doing hip thrusts correctly until you film them. The difference between good and great form often comes down to pelvic control and intent.” — Dr. Stuart McGill, Spine Biomechanics Expert
Checklist for Every Rep
Before adding weight or increasing volume, ensure each repetition meets these criteria:
- ✅ Feet flat, hip-width apart, toes slightly turned out
- ✅ Upper back firmly planted on the bench
- ✅ Core braced, ribs down, no excessive arch in the lower back
- ✅ Movement initiated by driving through the heels
- ✅ Hips fully extended at the top (straight line from shoulders to knees)
- ✅ Glute contraction held for a split second at peak
- ✅ Controlled descent without collapsing or losing tension
Real-World Application: From Injury Recovery to Performance Gains
Consider Sarah, a 32-year-old runner who began experiencing chronic hamstring tightness and mild sciatica after increasing her mileage. Her physical therapist identified weak glutes as a primary contributor. She started incorporating barbell hip thrusts twice weekly using moderate weight and strict form. Within six weeks, her glute activation improved significantly, hamstring strain symptoms decreased, and her running economy increased. She now uses hip thrusts as a staple in her strength routine, crediting them with better posture and reduced fatigue during long runs.
This case illustrates how targeted glute training isn’t just for aesthetics—it plays a crucial role in injury prevention and movement efficiency, especially in sports involving sprinting, jumping, or prolonged standing.
Frequently Asked Questions
How heavy should I go on hip thrusts?
Begin with a weight that allows you to complete 3 sets of 8–12 reps with perfect form. Advanced lifters may work up to loads exceeding bodyweight, but never sacrifice technique for heavier plates. Progressive overload should be gradual—add 5–10 lbs only once current weight feels controlled.
Can I do hip thrusts without a bench?
While possible, the standard setup requires an elevated surface to allow full hip extension. Alternatives like floor bridges or resistance band hip thrusts can be used temporarily, but lack the mechanical advantage and loading capacity of the barbell version.
Are hip thrusts safe for people with back pain?
Yes—when performed correctly. Individuals with existing back issues should consult a healthcare provider first and begin with bodyweight or very light loads. Emphasize neutral spine positioning and avoid lumbar hyperextension. For many, hip thrusts actually alleviate back pain by strengthening stabilizing muscles.
Final Thoughts: Build Power From the Ground Up
The barbell hip thrust is more than a glute builder—it's a foundational movement for total-body strength, balance, and resilience. When executed with precision, it enhances athletic output, supports spinal health, and corrects muscular imbalances that develop from daily sitting. Mastery doesn’t come overnight; it comes from mindful repetition, constant self-assessment, and respect for proper biomechanics.
Whether you're rehabbing an old injury, training for sport, or simply aiming to feel stronger in your body, the hip thrust deserves a permanent place in your program. Start today with attention to detail, and let every rep reinforce not just muscle, but movement mastery.


 浙公网安备
33010002000092号
浙公网安备
33010002000092号 浙B2-20120091-4
Comments
No comments yet. Why don't you start the discussion?