
Designing a watch is more than sketching a dial and picking a strap. It’s a fusion of engineering precision, aesthetic harmony, and user-centered thinking. A truly standout timepiece doesn’t just tell time—it tells a story. Whether you're an aspiring designer, a hobbyist, or launching your own brand, mastering the fundamentals is essential. This guide walks you through the core principles and practical steps to create a watch that captures attention and earns respect.
Understanding the Anatomy of a Watch
Before putting pen to paper, understand the components that define a watch’s form and function. Each element plays a role in both usability and visual impact:
- Case: Houses the movement; defines shape, size, and thickness.
- Dial: The face of the watch; includes markers, hands, subdials, and text.
- Movement: The engine—quartz, automatic, or manual.
- Crystal: Protective cover over the dial (sapphire, mineral, acrylic).
- Bezel: Outer ring around the crystal; functional (e.g., dive bezel) or decorative.
- Strap/Bracelet: Worn on the wrist; impacts comfort and style.
- Crown: Used for setting time and winding; placement affects symmetry.
A well-designed watch balances these elements so none overpower the others. Proportion, legibility, and wearability are non-negotiable.
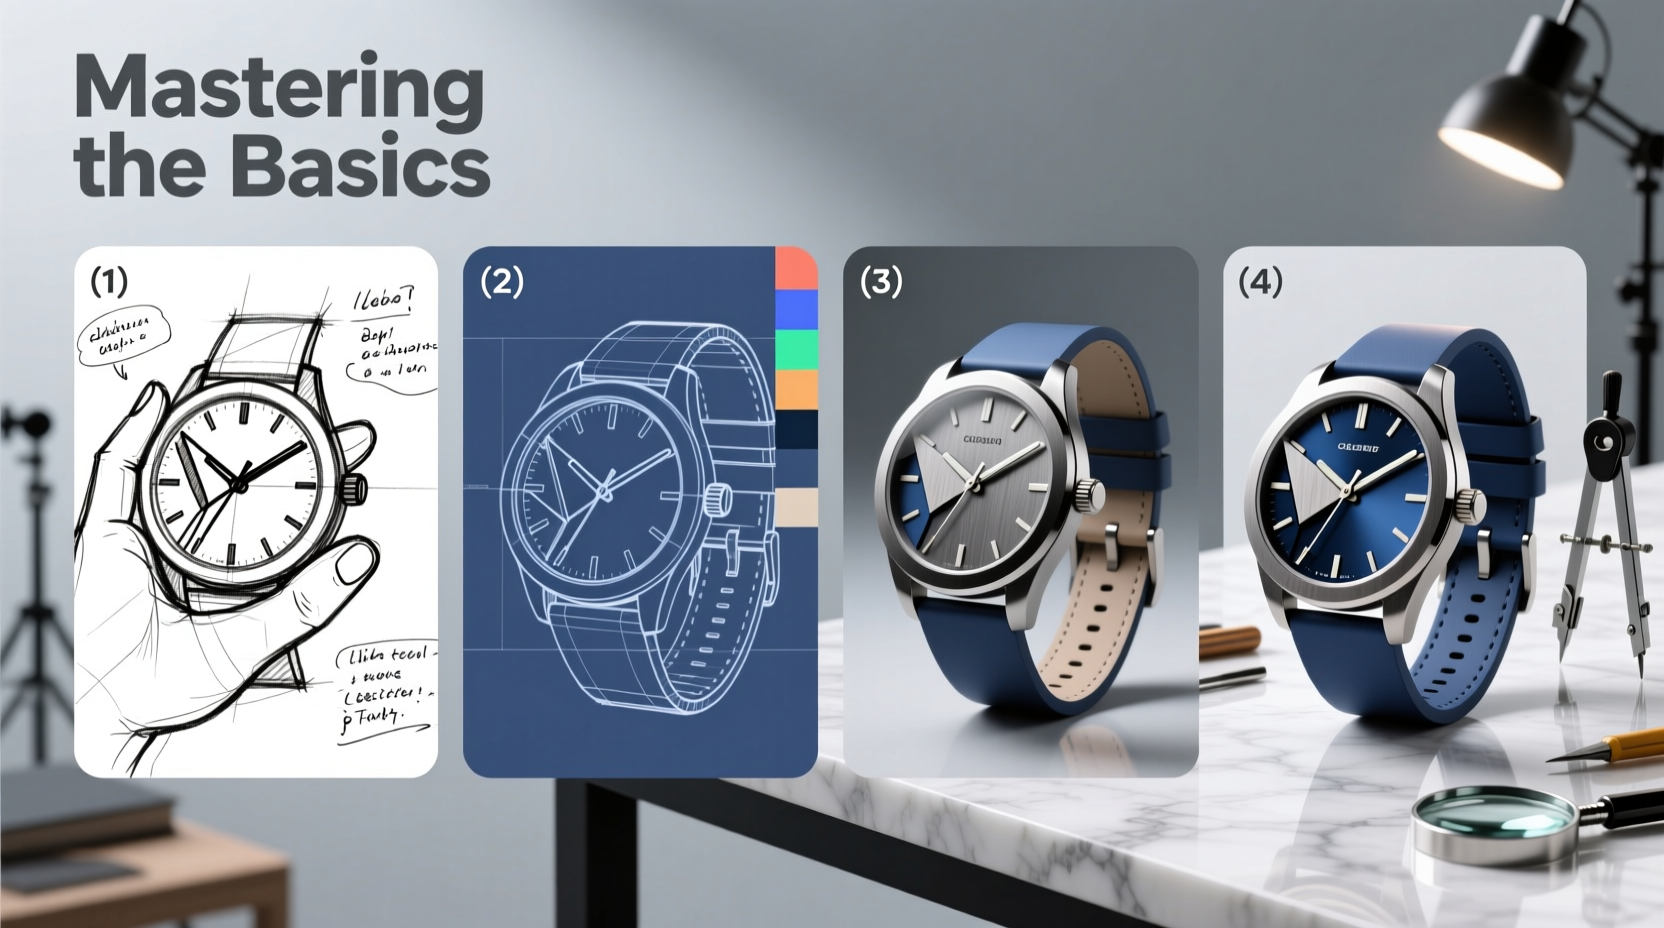
The Design Process: From Concept to Sketch
Great watches begin with intention. Ask: Who is this watch for? Is it a rugged diver, a minimalist dress piece, or a bold fashion statement? Define the purpose before designing.
- Define the identity: Choose a theme—vintage aviation, modern minimalism, marine exploration.
- Research references: Study iconic models (e.g., Rolex Submariner, Patek Philippe Calatrava) to understand what works.
- Create mood boards: Collect images, materials, colors, and typography that reflect your vision.
- Sketch freely: Begin with rough thumbnails. Focus on silhouette and layout, not details.
- Refine top concepts: Select 2–3 promising sketches and develop them into detailed drawings.
Use graph paper or digital tools like Adobe Illustrator to maintain scale and symmetry. Pay close attention to hand alignment, hour marker spacing, and negative space.
Key Design Principles for Standout Timepieces
Even the smallest detail can elevate a watch from ordinary to exceptional. Apply these principles to ensure your design resonates:
Proportion and Balance
The relationship between case size, lugs, crown, and dial elements must feel harmonious. A large crown on a small case disrupts balance. Avoid clutter—empty space enhances clarity.
Legibility First
No matter how artistic, a watch must be readable at a glance. Use high-contrast colors, distinct hand shapes, and sufficient marker size. Test your design in low light conditions.
Material Integrity
Choose materials that support the design’s intent. Stainless steel conveys durability; titanium offers lightness; sapphire crystal resists scratches. Be consistent—don’t pair a luxury dial with a plastic strap unless it’s intentional.
Signature Detail
What makes your watch memorable? It could be a unique handset, a colored seconds hand, an engraved case back, or asymmetrical lugs. One strong detail often speaks louder than ten weak ones.
“Simplicity isn’t the absence of clutter. It’s the presence of clarity.” — Dieter Rams, Industrial Designer
Step-by-Step Guide to Building Your First Prototype
Once your concept is refined, transition from sketch to prototype. Follow this timeline to bring your design to life:
- Week 1–2: Finalize Technical Drawings
Create scaled blueprints with exact measurements: case width, lug-to-lug, thickness, crystal height, dial cutouts. - Week 3: Select Movement & Components
Choose a reliable base movement (e.g., ETA 2824, Seiko NH35). Match dial diameter, stem position, and hand sizes accordingly. - Week 4: Source or Commission Parts
Work with suppliers for custom dials, hands, or cases. Use platforms like Alibaba for OEM manufacturers or Swiss specialists for premium finishes. - Week 5–6: Assemble a Mock-Up
Use 3D-printed case and printed dial to test ergonomics and aesthetics. Check fit on wrist and readability. - Week 7: Refine Based on Feedback
Show the mock-up to trusted peers. Adjust based on comfort, visual weight, and functionality. - Week 8: Build Functional Prototype
Assemble with real movement, crystal, and strap. Perform basic water resistance and durability checks.
Common Pitfalls and How to Avoid Them
New designers often fall into traps that undermine even the best ideas. Recognize these early:
| Pitfall | Why It Fails | Solution |
|---|---|---|
| Overcomplicated Dial | Hard to read; distracts from core function | Remove one element at a time until clarity improves |
| Poor Case Ergonomics | Uncomfortable on wrist; digs into skin | Test lug angle and curvature with 3D model |
| Inconsistent Branding | Lacks identity; forgettable | Develop a style guide: fonts, colors, logo placement |
| Neglecting Water Resistance | Leads to damage and customer complaints | Use gaskets, screw-down crowns, and pressure testing |
Mini Case Study: The Rise of “Nordic Minimal”
In 2018, designer Lena Voss launched a microbrand focused on Scandinavian-inspired timepieces. Her first model, the “Fjord No.1,” featured a 38mm brushed steel case, matte white dial, and navy blue leather strap. She avoided logos on the dial, using only subtle indices and slim hands.
The initial sketches included applied numerals and a date window, but user testing showed reduced legibility. She removed both, embracing negative space instead. The final design sold out in 72 hours.
Lesson: Confidence in simplicity can be more powerful than technical complexity.
Checklist: Before Launching Your Design
Use this checklist to ensure no critical step is missed:
- ✅ Defined target audience and use case
- ✅ Verified case dimensions and wearability (lug-to-lug ≤ 48mm)
- ✅ Confirmed movement compatibility with dial and hands
- ✅ Tested legibility in daylight and low-light settings
- ✅ Secured reliable suppliers for long-term production
- ✅ Developed packaging and branding materials
- ✅ Conducted at least one round of user feedback
FAQ
Can I design a watch without knowing how to draw?
Yes. While sketching helps, many designers use digital tools like CAD software or collaborate with illustrators. Focus on clear communication of your vision.
How much does it cost to prototype a watch?
Basic prototypes start around $500–$1,500, depending on customization. Off-the-shelf movements and standard cases reduce costs. Fully custom tooling can exceed $10,000.
Is it better to use automatic or quartz movement?
Automatic movements appeal to enthusiasts and convey craftsmanship. Quartz offers accuracy and affordability. Choose based on your audience—enthusiasts vs. everyday wearers.
Conclusion
Designing a standout watch isn’t about chasing trends—it’s about solving problems with elegance and purpose. By grounding your work in proportion, clarity, and authenticity, you create something that transcends fashion. Whether your watch ends up on wrists around the world or remains a personal project, the process itself sharpens your eye for detail and deepens your appreciation for timeless design.


 浙公网安备
33010002000092号
浙公网安备
33010002000092号 浙B2-20120091-4
Comments
No comments yet. Why don't you start the discussion?