
Cutting your own hair used to be a last resort—something people did only when salons were closed or budgets were tight. But today, more individuals are embracing DIY haircuts as a practical, empowering skill. With the right tools, technique, and mindset, you can achieve a clean, flattering cut in your bathroom or living room. This guide walks you through every essential step, from preparation to finishing touches, so you can trim your hair with precision and growing confidence.
Why Cut Your Own Hair?
There are several compelling reasons to learn how to cut your own hair. First, it saves money. Regular salon visits add up, especially if you prefer frequent trims. Second, it offers control. You decide the length, shape, and style—no miscommunication or stylist assumptions. Third, it builds self-reliance. Once mastered, self-haircutting becomes a sustainable habit that fits into your schedule on your terms.
That said, success requires patience and practice. A bad haircut at home can take months to grow out. The key is starting simple, using proven methods, and progressing gradually as your skills improve.
Essential Tools and What They Do
Professional results start with the right equipment. Using household scissors or dull clippers leads to split ends, uneven layers, and frustration. Invest in these core tools:
| Tool | Purpose | Recommended Type |
|---|---|---|
| Barber Scissors | Precise cutting on dry or damp hair | 7–8 inch, stainless steel, sharp edge |
| Thinning Shears | Reduce bulk without changing length | 30–40 tooth for subtle texturizing |
| Hair Clippers | Short back and sides, fades, edging | Cordless, adjustable guard (e.g., Wahl, Andis) |
| Comb Set | Sectioning and guiding cuts | Narrow-tooth tail comb + wide-tooth styling comb |
| Misting Bottle | Keep hair damp during cutting | Spray bottle with fine mist setting |
| Neck Duster or Brush | Remove loose hairs during process | Small soft brush or electric duster |
Always keep your tools clean and sanitized. Wipe blades with rubbing alcohol before and after use to prevent buildup and ensure smooth gliding.
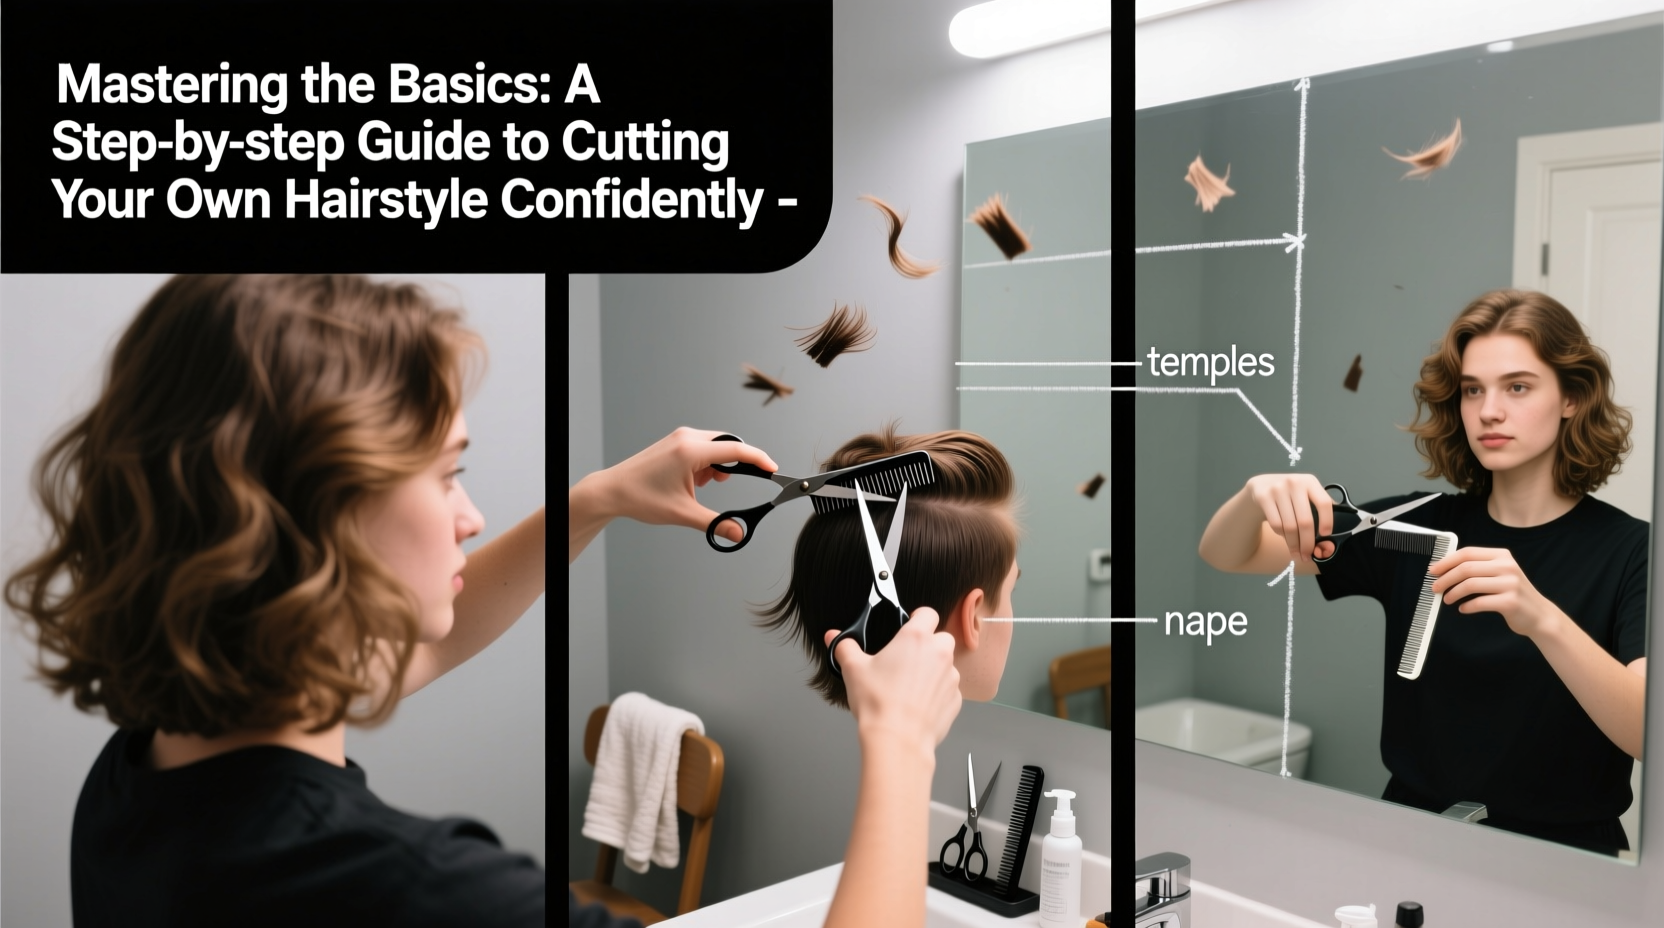
Step-by-Step Guide to Cutting Your Hair at Home
The following sequence applies to most short-to-medium length styles, including fades, tapers, and blunt cuts. Follow each step carefully for consistent results.
- Wash and condition your hair 1–2 hours before cutting. Clean hair shows true texture and lies more naturally. Avoid heavy products that weigh it down.
- Dampen hair evenly with a spray bottle. It should be damp—not soaking wet. This allows better control and visibility when sectioning.
- Section the hair using clips or hair ties. Divide into four quadrants: left/right top, left/right back. Work one section at a time.
- Start with the back lower sections. Use clippers with a longer guard (e.g., #4) to establish the baseline. Move upward in small, overlapping strokes.
- Blend into the sides using shorter guards or freehand fading. Gradually reduce guard length (e.g., #3 → #2 → #1) for a taper effect.
- Cut the top with scissors using point cutting or slide cutting. Hold small sections vertically and snip upward to create texture and avoid blunt lines.
- Check symmetry frequently using mirrors. Place one mirror in front, another behind you. Compare both sides at eye level. <8> Refine the neckline and sideburns. Use a trimmer or edger to crisp the hairline. Define the edge just above the natural nape curve.
- Rinse or brush out clippings and assess the final look. Dry your hair completely and recheck under natural light. Make micro-adjustments if needed.
Avoid These Common Mistakes
Even experienced DIYers make errors. Recognizing them early prevents repeat issues.
- Using kitchen or craft scissors: These aren’t designed for hair and cause jagged ends.
- Cutting dry hair without experience: Dry hair is harder to control and measure accurately.
- Over-thinning: Excessive use of thinning shears creates a “chewed” look. Use sparingly.
- Skipping sections: Freehand cutting without parting leads to asymmetry.
- Rushing the fade: Fades require patience. Build the gradient slowly with overlapping passes.
“The difference between an amateur and a polished DIY cut is not talent—it’s discipline in sectioning and consistency in hand movement.” — Marcus Reed, Master Barber & Educator
Real Example: James’ First Fade at Home
James, a 28-year-old graphic designer, had been visiting a barber every three weeks for a mid-fade cut. After paying $650 over six months, he decided to try it himself. He bought a quality clipper set, watched instructional videos, and practiced on damp hair during weekends.
His first attempt was uneven—he went too short on the left side and missed blending near the crown. But instead of giving up, he waited two weeks and tried again, this time using smaller guard transitions and more mirror checks. By his third attempt, he achieved a clean, symmetrical fade that matched his barber’s work. Now, he maintains his style every four weeks with confidence.
James’ story shows that proficiency comes with repetition. Each mistake teaches spatial awareness and muscle memory.
Checklist: Before You Start Cutting
Run through this list to ensure you’re fully prepared:
- ✅ Washed and conditioned hair (dried then lightly misted)
- ✅ All tools cleaned and charged (if electric)
- ✅ Two mirrors positioned (front and rear)
- ✅ Sectioning clips or ties ready
- ✅ Trash bin or cape nearby for easy cleanup
- ✅ Natural or bright lighting available
- ✅ Reference photo of desired style accessible
Frequently Asked Questions
Can I cut curly or textured hair myself?
Yes, but with extra caution. Curly hair shrinks when dry, so cut it while damp and avoid removing too much length. Consider cutting ½ inch longer than desired and adjusting after drying. Use a pick comb to detangle and define curl pattern during sectioning.
How often should I trim my own hair?
Every 3–6 weeks, depending on growth rate and style. Shorter styles like fades need maintenance every 3–4 weeks. Longer styles can go 5–6 weeks. Regular trims prevent split ends and maintain shape.
What if I mess up the cut?
Minor errors can be styled or grown out in days. For significant mistakes, consider visiting a barber to correct the worst areas. Use it as a learning moment—note what went wrong and adjust next time. Most barbers have made the same mistakes early in training.
Final Thoughts and Next Steps
Cutting your own hair isn’t about replacing skilled professionals—it’s about gaining independence and understanding your hair’s behavior. Mastery doesn’t happen overnight. The first few attempts may feel awkward, but each session builds familiarity with angles, tension, and flow.
Start conservatively. Focus on one area per session—maybe just cleaning up the neckline or trimming the ends. As your confidence grows, integrate more advanced techniques like layering or fading. Over time, you’ll develop a rhythm that suits your face shape, hair type, and lifestyle.


 浙公网安备
33010002000092号
浙公网安备
33010002000092号 浙B2-20120091-4
Comments
No comments yet. Why don't you start the discussion?