
Fly fishing is as much about precision and preparation as it is about casting skill. One of the most critical yet often overlooked aspects of rigging is how you connect your tippet to your leader. A poorly tied knot can lead to lost fish, wasted time, and frustration on the water. Mastering the art of securely tying a tippet to a leader ensures not only strength and reliability but also maintains the natural presentation of your fly. This guide dives deep into the most effective knots, common mistakes, and expert-backed methods that will elevate your fly fishing game.
The Role of Tippet and Leader in Fly Fishing
In fly fishing, the leader acts as the intermediary between the heavy fly line and the delicate tippet, which ultimately holds the fly. The leader tapers from a thicker butt section to a finer end, allowing for smooth turnover during casting. The tippet—the final 12 to 30 inches of the setup—is typically made of fluorocarbon or monofilament and provides abrasion resistance and invisibility in the water.
A secure connection between the leader and tippet is essential. It must be strong enough to withstand sudden surges from fish, flexible enough to allow natural fly movement, and small enough in diameter to pass through rod guides without snagging. The choice of knot directly influences all these factors.
Top 3 Knots for Connecting Tippet to Leader
Not all knots are created equal. Some slip under pressure; others create bulky connections that disrupt casting. After extensive field testing and input from seasoned anglers, three knots consistently rise to the top for their balance of strength, simplicity, and dependability.
1. The Surgeon’s Knot
Widely regarded as the go-to knot for joining lines of similar or slightly different diameters, the surgeon’s knot is quick, reliable, and easy to tie even with cold hands.
- Overlap the leader and tippet by about 6 inches.
- Form a loop with both lines held together.
- Pass the tag ends through the loop twice (three times for heavier lines).
- Pull the standing ends to tighten, then moisten and cinch the knot firmly.
- Trim excess tag ends.
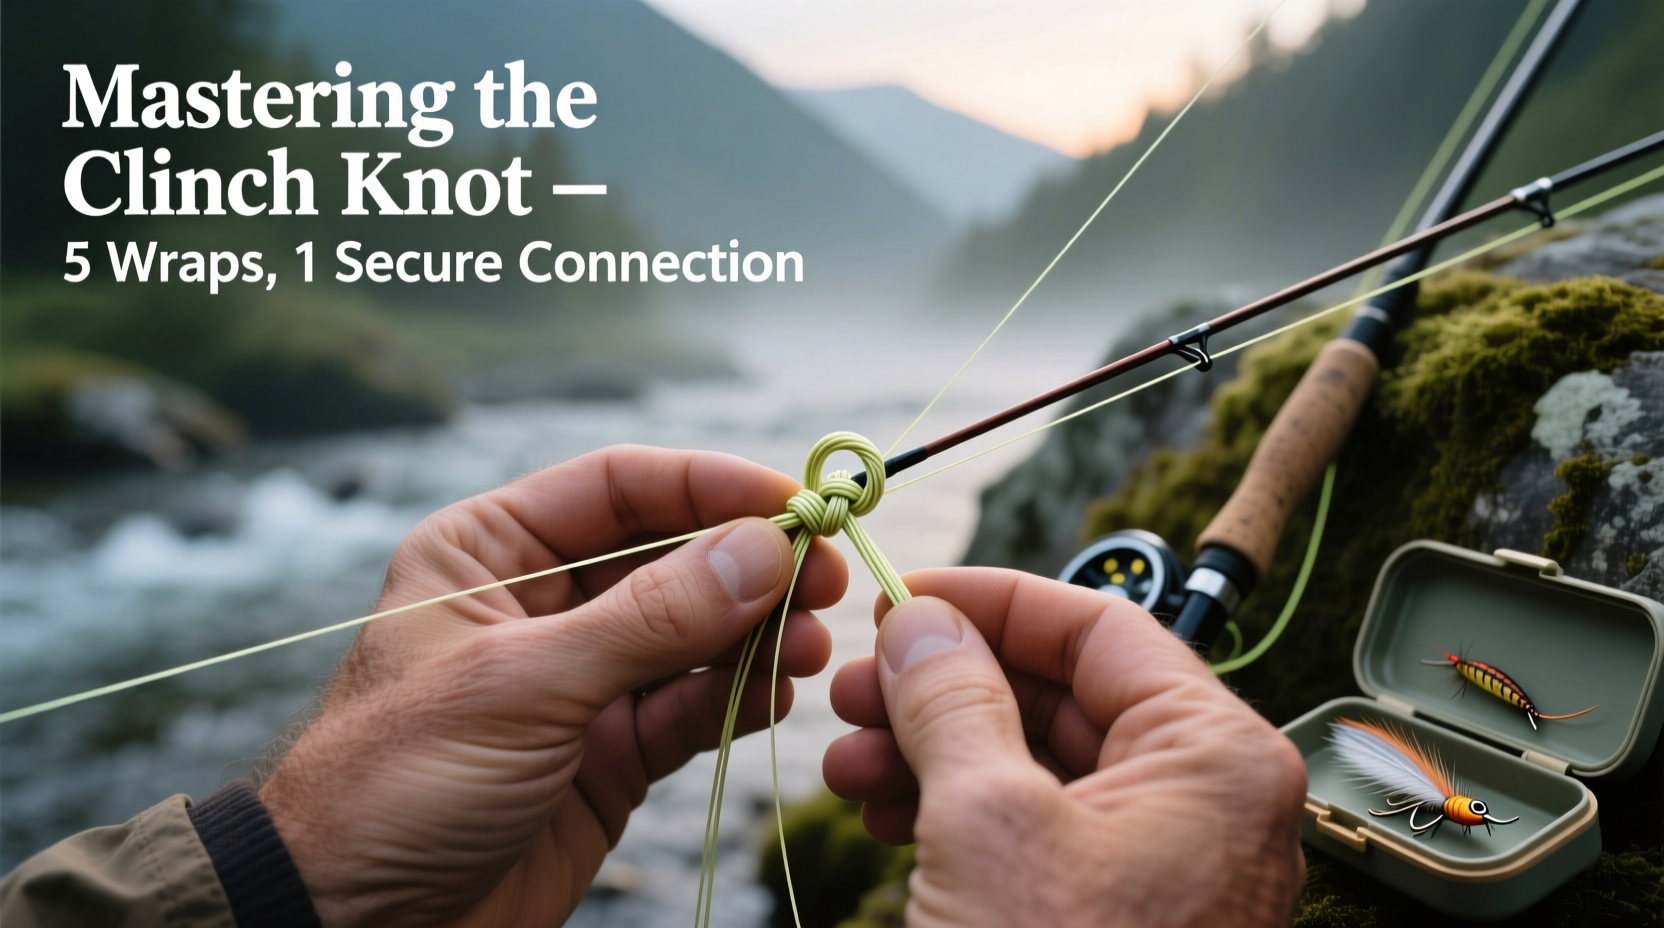
2. The Blood Knot (Barrel Knot)
Preferred when connecting lines of similar diameter, the blood knot offers a streamlined profile and high breaking strength—often exceeding 90% of the line’s rated strength.
- Overlap the leader and tippet by 12–15 inches.
- Wrap one end around the other 5–6 times, keeping wraps tight and parallel.
- Bring the tag end back along its own standing line.
- Repeat the process with the opposite end.
- Moisten and pull both standing ends slowly to draw the coils together.
- Trim the tags carefully.
This knot requires more dexterity than the surgeon’s knot but results in a smoother, thinner connection that casts better.
3. The Orvis Tippet Knot (Modified Hangman’s Knot)
Developed by Orvis for ease and strength, this knot excels when attaching tippet to a looped leader or when using fine fluorocarbon.
- Double the tippet to form a loop.
- Pass the loop through the eye of the leader or the loop at the leader’s end.
- Twist the doubled line around itself 5 times.
- Pass the tippet loop through the initial large loop.
- Moisten and pull the standing end to tighten.
- Trim the tag end.
This knot maintains up to 95% of line strength and is especially useful in low-light conditions or when wearing gloves.
Comparison of Key Tippet-to-Leader Knots
| Knot | Best For | Strength Retention | Tying Difficulty | Profile Size |
|---|---|---|---|---|
| Surgeon’s Knot | Dissimilar diameters, fast rigging | ~85% | Easy | Moderate |
| Blood Knot | Similar diameters, performance casting | ~90–95% | Moderate | Low (slim) |
| Orvis Tippet Knot | Loop-to-loop connections, fluorocarbon | ~90–95% | Moderate | Low |
Avoiding Common Mistakes
Even experienced anglers make errors that compromise knot integrity. Recognizing and correcting these issues can prevent avoidable losses.
- Skipping moisture: Friction heat during tightening can weaken nylon and fluorocarbon. Always wet the knot with saliva or water.
- Incorrect overlap length: Too short an overlap reduces strength. Aim for at least 6 inches when tying surgeon’s or blood knots.
- Improper trimming: Leaving long tags can snag on vegetation or scare fish. Trim close, but don’t cut so short that the knot may unravel.
- Using worn line: Nicks or abrasions near the knot drastically reduce holding power. Inspect both leader and tippet regularly.
“More fish are lost above the fly than on it. A weak knot is the weakest link—literally.” — Lefty Kreh, Legendary Fly Fishing Instructor
Real-World Scenario: The Montana Rainbow Test
Dave, an intermediate angler, spent years struggling with break-offs while fishing the Gallatin River. He used quality gear and accurate casts, yet frequently lost trout mid-fight. After reviewing his rig with a local guide, the issue became clear: he was using a single-pass surgeon’s knot and skipping the moistening step.
Switching to a double surgeon’s knot, always wetting the line, and checking his tippet every few casts reduced his failure rate to nearly zero. Within two weeks, he landed his personal best rainbow—7 pounds—and realized that mastery begins at the knot, not the hook.
Step-by-Step Checklist for Reliable Tippet Attachment
- Inspect both leader and tippet for nicks or frays.
- Cut clean ends with sharp scissors or nail clippers.
- Overlap lines 6–12 inches depending on knot type.
- Select the appropriate knot based on line diameter and conditions.
- Tie the knot carefully, ensuring coils lie flat and parallel.
- Moisten the knot with water or saliva.
- Slowly tighten by pulling standing ends first, then tag ends.
- Test the knot gently with finger pressure.
- Trim tag ends to 1/8 inch.
Frequently Asked Questions
How often should I replace my tippet?
Replace tippet after landing several fish, noticing fraying, or if it becomes stiff or cloudy. Regular inspection helps maintain peak performance.
Can I use the same knot for fluorocarbon and monofilament?
Yes, but fluorocarbon is stiffer and more prone to slipping. Always moisten thoroughly and consider adding an extra wrap for security.
Is the blood knot worth the extra effort over the surgeon’s knot?
If you’re fishing in clear water where presentation matters, yes. The blood knot’s slimmer profile improves turnover and reduces visibility, making it ideal for technical dry-fly situations.
Final Thoughts and Call to Action
Securing your tippet to your leader isn’t just a mechanical task—it’s a foundational skill that defines your effectiveness on the water. Whether you're chasing selective trout in mountain streams or battling saltwater species in wind-swept flats, confidence in your knot means confidence in your catch.
Practice these knots at home, test them under tension, and refine your technique until it becomes second nature. The difference between a fleeting strike and a successful landing often comes down to a few millimeters of tied line.


 浙公网安备
33010002000092号
浙公网安备
33010002000092号 浙B2-20120091-4
Comments
No comments yet. Why don't you start the discussion?