
Paracord leashes are more than just functional—they’re a testament to craftsmanship, durability, and thoughtful preparation. Originally developed for military use due to its strength and versatility, paracord (short for parachute cord) has become a favorite among outdoor enthusiasts, survivalists, and DIY crafters. A well-made 6-strand paracord dog leash offers superior grip, shock absorption, and resilience, especially under strain. More importantly, crafting one yourself allows full customization in length, color, and handle design—perfect for matching your dog’s personality or your own style.
This guide walks you through every stage of creating a professional-grade, hand-braided 6-strand paracord leash. Whether you're a beginner looking to learn basic knotting techniques or an experienced crafter aiming to refine your skills, this process builds both confidence and capability.
Gathering Your Materials and Tools
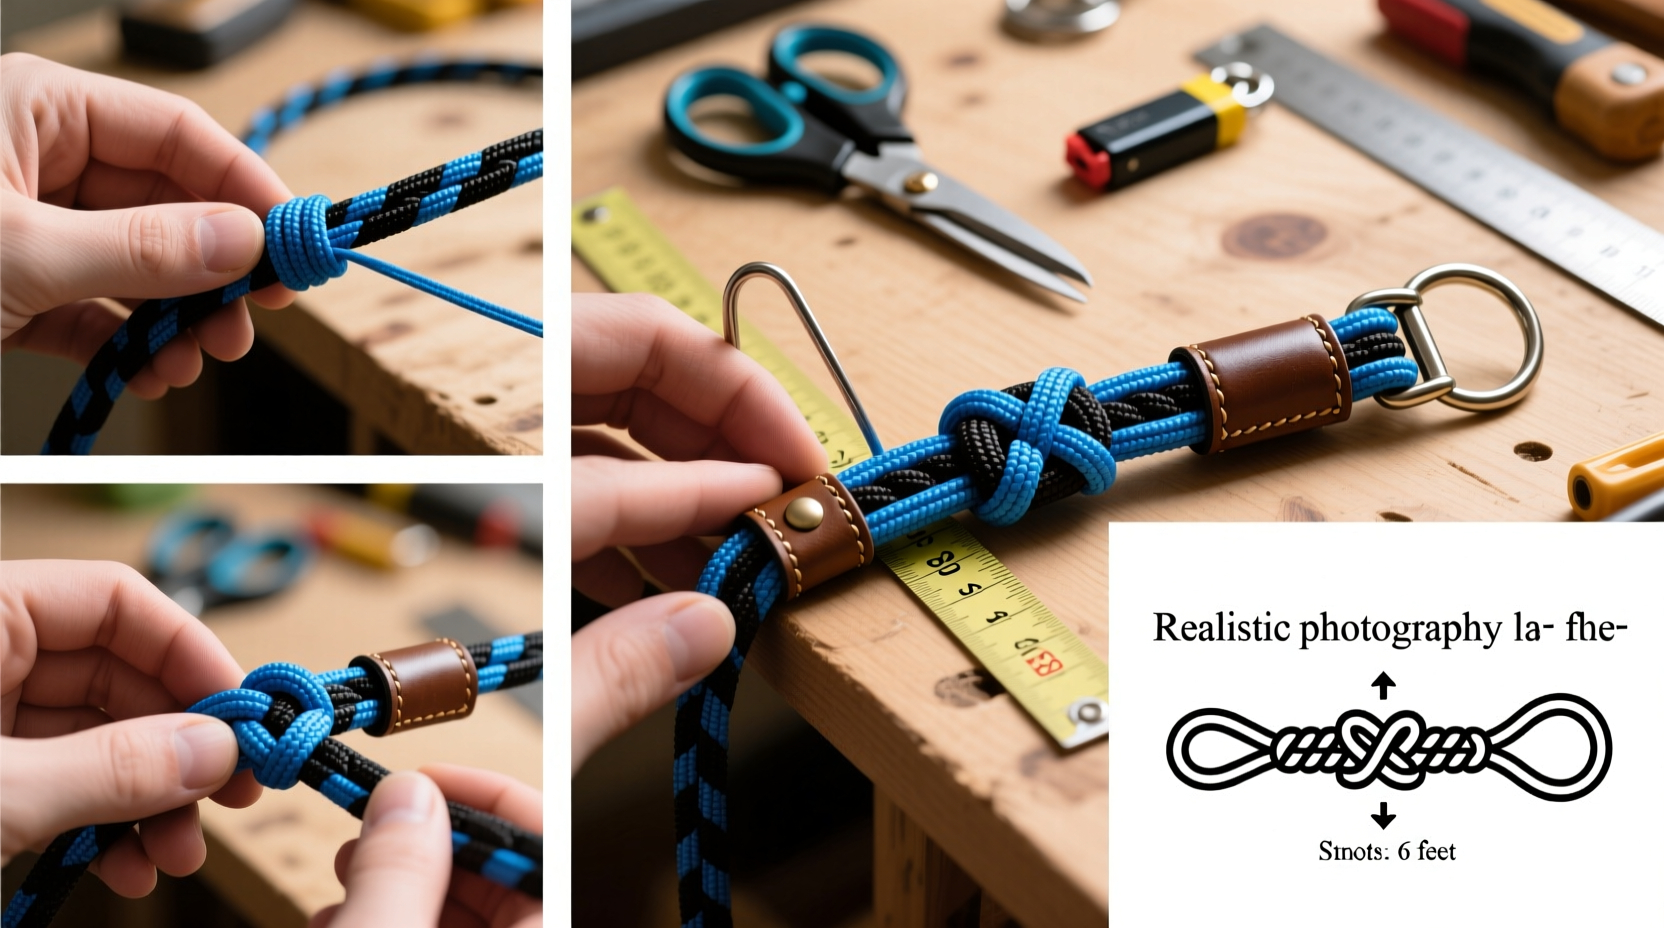
The foundation of any successful DIY project lies in preparation. Using high-quality materials ensures longevity and safety, especially when the final product will be used daily with your pet.
What You’ll Need:
- 100 feet of 550-lb test paracord (two colors recommended for visual contrast)
- One heavy-duty swivel bolt snap (rated for at least 500 lbs)
- Lighter or heat source for sealing ends
- Measuring tape or yardstick
- Masking tape or clips for securing strands
- Workbench or table with clamp (optional but helpful)
- Scissors or utility knife
Using two different colored cords—one for the core and one for the outer braid—not only enhances aesthetics but also helps track strand patterns during braiding, reducing errors.
Understanding the 6-Strand Round Braid Structure
The 6-strand round braid is a classic knotting technique known for its cylindrical symmetry, even tension distribution, and resistance to unraveling. Unlike flat braids, this method creates a smooth, rope-like finish that feels comfortable in hand and withstands repeated pulling.
In this braid, three strands run clockwise and three counter-clockwise, interweaving in a precise sequence. Each strand alternates over and under adjacent cords, forming a tight spiral. When done correctly, the result is a uniform, springy cord capable of absorbing sudden jerks—ideal for dogs that lunge or pull during walks.
“Properly executed, a 6-strand paracord braid can retain up to 90% of the original tensile strength of the material.” — Daniel Reyes, Tactical Gear Artisan and Cordage Instructor
Step-by-Step Construction Process
Follow these steps carefully to build a 4-foot leash (adjustable based on preference). Total working time: approximately 2–3 hours.
- Cut and Prepare Cords: Cut six strands, each 10 feet long. Group them evenly and fold in half. Attach the looped end to the swivel snap using a secure girth hitch. Secure the snap in a clamp or hook to keep it stable during braiding.
- Label the Strands (Optional): Use small pieces of tape to label the strands A–F, starting from left to right. This helps maintain consistency in pattern tracking.
- Begin the Braid: Arrange the six strands into two groups of three—one on the left, one on the right. Begin by taking the outermost right strand and crossing it diagonally over the middle two strands and under the third. Then, take the outermost left strand and repeat the same motion in reverse. Continue alternating sides, always maintaining consistent tension.
- Maintain Even Tension: As you braid, gently pull each strand taut after placing it. Uneven tension leads to lumps or weak spots. Work slowly until the rhythm becomes natural.
- Braid to Desired Length: Continue braiding down the length of the leash. For a standard 4-foot walking leash (excluding handle and hardware), aim for about 42 inches of braid.
- Create the Handle: Stop braiding and group the six strands together. Twist them tightly in one direction, then allow them to coil back on themselves to form a solid, self-locking handle. Secure the end with a crown knot or Matthew Walker knot for a polished finish.
- Finish and Seal: Trim excess cord, leaving about ½ inch. Carefully melt the cut ends with a lighter and press them flat against the knot to prevent fraying. Do not overheat—this weakens the fibers.
Testing, Maintenance, and Safety Checks
Before using the leash with your dog, perform a series of stress tests. Gently tug on the handle, snap, and braid sections. Simulate sudden pulls to ensure no slippage or deformation occurs. Inspect the girth hitch attachment point—it should remain firmly seated on the snap.
Regular maintenance extends the leash’s life:
- Rinse with mild soap and water if muddy or dirty.
- Air dry completely before storage—never machine dry.
- Inspect monthly for fraying, especially near high-stress zones like the handle and snap.
- Retire the leash if internal strands are exposed or if elasticity diminishes.
| Aspect | Do | Don’t |
|---|---|---|
| Attachment | Use a girth hitch or double-wrap anchor knot | Don’t rely on single-loop knots |
| Tension | Keep consistent while braiding | Don’t alternate loose and tight strands |
| Cleaning | Hand wash with cold water | Don’t soak for extended periods |
| Storage | Hang loosely or coil gently | Don’t compress under heavy objects |
Real-World Example: Building a Leash for an Active Border Collie
Sarah, a dog trainer in Colorado, needed a custom leash for her energetic Border Collie, Rex, who often lunged during trail hikes. Commercial leashes wore out within months. She decided to make her own 6-strand paracord leash using blue and black cords for visibility against snow and terrain.
After following the braiding technique outlined here, she added a thicker handle section for better grip during sudden stops. Over the next year, the leash endured daily use across rocky trails, rain, and freezing temperatures. Not once did it fray or fail. Sarah now teaches the method to fellow trainers, emphasizing how handmade gear can outperform off-the-shelf options when built with care.
Frequently Asked Questions
Can I make a shorter or longer leash?
Absolutely. Adjust the initial strand length proportionally—add 2 feet per additional foot of leash. Remember that braiding shortens the overall length slightly due to twist compression.
Is paracord safe for large or strong dogs?
Yes, provided it's properly constructed. A 6-strand 550-lb paracord braid exceeds 2,000 lbs of combined tensile strength. Always pair it with rated hardware and inspect regularly for wear.
How do I clean a paracord leash without damaging it?
Spot clean with a damp cloth and mild detergent. For deeper cleaning, hand-wash in lukewarm water, rinse thoroughly, and hang to dry away from direct sunlight. Avoid bleach or abrasive scrubbing.
Final Checklist Before First Use
- Confirm all strands are securely anchored to the snap.
- Verify braid is even and free of gaps or snags.
- Check that knots are sealed and smoothed.
- Test load capacity with firm hand pulls.
- Ensure the snap opens and closes smoothly.
Conclusion: Craftsmanship Meets Companionship
Creating a durable 6-strand paracord dog leash isn’t just a practical skill—it’s an act of care. Every braid reflects attention to detail, respect for materials, and love for your dog’s safety and comfort. Once mastered, this technique opens doors to other projects: collars, keychains, survival bracelets, or even climbing gear.


 浙公网安备
33010002000092号
浙公网安备
33010002000092号 浙B2-20120091-4
Comments
No comments yet. Why don't you start the discussion?