
Removing a broken, stripped, or seized bolt is one of the most frustrating challenges in mechanical repair. Whether you're working on an engine block, a household fixture, or industrial equipment, the moment a bolt head snaps or a screwdriver slips, time and patience start to dwindle. Enter the Easy Out bolt extractor—a precision tool designed to reverse-thread into damaged fasteners and extract them cleanly. But like any specialized tool, its success depends on correct use. When applied improperly, it can worsen the damage or break off inside the bolt, creating a far more complex problem.
This guide walks through the entire process of using an Easy Out extractor effectively, from diagnosis to extraction, with real-world tips and best practices that ensure reliability and safety.
Understanding How Easy Out Extractors Work
Easy Out extractors—also known as screw extractors—are typically made from hardened carbon steel or cobalt alloys. They feature a tapered, left-handed thread design that allows them to grip the interior of a drilled hole in a damaged bolt. As torque is applied counterclockwise, the extractor bites deeper into the material, turning the broken fastener loose.
The key principle behind their function is the combination of reverse threading and taper geometry. Unlike standard drill bits or taps, these tools are engineered to work under tension, not compression. This means they must be driven into a properly sized pilot hole with enough force to engage but not so much that they fracture.
“An Easy Out isn’t a brute-force solution—it’s a surgical instrument for mechanical recovery.” — Mark Reynolds, Industrial Maintenance Supervisor
Essential Tools and Materials Checklist
Before beginning any extraction job, gather the following items to ensure a smooth process:
- Easy Out bolt extractor set (matched to bolt size)
- Center punch and hammer
- High-speed steel (HSS) or cobalt drill bits
- Cordless impact driver or hand tap wrench
- Penetrating oil (e.g., PB Blaster, Kroil)
- Safety glasses and gloves
- Compressed air or brush (for debris removal)
- Anti-seize compound (for future reassembly)
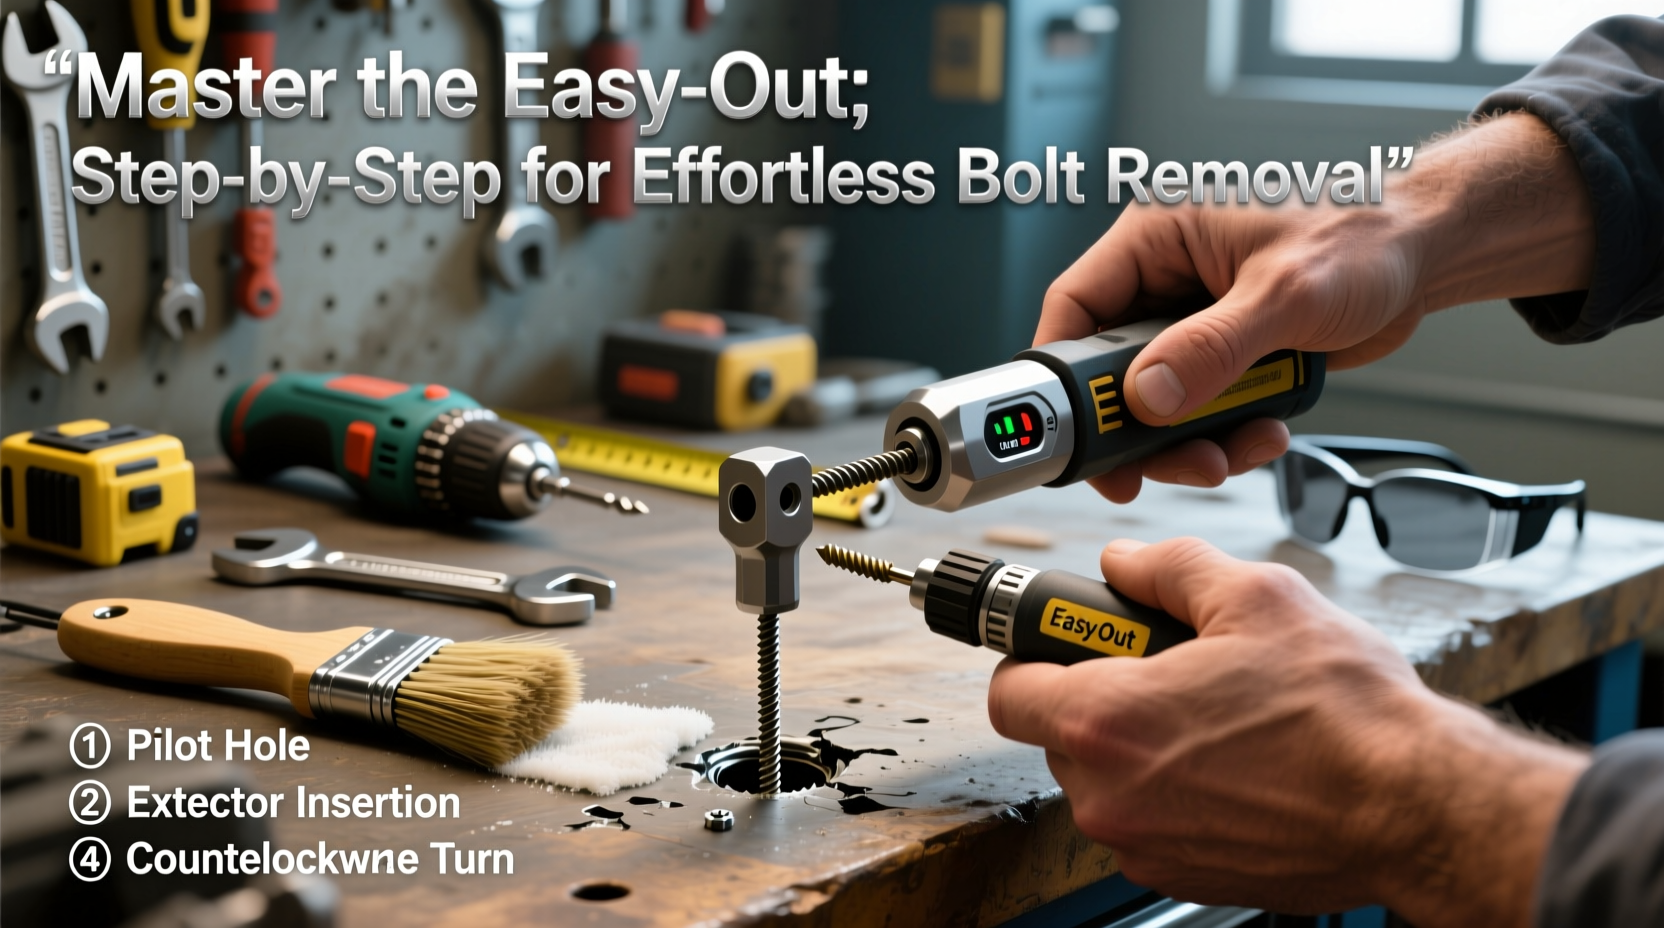
Step-by-Step Guide to Using an Easy Out Extractor
Follow this systematic approach to maximize your chances of successful bolt removal without damaging surrounding components.
- Assess the Damage: Confirm that the bolt is indeed broken or stripped. If the head remains partially intact, attempt removal with a six-point socket or vice grips first.
- Apply Penetrating Oil: Spray penetrating oil liberally around the bolt shaft and let it soak for at least 15 minutes. For severely corroded fasteners, repeat application and allow several hours or overnight dwell time.
- Mark the Center: Use a center punch to create a precise indentation in the center of the broken bolt. This guides the drill bit and prevents slippage.
- Select the Correct Drill Bit: Choose a bit slightly smaller than the recommended starting diameter for your Easy Out size. Drilling too large compromises grip; too small risks breaking the extractor.
- Drill the Pilot Hole: Secure the workpiece if possible. Drill slowly with light pressure, using cutting fluid or lubricant to reduce heat. Keep the drill perpendicular to the surface.
- Clean the Hole: Remove metal shavings with compressed air or a small brush. Residual debris can interfere with extractor engagement.
- Insert the Easy Out: Tap the extractor gently into the hole with a hammer to seat it. Then, using a tap wrench or impact driver, turn it counterclockwise. Apply steady, increasing pressure until resistance gives way.
- Remove the Bolt: Once the bolt begins to rotate, continue turning until fully extracted. Avoid sudden jerking motions that could snap the extractor.
- Inspect and Clean the Threaded Hole: After removal, clean the internal threads with a bottoming tap to restore integrity before installing a replacement bolt.
Common Mistakes and How to Avoid Them
Even experienced mechanics can make errors when using Easy Outs. The following table outlines frequent missteps and corrective actions:
| Mistake | Consequence | Prevention |
|---|---|---|
| Drilling off-center | Extractor fails to grip; bolt becomes harder to remove | Always use a center punch and start with a small pilot bit |
| Using excessive force | Breaks the extractor, requiring EDM or core drilling to remove | Apply gradual torque and back off periodically to clear chips |
| Skipping penetrating oil | Increased friction leads to galling or seizure | Soak the area thoroughly before drilling |
| Reusing broken extractors | Compromised structural integrity causes failure | Discard any extractor showing cracks or deformation |
Real-World Example: Extracting a Seized Exhaust Manifold Bolt
A mechanic faced a common yet challenging scenario: removing two broken exhaust manifold bolts on a 2012 Honda Accord. The bolts had corroded over years of thermal cycling and moisture exposure. Initial attempts with heat and vice grips failed, stripping the heads completely.
Following the procedure outlined here, he began by soaking the area with PB Blaster overnight. The next day, he centered punched each stub, drilled a 3/16” pilot hole using a cobalt bit, then inserted a #3 Easy Out. With a tap wrench and steady counterclockwise pressure, both bolts released cleanly within minutes. The threaded holes were cleaned with M8x1.25 bottoming taps, and new anti-seize-coated bolts were installed. Total downtime: less than 45 minutes.
This case highlights how proper preparation and technique outweigh brute strength every time.
Frequently Asked Questions
Can I use an Easy Out on stainless steel bolts?
Yes, but extra caution is required. Stainless steel is prone to galling and work-hardening. Use sharp cobalt bits, low RPMs, and ample cutting fluid during drilling. Pre-soaking with penetrating oil also helps reduce binding.
What should I do if the Easy Out breaks inside the bolt?
A broken extractor is a serious complication. Options include:
- Using a diamond-tipped rotary file to carefully erode the extractor
- Employing electrical discharge machining (EDM), which vaporizes the material without contact
- Core drilling around the broken piece, though this may require helical thread inserts (e.g., Time-Sert or Helicoil)
Are there alternatives to Easy Out extractors?
Yes. Alternatives include:
- EZ-Grip or Damaged Screw Extractor kits with reverse-fluted bits
- Left-handed drill bits that often back out the bolt while drilling
- Welding a nut onto the stub for grip
Final Tips for Long-Term Success
Mastering the Easy Out goes beyond just removing a stuck bolt—it's about preserving equipment longevity and minimizing downtime. Always keep your extractor set organized and labeled by size. Store them in a dry place to prevent rust, and inspect them regularly for wear.
Equally important is preventive maintenance: apply anti-seize compound on bolts exposed to heat, moisture, or vibration. This simple step reduces future extraction emergencies by up to 70%, according to field data from automotive repair shops.
“The best bolt extraction is the one you never have to perform.” — Lena Torres, Automotive Restoration Specialist
Take Control of Your Repairs
With the right knowledge and tools, even the most stubborn broken bolts can be removed safely and efficiently. The Easy Out bolt extractor is not magic—but in skilled hands, it performs like it is. By following the steps in this guide, avoiding common pitfalls, and preparing thoroughly, you transform frustration into confidence. Next time a bolt breaks, don’t reach for the angle grinder just yet. Reach for your Easy Out, stay patient, and let precision do the work.


 浙公网安备
33010002000092号
浙公网安备
33010002000092号 浙B2-20120091-4
Comments
No comments yet. Why don't you start the discussion?