
Stripped, rusted, or broken bolts are among the most frustrating obstacles in mechanical repair and home improvement. Whether you're restoring an old engine, assembling furniture, or repairing outdoor equipment, encountering a seized fastener can bring progress to a halt. Enter the Easy Out bolt extractor—a specialized tool designed to reverse-thread into damaged bolts and remove them cleanly. When used correctly, it can save hours of labor and prevent costly damage. However, improper use often leads to further breakage or even worse complications. This guide delivers practical, field-tested methods to help you master the Easy Out system with confidence.
Understanding How Easy Out Extractors Work
Easy Out extractors—also known as screw extractors—are typically made from hardened carbon steel with a left-handed (reverse) thread. They function on a simple but effective principle: after drilling a pilot hole into the center of a damaged bolt, the extractor is inserted and turned counterclockwise. As torque is applied, the tapered design bites into the internal walls of the drilled hole, gripping tightly and rotating the bolt out.
Their effectiveness depends heavily on proper technique, correct sizing, and material compatibility. Most kits include multiple sizes, each suited to specific bolt diameters. The key lies not just in having the tool, but in knowing how to use it without causing additional damage.
“Precision matters more than force when using extractors. A clean drill hole and steady hand make all the difference.” — Carlos Mendez, Automotive Machinist with 20+ years of experience
Step-by-Step Guide to Using an Easy Out Bolt Extractor
Follow this proven sequence to maximize success and minimize risk:
- Assess the Situation: Confirm that the bolt head is stripped, broken, or otherwise inaccessible. Ensure the surrounding area allows space for drilling and tool access.
- Apply Penetrating Oil: Spray a high-quality penetrating oil like PB Blaster or Kroil around the bolt shaft. Let it soak for at least 15–30 minutes (longer for rusted bolts). Reapply if necessary.
- Center Punch the Bolt: Use a center punch and hammer to create a small indentation in the exact center of the bolt. This prevents the drill bit from wandering during the next step.
- Select the Correct Drill Bit: Refer to your Easy Out kit’s sizing chart. Choose a drill bit slightly smaller than the extractor’s recommended pilot size—usually about 75% of the bolt diameter.
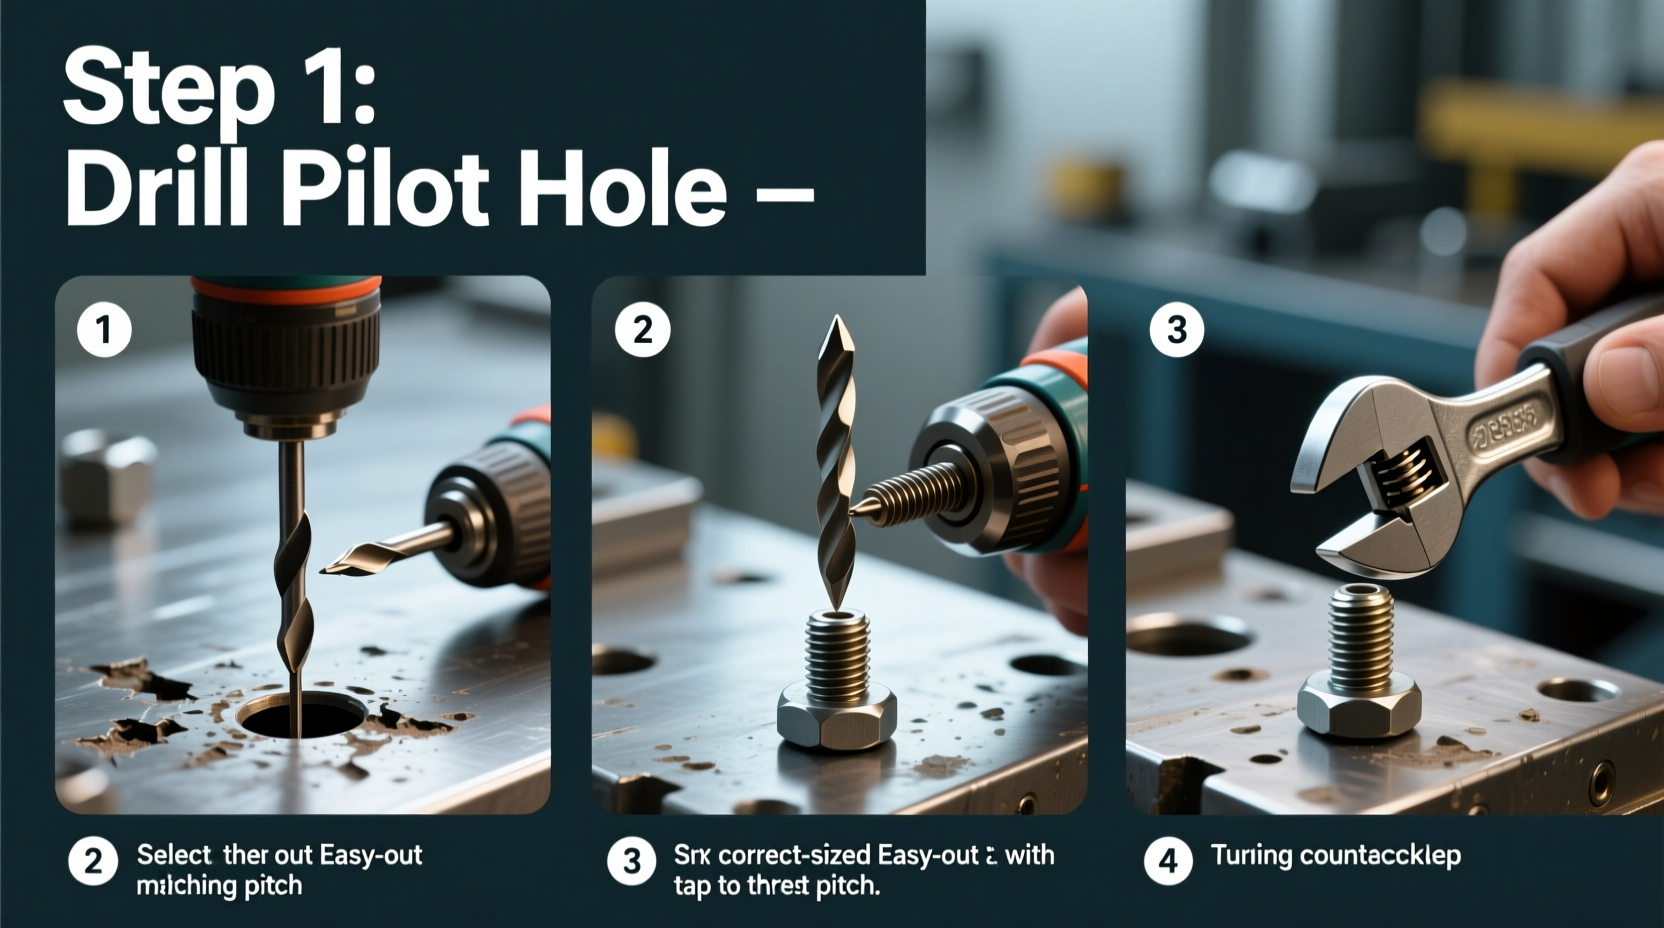
- Drill a Pilot Hole: Using a sharp carbide-tipped bit and a variable-speed drill, carefully drill straight into the bolt. Maintain perpendicular alignment and use light pressure. Clear metal shavings frequently.
- Insert the Easy Out: Tap the extractor lightly into the hole with a hammer, then engage it with a T-handle or wrench. Turn counterclockwise slowly and steadily.
- Extract the Bolt: Apply consistent, firm pressure. If resistance increases sharply, stop and reevaluate. Forcing it may break the extractor, which is far harder to remove than the original bolt.
- Clean the Threaded Hole: Once removed, use a thread chaser or tap to clean any debris or distortion in the hole before installing a replacement bolt.
Common Mistakes and How to Avoid Them
Even experienced mechanics sometimes fail with bolt extractors due to avoidable errors. Recognizing these pitfalls improves your odds of success:
- Drilling Off-Center: Misalignment causes uneven grip and extractor slippage. Always use a center punch.
- Using the Wrong Drill Bit Size: Too large weakens the bolt wall; too small reduces extractor grip. Follow manufacturer guidelines precisely.
- Applying Excessive Force: Extractors are brittle. Over-torquing can snap them inside the bolt, creating a much harder removal problem.
- Skipping Penetrating Oil: Heat and corrosion lock bolts in place. Lubrication reduces friction and increases extraction chances.
- Using Worn or Dull Bits: A dull drill bit wanders and overheats, increasing the chance of failure. Replace bits regularly.
| Action | Do | Don’t |
|---|---|---|
| Drilling | Use sharp bit, go slow, keep straight | Rush, tilt the drill, use excessive pressure |
| Extractor Insertion | Tight fit, light tap, turn gently | Hammer aggressively, force rotation |
| Lubrication | Apply penetrating oil early and repeat | Assume dry extraction will work |
| Tool Selection | Match extractor size to bolt diameter | Guess based on appearance |
Real-World Example: Removing a Seized Exhaust Manifold Bolt
A classic challenge faced by auto enthusiasts involves removing exhaust manifold bolts on older vehicles. These fasteners endure extreme heat cycles and corrosion, making them prone to snapping. Consider a 2008 Honda Accord with two broken bolts near cylinder one.
The owner first applied PB Blaster overnight. The next day, he used a center punch to mark both broken ends, then drilled precise pilot holes using a 1/8-inch carbide bit. After inserting size #3 and #4 Easy Outs with a hex handle, he gently turned counterclockwise. One bolt released smoothly; the second resisted. He paused, applied more lubricant, heated the surrounding area with a torch, and tried again. The bolt broke free without damaging the aluminum head.
This example underscores patience and preparation. Rushing would have risked cracking the manifold or embedding a broken extractor—costly outcomes avoided through methodical execution.
Essential Tips for Maximum Effectiveness
Alternative Methods When Easy Outs Fail
Sometimes, despite best efforts, the extractor won’t budge the bolt—or worse, breaks off inside. In such cases, consider these alternatives:
- EZ Grind Method: Use a rotary tool with a carbide burr to flatten the broken bolt end, then drill and try again.
- Left-Hand Drill Bit Only: Some left-hand twist bits can catch and unscrew small broken bolts without needing an extractor.
- Welding a Nut On: For larger bolts protruding slightly, welding a nut onto the stub provides grip for a wrench.
- EDM (Electrical Discharge Machining): Professional shops use EDM to erode metal precisely without contact—ideal for broken extractors in critical components.
Frequently Asked Questions
Can I reuse an Easy Out extractor?
It’s not recommended. Each use wears down the cutting edges, reducing grip and increasing slippage risk. Treat them as semi-disposable tools for best results.
What if the extractor itself breaks inside the bolt?
This is a serious issue. The hardened steel is difficult to drill. Options include using a diamond-coated bit, EDM machining, or taking the part to a machine shop. Prevention—using correct size and avoiding over-torque—is far better than cure.
Are Easy Outs suitable for soft metals like aluminum?
Proceed with caution. Aluminum threads are fragile. Drilling too deep or applying too much force can damage the parent material. Use lower torque and consider helicoil repair afterward if threading is compromised.
Final Checklist Before You Begin
- Checklist: Bolt Extraction Readiness
- ☐ Penetrating oil applied and given time to soak
- ☐ Center punch mark made on bolt center
- ☐ Correct drill bit selected and sharpened
- ☐ Proper-sized Easy Out available
- ☐ Safety glasses and gloves worn
- ☐ Drill running at low RPM with steady pressure
- ☐ Workspace well-lit and stable
Mastery Leads to Confidence
Mastering the Easy Out bolt extractor isn’t about brute strength—it’s about precision, patience, and procedure. Every mechanic, DIYer, or fabricator will face a stubborn bolt eventually. Those who succeed aren’t luckier; they’re better prepared. By following structured steps, respecting material limits, and learning from real-world applications, you transform a potential disaster into a quiet victory.


 浙公网安备
33010002000092号
浙公网安备
33010002000092号 浙B2-20120091-4
Comments
No comments yet. Why don't you start the discussion?