
For individuals managing diabetes, reliable blood glucose monitoring is not just a routine—it’s a lifeline. The OneTouch Ultra 2 has long been a trusted companion in this daily effort, offering simplicity, speed, and consistent accuracy. Yet even the most dependable device can deliver misleading results if used improperly. Understanding how to use the OneTouch Ultra 2 correctly—from preparing the test strip to interpreting your numbers—can make the difference between stable control and unexpected fluctuations.
This guide breaks down every aspect of using the OneTouch Ultra 2 effectively, from step-by-step testing procedures to recognizing patterns in your results. Whether you're newly diagnosed or have been managing diabetes for years, mastering this meter ensures confidence in your readings and empowers informed decisions about food, medication, and lifestyle.
Understanding the OneTouch Ultra 2: Key Features and Benefits
The OneTouch Ultra 2 stands out for its user-friendly design and clinical reliability. It requires only a small 1-microliter blood sample, making testing less invasive. Results appear in just five seconds, and the large digital display enhances readability, especially for users with visual challenges. Unlike some meters that require coding before each new vial of strips, the Ultra 2 automatically codes itself, reducing user error.
Additional features include memory storage for up to 500 test results, average calculations over 7, 14, or 30 days, and the ability to flag tests taken before or after meals. These functions support long-term trend analysis, which is essential for both patients and healthcare providers when adjusting treatment plans.
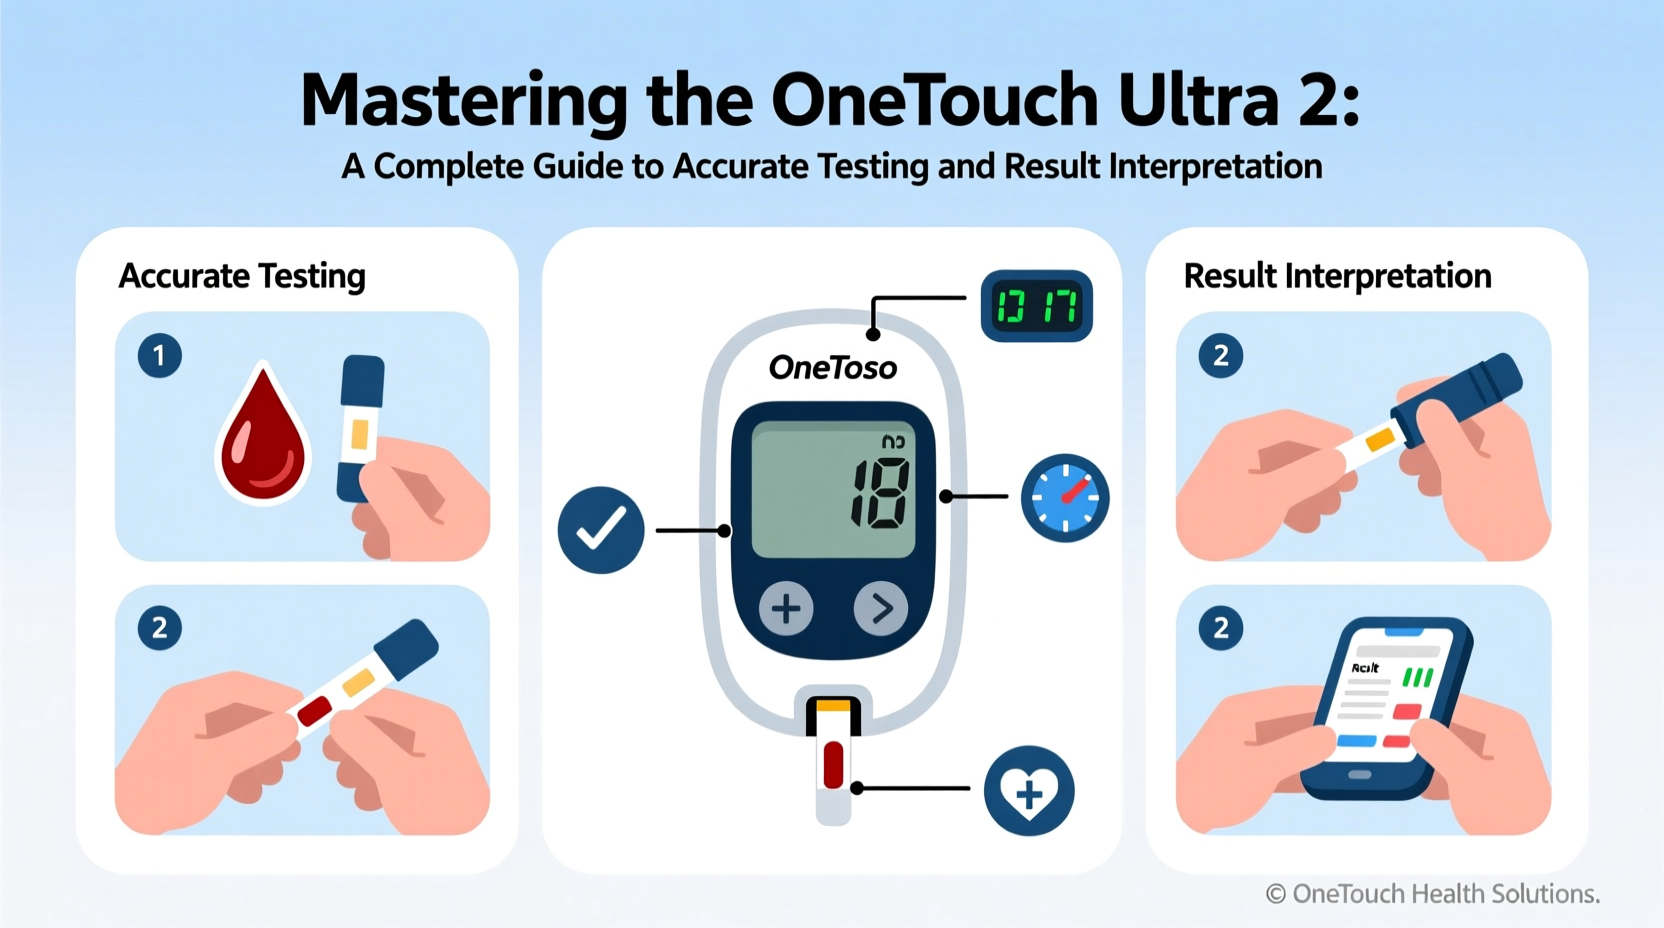
Step-by-Step Guide to Accurate Testing
Proper technique is critical for trustworthy results. Follow this sequence to ensure consistency and precision with every test:
- Wash and dry hands thoroughly. Residue from food, lotions, or cleaning agents can skew results. Use soap and water—avoid alcohol wipes immediately before testing, as they may leave traces that interfere.
- Insert a test strip into the meter. The device powers on automatically. Ensure the strip is fully seated; partial insertion leads to errors.
- Lance the side of the fingertip. Rotate sites regularly to prevent calluses. The sides of the fingertip are less sensitive than the pad and provide adequate blood flow.
- Apply blood to the edge of the strip. Let the strip wick in the sample. Do not “smear” blood onto the strip, as this can cause underfilling or contamination.
- Wait five seconds for the result. The meter beeps and displays your blood glucose level in mg/dL.
- Record the result. Note the time, whether it was fasting or post-meal, and any relevant context (e.g., exercise, stress).
- Eject the used strip safely. Dispose of it in a sharps container along with the lancet.
Repeat this process consistently to build a reliable data set. Skipping handwashing or using expired strips are among the most common causes of inaccurate readings.
Interpreting Your Results: What the Numbers Mean
A number on the screen is only useful when understood in context. The American Diabetes Association (ADA) recommends the following target ranges for most adults with diabetes:
| Testing Scenario | Target Range (mg/dL) | Actionable Insight |
|---|---|---|
| Fasting / Before Meals | 80–130 | Indicates baseline control; levels below 80 suggest hypoglycemia risk. |
| Two Hours After Meals | Below 180 | Reflects how foods affect glucose; sustained highs may require dietary adjustment. |
| Bedtime | 100–140 | Helps prevent overnight lows; below 100 may need a snack. |
Patterns matter more than isolated readings. For example, consistent pre-breakfast highs could indicate the dawn phenomenon, while frequent post-lunch spikes may point to carbohydrate portions or insulin timing issues.
“Patients who track trends—not just single values—are far more successful at achieving glycemic control.” — Dr. Lena Patel, Endocrinologist, Cleveland Clinic
Troubleshooting Common Issues and Avoiding Errors
Even with careful use, problems can arise. Here’s how to identify and resolve frequent issues:
- Error Code E-1: Insufficient blood sample. Reapply blood immediately or insert a new strip.
- Error Code E-3: Test strip exposed to air or moisture. Replace the cap on the container and use a fresh strip.
- Inconsistent results: Check strip expiration, battery level, and environmental conditions (extreme heat or cold affects performance).
- Meter won’t turn on: Replace batteries and clean the battery compartment if corroded.
Do’s and Don’ts of OneTouch Ultra 2 Use
| Do’s | Don’ts |
|---|---|
| Wash hands with soap and water before testing | Test with sugary residue on fingers (e.g., fruit juice) |
| Store strips in a cool, dry place with cap tightly closed | Leave strips in humid environments like bathrooms |
| Use the auto-memory feature to review weekly averages | Rely solely on real-time readings without tracking trends |
| Carry a logbook or sync with compatible apps | Share lancets or meters with others due to infection risk |
Real-Life Example: Managing Morning Spikes
Sarah, a 54-year-old with type 2 diabetes, noticed her fasting glucose levels were consistently above 160 mg/dL despite taking her medication. She began logging her bedtime snacks and discovered that a nightly serving of yogurt with honey correlated strongly with higher morning readings. By switching to plain Greek yogurt without added sugar, her fasting levels dropped to an average of 125 mg/dL within a week.
Using the OneTouch Ultra 2’s memory function, Sarah reviewed her 7-day average before and after the change, providing clear evidence of improvement. This small dietary shift, validated by accurate self-monitoring, significantly improved her overall control.
Essential Checklist for Daily Success
- ✅ Wash and dry hands before testing
- ✅ Use a fresh, undamaged test strip from a sealed container
- ✅ Confirm the meter displays the correct code (should match the strip vial)
- ✅ Apply enough blood—let the strip fill naturally
- ✅ Record the result with context (meal, activity, symptoms)
- ✅ Review weekly averages at least once a week
- ✅ Replace batteries when low-battery symbol appears
Frequently Asked Questions
Can I test on areas other than my fingertips?
The OneTouch Ultra 2 is designed for fingertip testing only. Alternate site testing (like forearm or palm) may lag behind actual blood glucose changes, especially during rapid swings, making it less reliable for immediate decision-making.
Why do my results differ from the lab test?
Home meters are allowed a variance of up to ±15% compared to lab analyzers. If your result is 100 mg/dL, the acceptable range is 85–115 mg/dL. Consistent discrepancies beyond this should prompt a discussion with your provider and possible meter recalibration.
How often should I replace my meter?
Most meters remain accurate for 3–5 years with proper care. Signs it’s time to replace include persistent error messages, difficulty accepting strips, or visible damage. Consult your healthcare team for model recommendations.
Take Control of Your Health Today
Mastering the OneTouch Ultra 2 goes beyond pressing buttons and reading numbers. It’s about building a disciplined, informed approach to diabetes management. Every accurate test strengthens your understanding of how food, activity, medication, and stress influence your body. With consistent practice and attention to detail, you transform a simple device into a powerful tool for long-term health.


 浙公网安备
33010002000092号
浙公网安备
33010002000092号 浙B2-20120091-4
Comments
No comments yet. Why don't you start the discussion?