
Colorful thread woven bracelets have become more than just accessories—they’re personal expressions of creativity, culture, and connection. Whether handmade as gifts, exchanged as friendship tokens, or worn as symbols of intention, their appeal lies not only in their vibrant designs but in how they feel on the wrist. A poorly fitted bracelet can slip off unnoticed or dig into the skin, undermining both comfort and meaning. Achieving the perfect fit requires more than guesswork; it demands precision, patience, and an understanding of materials and anatomy. This guide walks you through every stage of adjusting woven thread bracelets for a secure, comfortable, and lasting wear.
Understanding Woven Bracelet Materials and Structure
Before adjusting any bracelet, it’s essential to understand what you're working with. Most colorful woven bracelets are made from cotton embroidery floss, nylon thread, or silk threads—each with distinct elasticity, thickness, and response to tension. Cotton is soft and breathable but stretches slightly over time. Nylon holds shape well but may tighten with heat. Silk offers luxury and strength but requires delicate handling.
The weave pattern also affects adjustability. Common styles include:
- Flat braid (e.g., fishtail or chevron): Lies flush against the wrist, ideal for snug fits.
- Round braid (e.g., kumihimo or spiral): Slightly thicker, often used for adjustable closures.
- Macramé knots (e.g., square or half-hitch): Allow for sliding adjustments if designed with loops and knots.
Knowing your bracelet’s construction helps determine whether it can be resized permanently or adapted temporarily using sliding mechanisms.
Step-by-Step Guide to Adjusting the Fit
Follow this structured process to ensure your woven bracelet fits perfectly without compromising integrity.
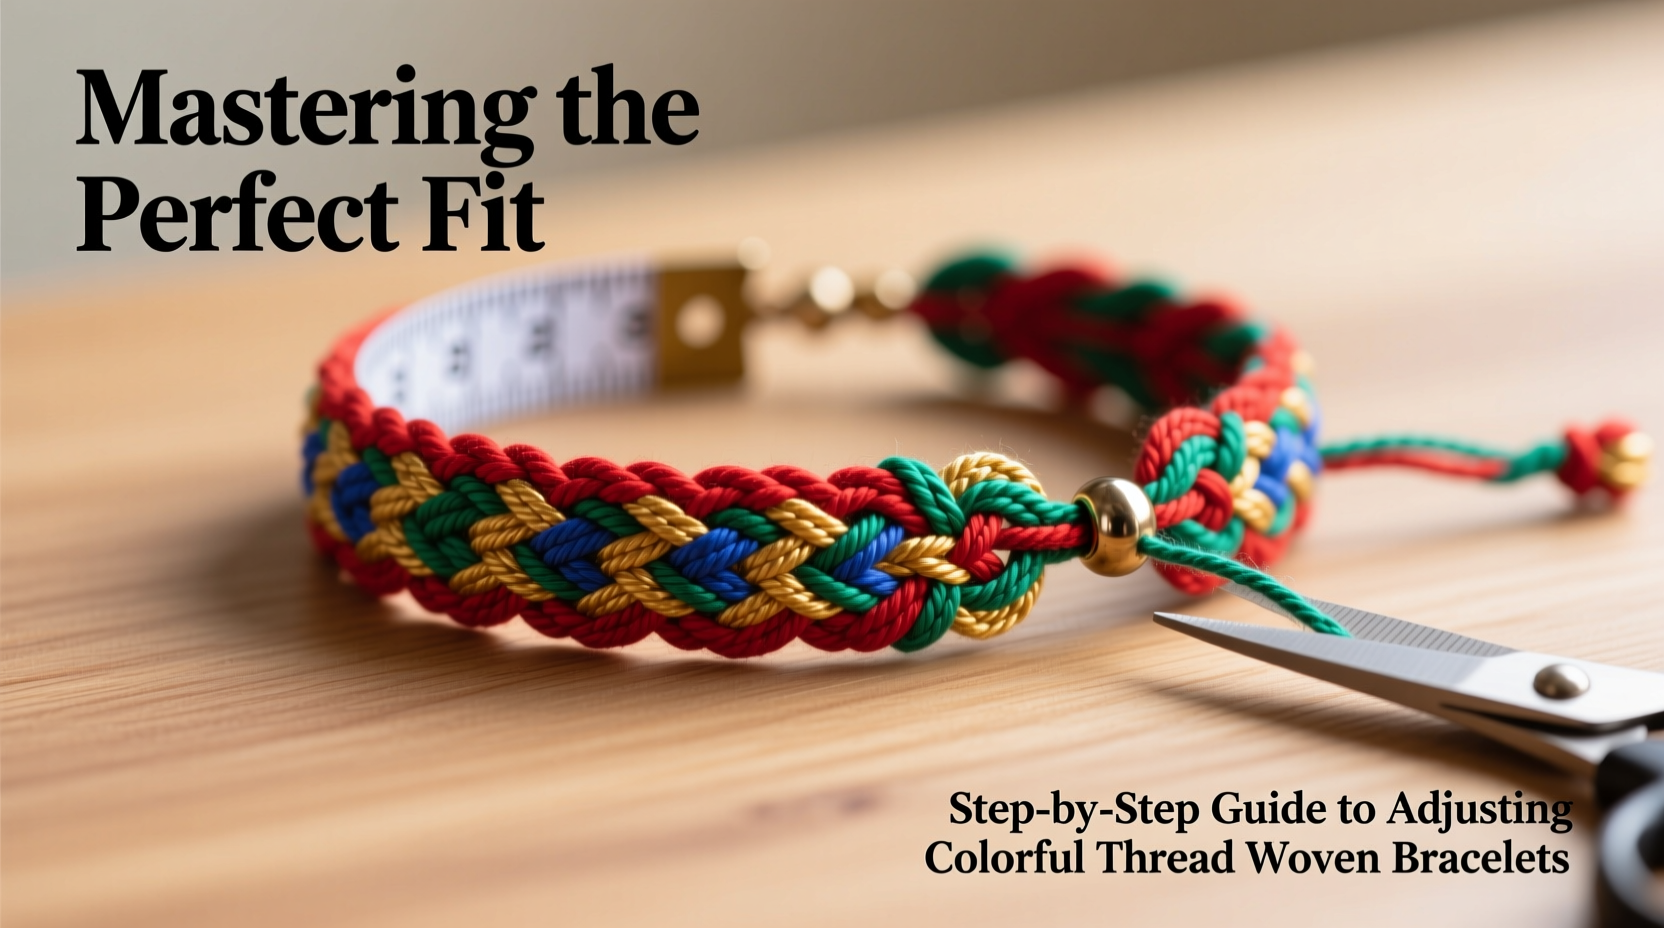
- Measure Your Wrist: Use a flexible measuring tape around the narrowest part of your wrist, just below the hand bone. Add 0.25 to 0.5 inches for comfort. For example, a 6.5-inch wrist should aim for a 6.75-inch inner circumference.
- Determine Closure Type: Identify if your bracelet uses a knot closure, toggle clasp, sliding loop, or elastic tie. Sliding loops offer the most flexibility for adjustment.
- Loosen or Tighten Knots: If the bracelet ends in knots, carefully untie them using a seam ripper or fine needle. Re-tie at the desired length, leaving enough thread for a secure double knot.
- Adjust Sliding Mechanisms: For loop-and-knot styles, slide the knot along the looped end to tighten or loosen. Ensure the knot sits flat and doesn’t twist.
- Secure and Trim Excess: After repositioning, reinforce knots with a drop of clear fabric glue (like Fray Check). Trim excess thread close to the knot, avoiding fraying.
- Test Wearability: Put on the bracelet and move your hand through natural motions—typing, washing hands, lifting objects. It should stay in place without pinching.
This method works best when performed slowly and deliberately. Rushing increases the risk of uneven tension or broken threads.
Do’s and Don’ts When Adjusting Thread Bracelets
| Do’s | Don’ts |
|---|---|
| Use a magnifying glass for intricate knots | Pull threads aggressively when loosening |
| Moisten cotton knots slightly to ease undoing | Cut threads before securing new knots |
| Store adjusted bracelets flat to maintain shape | Expose nylon threads to direct heat or flames |
| Check fit after 24 hours of wear (material settles) | Wear wet bracelets—they weaken fibers |
Real-Life Example: Recovering a Gifted Friendship Bracelet
Sophia received a beautifully woven rainbow bracelet from her best friend during summer camp. Excited to wear it daily, she found it slipped off within hours. At first, she tied extra knots to shorten it, but they unraveled quickly. After researching adjustment techniques, she carefully unpicked the original square knot using a sewing needle. She measured her wrist again, added a quarter inch for movement, then re-tied the knot with reinforced finishing. Applying a tiny dot of fabric glue prevented fraying. Now, months later, the bracelet remains intact, a constant reminder of their bond—securely fastened where it belongs.
This case illustrates how minor technical knowledge transforms sentimental value into lasting utility.
“Proper fit isn’t just about size—it’s about honoring the craftsmanship and emotional weight behind each woven strand.” — Lena Torres, Textile Artist & Jewelry Designer
Essential Checklist for Perfect Adjustment
✅ Final Adjustment Checklist:
- Measured wrist accurately with allowance for comfort
- Identified thread type and weave structure
- Used proper tools: needle, scissors, fabric glue
- Adjusted knots or sliders without damaging fibers
- Reinforced new knots for durability
- Tested fit during active use
- Trimmed excess neatly and stored properly
Frequently Asked Questions
Can I resize a bracelet that’s already knotted and sealed?
Yes, but cautiously. Soften hardened glue with gentle heat (like a hairdryer on low) or rubbing alcohol. Work slowly to avoid breaking threads. Once undone, re-knot at the correct length and reseal with fresh adhesive.
What if my bracelet is too tight and leaves a mark?
A bracelet that indents the skin is too tight. Loosen it immediately. For non-adjustable styles, consider gifting it and making a new one with additional length. Persistent pressure can restrict circulation over time.
How do I prevent color bleeding when adjusting wet threads?
Always test one thread strand by soaking it in water for 10 minutes. If dye runs, avoid moisture-based methods. Instead, use dry techniques like careful picking with a needle. Pre-washing threads before weaving prevents this issue long-term.
Maintaining Fit Over Time
Even a perfectly adjusted bracelet changes with wear. Cotton absorbs moisture from sweat and expands temporarily. Nylon contracts in cold environments. To maintain consistent fit:
- Inspect knots monthly for loosening.
- Avoid wearing during swimming or intense workouts.
- Rotate multiple bracelets to reduce strain on individual pieces.
- Store in a breathable pouch away from humidity.
Seasonal changes affect fit—tighten slightly in winter when wrists shrink due to lower temperatures, and allow extra room in summer when swelling occurs.
Conclusion: Wear With Confidence and Care
A perfectly fitted woven bracelet blends aesthetics with ergonomics, transforming a simple accessory into a seamless extension of self-expression. By mastering measurement, respecting material behavior, and applying thoughtful adjustments, you preserve both function and sentiment. These small acts of care deepen appreciation for the artistry behind every twist and knot. Whether you’re adjusting a child’s handmade gift or refining your own craft, precision elevates meaning.


 浙公网安备
33010002000092号
浙公网安备
33010002000092号 浙B2-20120091-4
Comments
No comments yet. Why don't you start the discussion?