
A steering wheel is more than just a control mechanism—it’s where your hands spend hours during commutes, road trips, and daily errands. Upgrading it with a houndstooth-patterned cover does more than elevate your car’s interior aesthetics; it improves grip, reduces hand fatigue, and protects the original wheel from wear. However, even the most stylish cover fails if it’s poorly installed. A loose or misaligned fit can lead to slipping, discomfort, or even safety concerns.
This comprehensive guide walks you through every stage of selecting and installing a houndstooth steering wheel cover with precision. Whether you’re enhancing a vintage sedan or refreshing a modern compact, these steps ensure a snug, professional-grade result that lasts.
Why Choose a Houndstooth Steering Wheel Cover?
The houndstooth pattern—characterized by its broken check design—originated in Scottish textiles but has found lasting appeal in automotive accessories for its timeless elegance and subtle texture. Beyond style, modern houndstooth covers are typically made from breathable, durable materials like neoprene, synthetic leather, or woven fabric blends that resist sweat, UV fading, and cracking.
- Enhanced Traction: Textured weaves improve grip, especially in humid or cold conditions.
- Vibration Dampening: Adds a layer of cushioning between your hands and the rigid wheel.
- UV Protection: Shields the original steering wheel from sun damage and discoloration.
- Personalization: Offers a quick, cost-effective way to refresh your vehicle’s interior.
Step-by-Step Installation Guide
Installing a steering wheel cover may seem straightforward, but rushing the process often leads to wrinkles, uneven seams, or loose sections near the spokes. Follow this detailed sequence to achieve a seamless, secure fit.
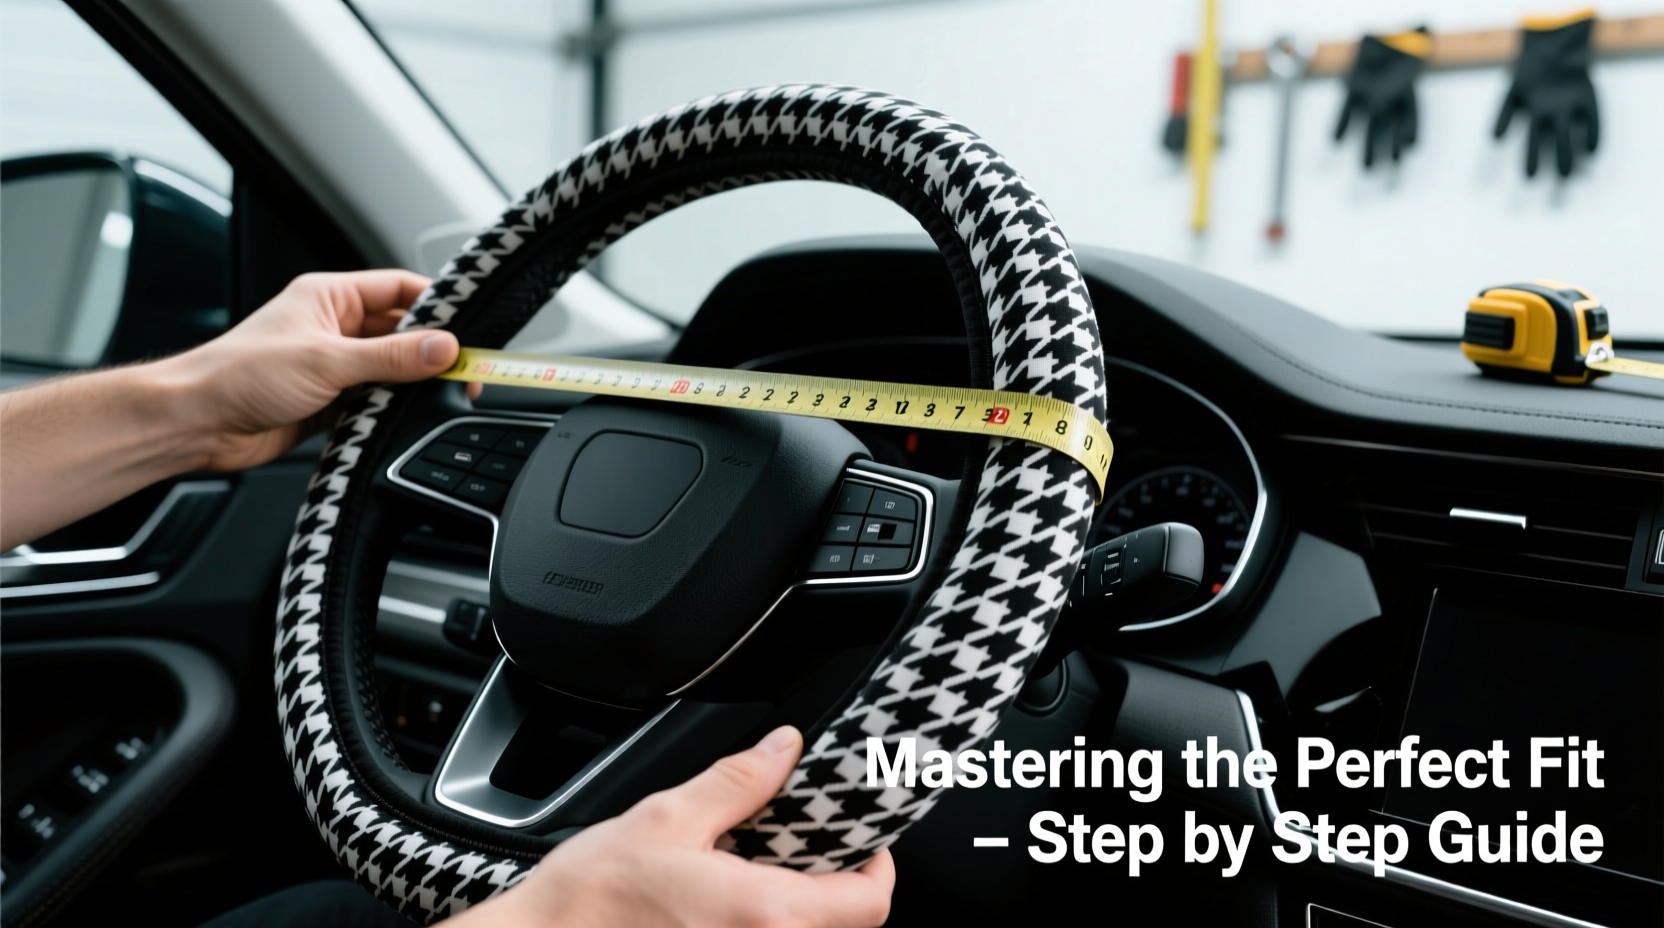
- Measure Your Steering Wheel Diameter
Select the correct size. Most passenger vehicles have wheels between 14.5” and 15.5”. Use a tape measure across the front face from edge to edge. Refer to the manufacturer’s sizing chart before purchase. - Clean the Original Steering Wheel
Wipe down the entire surface with a damp microfiber cloth and mild soap. Remove dust, oils, and residues. Let dry completely. A clean base prevents slippage and extends the life of the adhesive (if used). - Identify Spoke Alignment
Most covers have pre-cut openings for airbag logos or spokes. Match these to your wheel’s layout. Hold the cover loosely in place to confirm orientation before stretching. - Begin at the Top Center
Start installation at the 12 o’clock position. Insert your fingers into the top edge of the cover and gently stretch it over the rim. Work symmetrically downward on both sides to avoid bunching. - Work Around the Rim
Gradually pull the cover around the circumference, using both hands to maintain even tension. Avoid using sharp tools that could tear the fabric. - Secure the Spokes
When reaching the spoke areas, tuck the fabric neatly around each junction. Some covers include inner elastic bands or Velcro straps—engage these for added stability. - Check for Smoothness and Symmetry
Run your palms along the entire surface. Ensure no folds, gaps, or twisted patterns. Adjust as needed by loosening and re-tensioning. - Final Inspection
Confirm the center logo (if present) is upright and aligned. Test grip during slow turns to verify no shifting occurs.
Time Required: 10–20 Minutes
No special tools are required. Patience and attention to symmetry yield the best results.
Do’s and Don’ts During Installation
| Do’s | Don’ts |
|---|---|
| Use talcum powder to reduce friction when stretching | Don’t use scissors or blades to force the fit |
| Install in a warm room—materials stretch easier | Don’t leave the car running during installation |
| Double-check airbag access points are unobstructed | Don’t ignore manufacturer warnings about airbag compatibility |
| Recheck fit after 24 hours of driving | Don’t wash the cover before installation (can affect elasticity) |
Real-World Example: Sarah’s Commute Upgrade
Sarah drives a 2018 Honda Civic with a worn leather steering wheel that had begun peeling near the grips. After researching options, she chose a charcoal-and-white houndstooth cover made from eco-leather with memory foam padding. Initially skeptical about DIY installation, she followed the step-by-step method outlined above.
She started by measuring her wheel (15 inches), cleaned it thoroughly, and began installation in her garage on a mild afternoon. Using light pressure and rotating the wheel as she worked, she completed the job in 15 minutes. The result was a snug, symmetrical fit that transformed her daily commute. “It feels like a luxury upgrade,” she said. “My hands don’t slip anymore, and the texture makes long drives much more comfortable.”
Expert Insight on Material and Fit
“Even the best-designed cover loses value if it doesn’t fit precisely. The houndstooth weave adds grip, but only when properly tensioned across the wheel. I recommend checking alignment every few weeks, especially in climates with extreme temperature shifts.” — Marcus Tran, Automotive Interior Specialist with 12 years of OEM experience
Installation Checklist
- ✅ Measure steering wheel diameter accurately
- ✅ Verify cover size and spoke configuration match your vehicle
- ✅ Clean and dry the original wheel surface
- ✅ Begin installation at the top center (12 o’clock)
- ✅ Stretch evenly around the rim without tearing
- ✅ Secure fabric around spokes and fasten inner straps if available
- ✅ Inspect for symmetry, smoothness, and logo alignment
- ✅ Confirm unobstructed access to airbag zones
- ✅ Test drive at low speed to check stability
- ✅ Re-tighten if necessary after initial use
Frequently Asked Questions
Can a steering wheel cover interfere with airbag deployment?
High-quality covers designed for modern vehicles include engineered seams that split open under pressure, allowing the airbag to deploy safely. Always choose a cover labeled as “airbag-safe” and avoid models with rigid stitching directly over deployment zones.
How do I clean a houndstooth steering wheel cover?
Most are spot-clean only. Use a soft brush and a mix of mild detergent and water. Gently scrub the fabric, then wipe with a damp cloth. Avoid soaking or machine washing, which can degrade adhesives and cause shrinkage.
Will the cover loosen over time?
Prolonged exposure to heat, UV rays, and frequent use can reduce elasticity. To maintain tightness, inspect the fit monthly and consider covers with internal silicone strips or adjustable fasteners for high-mileage drivers.
Conclusion: Drive in Style and Confidence
A well-installed houndstooth steering wheel cover blends classic sophistication with functional improvement. It’s not merely an accessory—it’s an investment in comfort, control, and the longevity of your vehicle’s interior. By following precise measurement, careful cleaning, and methodical installation, you ensure a result that looks professionally fitted and performs reliably mile after mile.


 浙公网安备
33010002000092号
浙公网安备
33010002000092号 浙B2-20120091-4
Comments
No comments yet. Why don't you start the discussion?