
Sizing handmade pressed nails accurately is one of the most overlooked yet critical steps in achieving a professional-looking manicure. Whether you're a nail technician refining your craft or a DIY enthusiast creating custom sets at home, the right fit ensures comfort, durability, and aesthetic precision. A poorly sized nail can lift prematurely, cause discomfort, or look unnatural—no matter how intricate the design. This guide breaks down the science and art of nail sizing with actionable techniques, expert insights, and practical tools to help you achieve consistency every time.
Understanding Nail Anatomy and Fit Fundamentals
The foundation of a perfect fit begins with understanding natural nail structure. The nail bed—the visible portion of the nail plate—is not uniform across fingers or individuals. It varies in width, curvature, length, and even cuticle angle. Handmade pressed nails must mirror these characteristics closely to adhere seamlessly.
A well-fitted nail should:
- Cover the entire nail bed without extending under the cuticle
- Align flush with the sidewalls, avoiding gaps or overhangs
- Follow the natural C-curve of the nail for optimal adhesion
- End just at or slightly beyond the free edge, depending on preference
Failing to account for any of these factors leads to lifting, snagging, or an artificial appearance. The key is customization—standard sizes rarely work universally, especially in handmade applications where precision defines quality.
Step-by-Step Guide to Sizing Pressed Nails Correctly
Follow this systematic approach to ensure each nail fits perfectly before application. This process applies whether you’re working with pre-made blanks or crafting from scratch using liquid-and-powder systems.
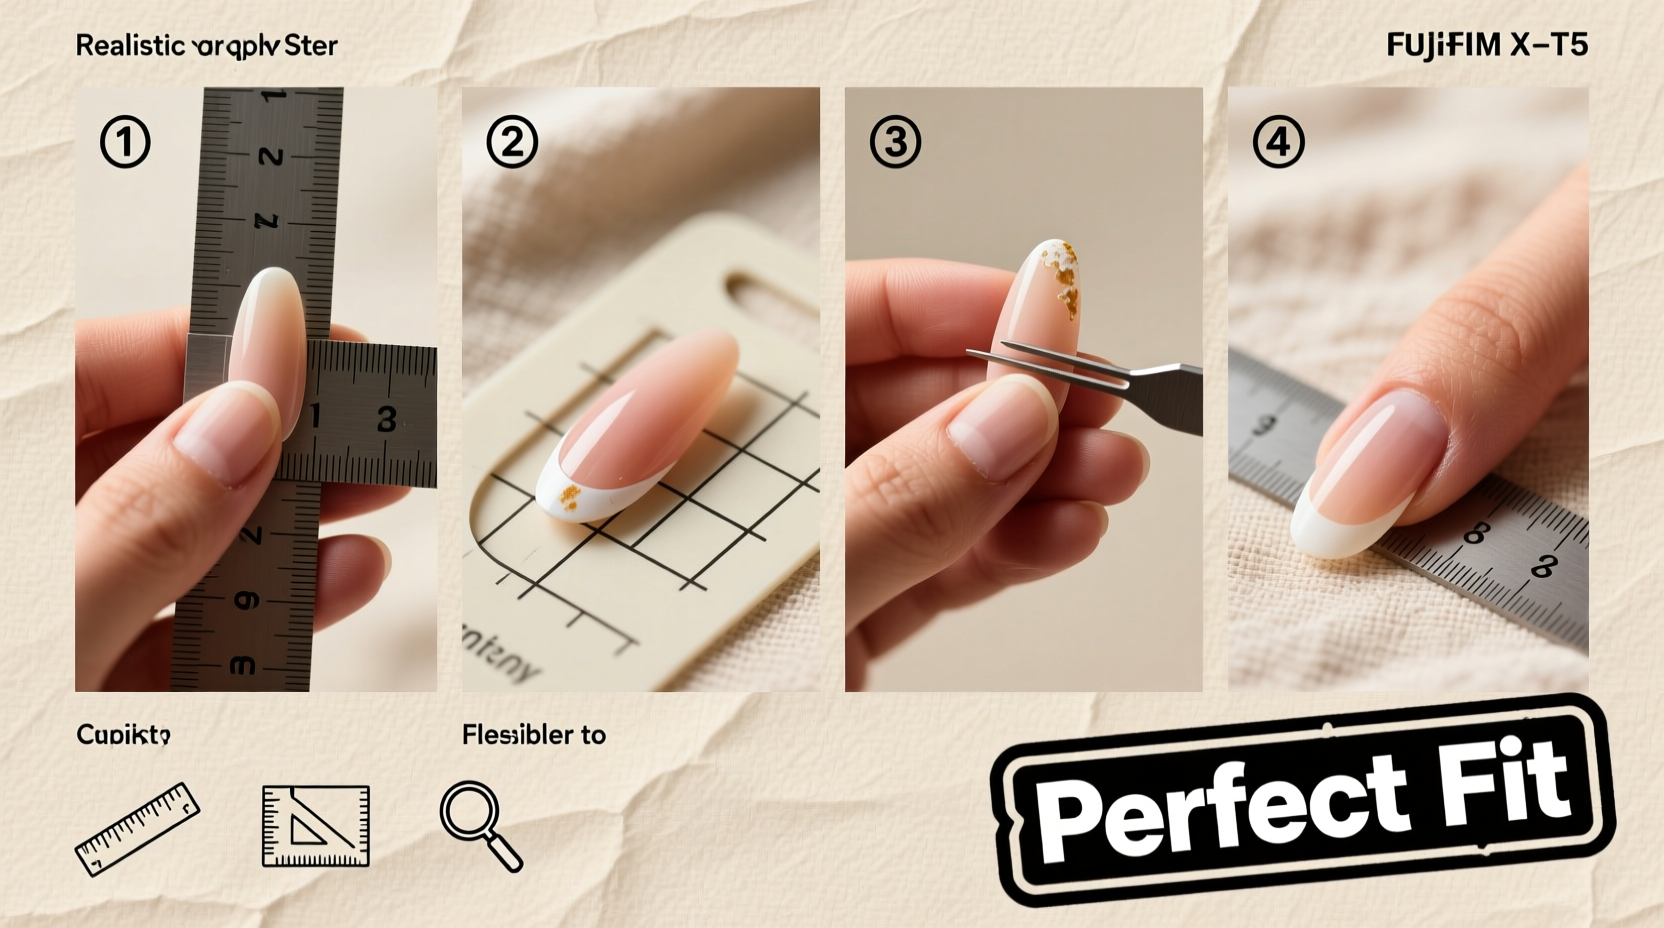
- Prepare the Natural Nail: Cleanse and lightly buff the surface to remove oils and create micro-texture for better grip. Push back cuticles gently to expose the full nail bed.
- Measure Width: Use a digital caliper or flexible measuring tape to record the widest point of each nail. Note variations—even between thumbs and pinkies, differences of 0.5mm matter.
- Assess Length: Determine desired extension length. For pressed nails, leave a 1–2mm buffer beyond the natural free edge to allow for filing post-application.
- Check Curve Profile: Place a test blank on the nail. Observe how it sits along the sides and apex. Gaps indicate poor curve matching; pressure points suggest excessive arch.
- Customize the Well: Using a fine file or buffer, adjust the underside (well) of the pressed nail to match the C-curve of the natural nail. Work gradually—remove too much, and adhesion suffers.
- Dry-Fit Each Nail: Before applying adhesive, place each nail without glue to confirm alignment. Make micro-adjustments as needed.
- Final Filing Post-Application: After curing or setting, refine edges and blend the seam between artificial and natural nail for a seamless finish.
This methodical process minimizes errors and builds confidence in consistent results, especially when working with clients who expect salon-grade outcomes.
Common Sizing Mistakes and How to Avoid Them
Even experienced technicians occasionally misjudge fit. These frequent errors compromise both function and appearance:
| Mistake | Consequence | Solution |
|---|---|---|
| Using one size per hand | Poor fit on smaller fingers like pinkies or asymmetrical thumbs | Size each finger individually; never assume symmetry |
| Ignoring lateral walls | Gaps lead to moisture trapping and lifting | Shape the sides of the pressed nail to hug the sidewalls snugly |
| Over-filing the well | Reduced contact area weakens bond | Remove material sparingly; aim for full surface contact |
| Extending too far under cuticle | Irritation and premature detachment | Stop the nail just short of the eponychium |
Real Example: The Bridal Client Who Nearly Lost Her Set
A freelance nail artist once applied a full set of handmade pressed nails for a bride-to-be. Despite flawless painting and detailing, two nails lifted within 24 hours. Upon inspection, she realized the thumbnails were slightly too wide and had been forced into place, creating tension at the cuticle. The correction? She remade the pair, measuring each thumbnail separately and adjusting the well depth. The second set lasted the full honeymoon—with no lifting or complaints.
This case underscores that aesthetics alone don’t guarantee success. Structural integrity rooted in accurate sizing does.
Expert Insight: Why Precision Matters in Nail Crafting
“Most failures in nail retention aren’t due to product quality—they’re fit issues. If the nail doesn’t seat properly from the start, nothing else matters.” — Lila Torres, Master Nail Technician & Educator, 15+ years in advanced nail systems
Torres emphasizes that pressing materials like acrylic or hybrid powders into molds requires more than artistic flair. “You’re engineering a prosthetic,” she says. “It has to move with the natural nail, breathe appropriately, and distribute stress evenly. That starts with millimeter-perfect sizing.”
Essential Checklist for Perfect Sizing Every Time
Use this checklist before finalizing any pressed nail set:
- ✅ Clean and prep all natural nails
- ✅ Measure width and length of each nail individually
- ✅ Select or customize blanks based on measurements
- ✅ Verify C-curve compatibility with dry-fit test
- ✅ Adjust wells and sidewalls as needed
- ✅ Confirm no overhang at cuticle or sides
- ✅ File and blend edges after application
- ✅ Inspect for gaps or pressure points
Going through this list may add five minutes to your process, but it prevents costly callbacks, damaged reputations, or dissatisfied clients.
Frequently Asked Questions
Can I reuse pressed nails if they don’t fit?
Generally, no—if the well has been filed or altered, reusing compromises hygiene and structural integrity. Unmodified blanks can be sterilized and reused, but always inspect for warping or residue.
How do I size nails for someone with very small or wide nail beds?
For extreme shapes, consider hand-sculpting from thin acrylic sheets rather than relying on standard blanks. Custom molding allows total control over width, curve, and thickness, ensuring a tailored fit.
Is there a universal sizing chart for pressed nails?
No reliable universal chart exists. While some brands offer small/medium/large guides, individual variation makes them inaccurate. Personal measurement remains the gold standard.
Conclusion: Elevate Your Craft Through Precision
Mastering the perfect fit isn't about speed—it's about intention. Every adjustment made to a pressed nail brings it closer to invisibility: looking so natural that no one questions whether they’re real. By treating nail sizing as both a technical skill and an artistic necessity, you elevate your work from temporary decoration to durable, personalized beauty.


 浙公网安备
33010002000092号
浙公网安备
33010002000092号 浙B2-20120091-4
Comments
No comments yet. Why don't you start the discussion?