
The iPhone 15’s sleek design and premium materials make it a joy to use, but also vulnerable to scratches, drops, and daily wear. A soft protective cover offers lightweight defense while preserving the phone’s elegant profile. However, even the most flexible silicone or TPU cases can be tricky to install correctly. Misaligned placement, trapped dust, or excessive force often lead to imperfect fits, button stiffness, or unintended pressure on the screen. Achieving a flawless installation isn’t about strength—it’s about technique, preparation, and attention to detail.
Why Proper Installation Matters
A poorly installed soft cover does more than look uneven—it can compromise functionality. Gaps around the camera cutout reduce impact protection. Misaligned ports interfere with charging. Stretched material over buttons may dull tactile feedback or prevent full actuation. Over time, stress from improper seating can cause micro-tears in the case or strain on the phone’s frame.
Soft cases, typically made from thermoplastic polyurethane (TPU) or silicone, are designed to flex during installation and then conform snugly to the iPhone 15’s contours. When applied correctly, they absorb shock, resist minor abrasions, and maintain precise access to all features. The key is understanding how these materials behave and respecting the phone’s exact dimensions.
“Many users damage their cases—or worse, their phones—by forcing a fit. A proper installation should feel smooth, not strenuous.” — Jordan Lee, Mobile Accessory Design Engineer
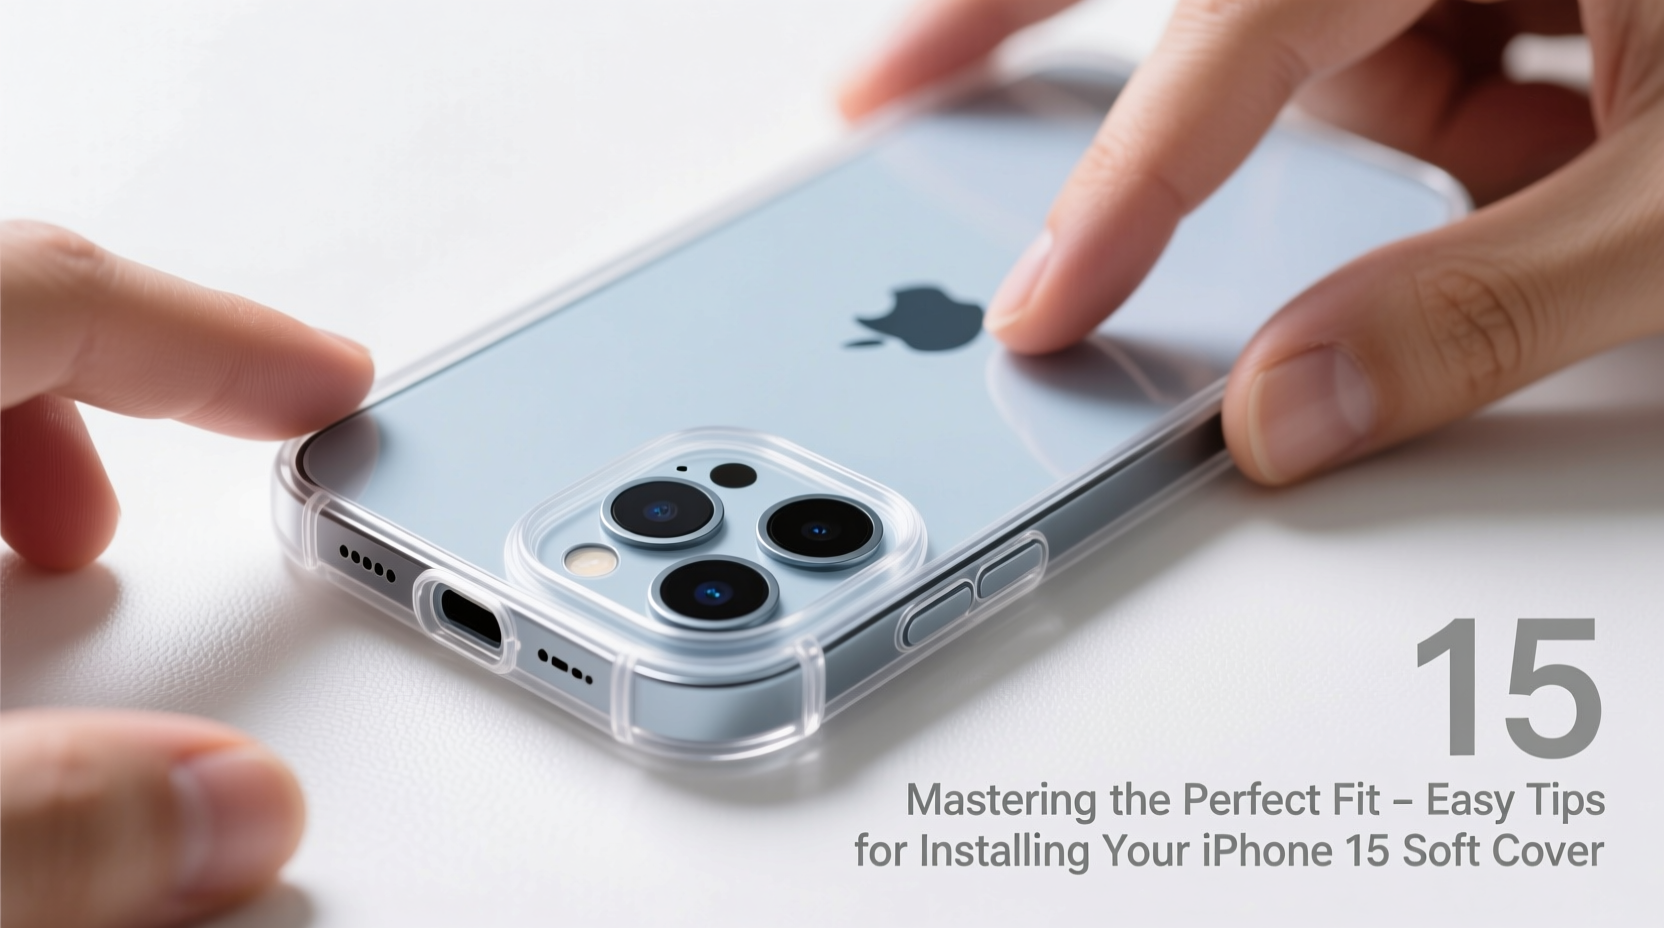
Step-by-Step Guide to Flawless Installation
Follow this sequence to ensure your iPhone 15 soft cover installs cleanly and securely every time:
- Power down the device – While not always necessary, turning off the iPhone eliminates any risk of accidental input during installation, especially if you’re handling the screen closely.
- Clean the phone thoroughly – Use a microfiber cloth slightly dampened with isopropyl alcohol (70%) to wipe down the back and sides. Remove fingerprints, oils, and debris that could create bubbles or affect grip.
- Inspect the case interior – Hold the case up to light and check for lint, dust, or manufacturing residue inside. Use a cotton swab or compressed air to clean if needed.
- Align the top edge first – Position the case so the camera cutout lines up perfectly with the iPhone’s module. Gently press the top edge into place. This acts as an anchor point.
- Work downward along the sides – Starting from the top corners, slowly press each side into place using your thumbs. Don’t pull or stretch the case excessively; let it naturally settle.
- Secure the bottom last – Once the top and sides are seated, gently snap the bottom edge. Ensure the Lightning port and speaker cutouts remain unobstructed.
- Test all functions – Press each button to confirm responsiveness. Plug in a cable to verify port alignment. Check screen clearance by viewing edges under bright light.
Common Mistakes and How to Avoid Them
Even experienced users make avoidable errors when installing soft cases. Awareness of these pitfalls leads to better outcomes.
| Mistake | Consequence | Solution |
|---|---|---|
| Skipping cleaning | Dust causes bumps and poor adhesion | Always wipe phone and case before installation |
| Starting from the bottom | Top misalignment and camera obstruction | Begin at the top near the camera module |
| Over-stretching the case | Material fatigue and loose fit over time | Apply steady pressure, not force |
| Ignoring button cutouts | Muffled volume control or mute switch issues | Ensure precise cutout alignment before final snap |
| Installing with screen facing down | Scratches from surface debris | Work on a clean, soft surface with screen up |
Real-World Example: Sarah’s Smooth Upgrade
Sarah purchased a matte-finish TPU case for her new iPhone 15 after upgrading from an older model. Excited to protect her investment, she opened the package and immediately tried to slide the phone in from the bottom. The case stretched awkwardly, and the camera ring didn’t align. Frustrated, she used her fingernail to push the top edge into place—leaving a faint scuff on the aluminum band.
After reading a quick guide, she removed the case, cleaned both surfaces, and started again—this time aligning the top first. The difference was immediate. The case settled smoothly, buttons responded crisply, and the finish sat flush. “I wasted five minutes rushing,” she said later. “Taking two extra minutes to do it right saved my phone and my patience.”
Checklist for Perfect Case Installation
- ✅ Power off the iPhone (optional but recommended)
- ✅ Clean the back and sides of the phone
- ✅ Inspect and clean the inside of the case
- ✅ Align camera cutout precisely
- ✅ Snap in the top edge first
- ✅ Press sides gradually from top to bottom
- ✅ Secure the bottom edge gently
- ✅ Test volume, power, and mute switch
- ✅ Verify charging port and speaker openness
- ✅ Check for gaps or lifting at the edges
Frequently Asked Questions
Can I install a soft case without removing the screen protector?
Yes. Most high-quality screen protectors do not interfere with soft case installation. Just ensure the protector doesn’t extend beyond the screen’s edge, which could create pressure at the front bezel.
Why does my case feel loose after installation?
If the case isn’t snug, it may be a counterfeit or low-quality product. Genuine precision-cut cases for the iPhone 15 fit tightly without gaps. Also, verify you have the correct model—iPhone 15, 15 Plus, 15 Pro, and 15 Pro Max have slightly different dimensions.
How often should I remove and reseat the case?
It’s wise to remove and clean both the case and phone every 2–3 weeks. Dust buildup can degrade the fit over time. Reinstalling ensures continued optimal protection and alignment.
Expert Tips for Long-Term Fit Maintenance
Even after perfect installation, long-term care keeps your case functioning well. Exposure to heat, oils, and UV light can degrade soft materials, causing warping or discoloration.
Wash removable cases monthly with mild soap and water. Let them air dry completely before reinstalling. Avoid abrasive cloths that can scratch textured finishes. For matte cases, steer clear of oily hand lotions that can leave shiny residues.
“The best protection is invisible—when a case fits so well you forget it’s there.” — Lena Patel, Product Tester at TechShield Labs
Conclusion: Precision Protects Performance
Installing a soft protective cover on your iPhone 15 shouldn’t be a battle of brute force. With the right approach, it becomes a simple ritual that enhances both safety and usability. By preparing the surfaces, following a logical sequence, and avoiding common errors, you preserve the integrity of both your phone and its case. A perfect fit isn’t just about appearance—it ensures responsive controls, full feature access, and reliable drop protection.


 浙公网安备
33010002000092号
浙公网安备
33010002000092号 浙B2-20120091-4
Comments
No comments yet. Why don't you start the discussion?