
Tying a secure and effective rope halter is a fundamental skill for anyone working with horses—whether you're a seasoned equestrian, a ranch hand, or a beginner learning stable management. A properly tied halter ensures your horse remains safe during handling, grooming, leading, and training. But more than just function, the way you tie a halter reflects your understanding of equine behavior, knot mechanics, and safety protocols. This guide walks you through the process of mastering the perfect halter knot, offering practical insights, structural clarity, and expert-backed methods to help you achieve consistency and confidence every time.
The Importance of a Well-Tied Rope Halter
A rope halter isn't just a tool for control—it's a communication device between horse and handler. Unlike flat webbing halters, rope halters apply subtle pressure points that encourage responsiveness. However, their effectiveness hinges on correct construction and proper knotting. An improperly tied halter can slip, loosen under tension, or even cause discomfort due to uneven pressure distribution.
Rope halters are commonly used in groundwork, liberty work, and natural horsemanship because they offer clearer signals than traditional halters. But these benefits only materialize when the halter fits correctly and is secured with reliable knots. The foundation of that reliability begins with mastering the halter knot.
Materials and Tools You’ll Need
Before tying the knot, ensure you have the right materials:
- Rope: Use high-quality, braided nylon or polyester rope (typically 3/8” to 1/2” diameter). It should be strong, flexible, and abrasion-resistant.
- Cutting tool: A sharp knife or rope cutter for clean ends.
- Lighter: To melt the cut ends and prevent fraying.
- Measuring tape: For consistent loop sizing.
- Work surface: A clean, flat area where you can lay out the rope.
While pre-made halters are available, many professionals prefer hand-tying their own using a diamond knot or similar secure binding method. Custom-fitted halters reduce slippage and enhance comfort, especially for sensitive horses.
Step-by-Step Guide to Tying a Secure Halter Knot
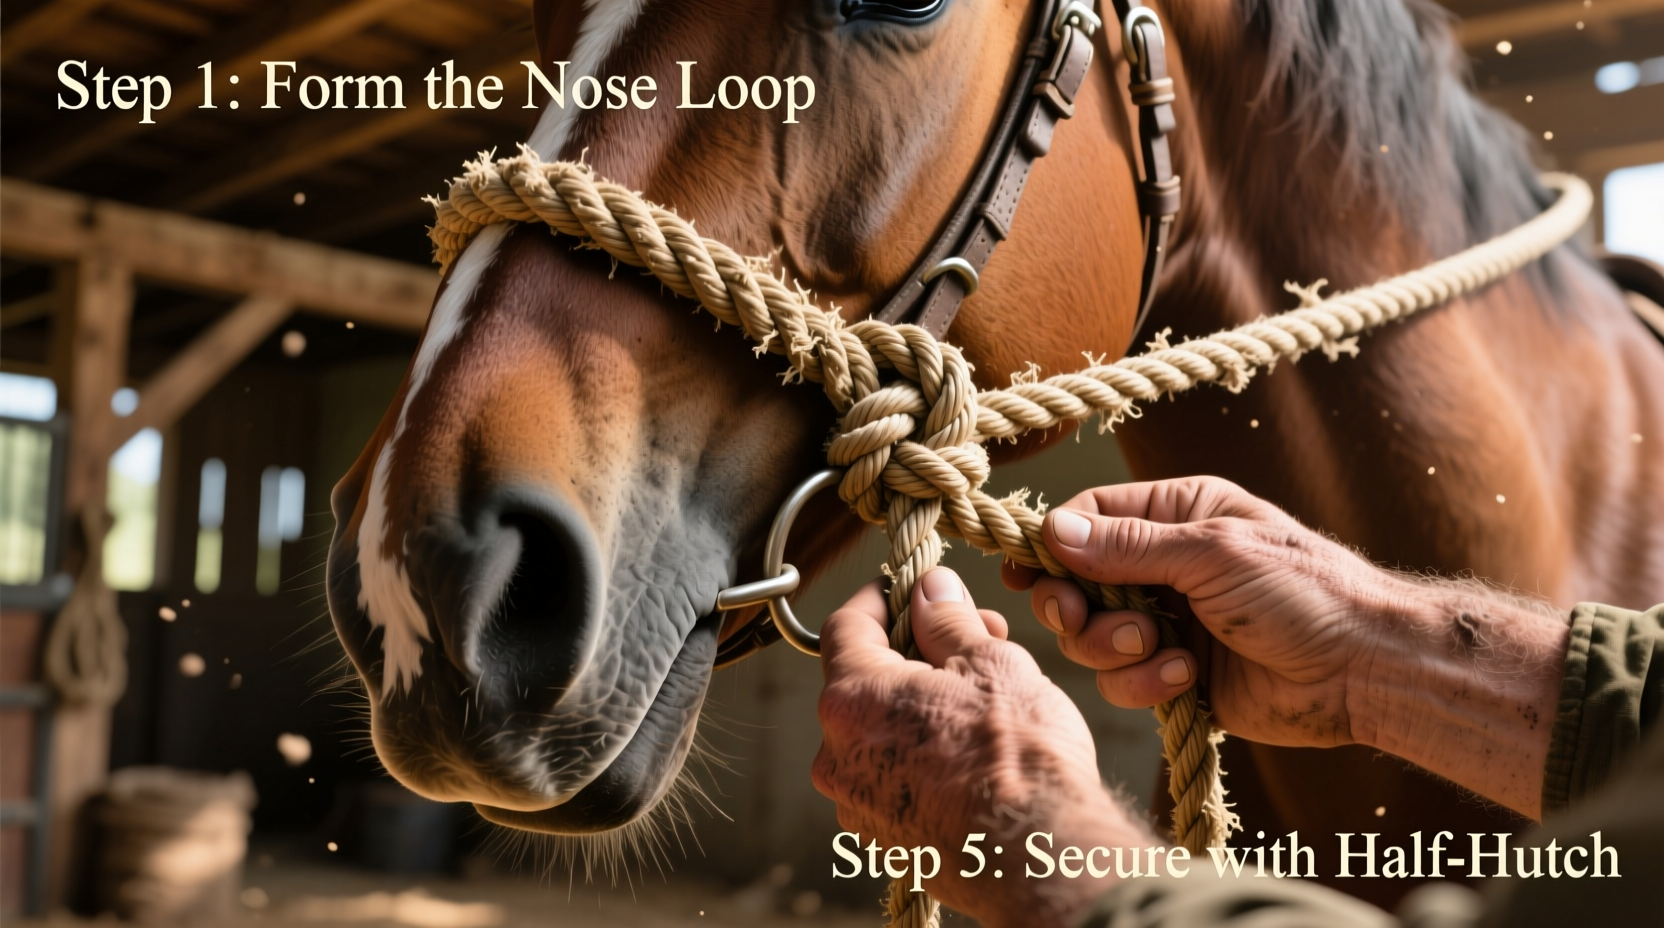
The most widely trusted knot for rope halters is the **diamond knot**, known for its strength, symmetry, and ability to maintain tension without slipping. Follow these steps carefully to create a durable, balanced halter.
- Cut the main rope: Measure approximately 8–9 feet of rope, depending on the horse’s size. Larger breeds may require up to 10 feet.
- Create the crown knot base: At one end of the rope, form a small loop about 6 inches from the tip. Wrap the working end around the standing part three times, threading it back through the initial loop. Pull tight to form a crown knot—this becomes the top of the halter behind the ears.
- Form the cheekpieces: From the crown knot, extend two equal-length strands downward—one will become the left cheekpiece, the other the right. Each should measure about 22–26 inches, depending on head size.
- Tie the diamond knot:
- Cross the two strands to form an “X” below the crown knot.
- Take the left strand over the right, forming a loop.
- Pass the right strand under the left and up through the loop, creating a simple knot.
- Now, begin weaving: pass each strand alternately over and under the opposing side, maintaining tension.
- After three full passes, pull both ends firmly to tighten into a symmetrical diamond shape.
- Attach the noseband: Below the diamond knot, split each strand again to form four ends. These will form the upper and lower nosebands. Tie another smaller diamond or button knot at the front to secure the junction.
- Finish with the throat latch: Allow one long tail to extend from the back of the crown knot (about 18–24 inches) to serve as the throat latch. Melt the end slightly to prevent unraveling.
- Add the lead rope attachment: Attach a separate rope or snap via a secure bowline or quick-release knot at the chin groove, just below the diamond knot.
Common Mistakes and How to Avoid Them
Even experienced handlers can make errors when tying rope halters. Below is a comparison of best practices versus frequent missteps.
| Do’s | Don’ts |
|---|---|
| Measure all segments evenly before tying | Guess lengths; leads to crooked fit |
| Melt rope ends to prevent fraying | Leave raw cuts exposed |
| Check symmetry after each knot stage | Assume knots will balance themselves |
| Use appropriate rope diameter (not too thin) | Use climbing rope or bungee cord—unsafe materials |
| Inspect regularly for wear | Use a halter with loose or deformed knots |
“Precision in knot tying translates directly to safety and communication. A well-tied halter respects the horse’s anatomy and builds trust.” — Dr. Laura Bennett, Equine Behavior Specialist and Clinician
Real-World Example: Correcting a Problematic Fit
Jessica, a trainer at a rehabilitation facility, noticed one of her horses consistently resisted being led. The rope halter appeared fine, but upon closer inspection, she realized the diamond knot had shifted to one side, causing uneven pressure on the nasal bone. After retying the halter with precise measurements and balanced tension, the resistance vanished within two sessions. The horse responded more willingly, confirming that minor asymmetries in knot placement can significantly affect behavior.
This case illustrates how critical attention to detail is—not just for security, but for humane interaction. A lopsided knot doesn’t just look unprofessional; it can cause chronic discomfort and undermine training progress.
Expert Checklist for a Perfect Halter
Use this checklist each time you tie or inspect a rope halter:
- ✅ All loops are symmetrical and appropriately sized
- ✅ No frayed or weakened sections in the rope
- ✅ Knots are fully tightened and seated
- ✅ Noseband sits 1–2 inches below the cheekbones
- ✅ Throat latch allows space for two fingers
- ✅ Lead rope attaches securely at the chin groove
- ✅ Ends are melted and smooth to prevent irritation
Frequently Asked Questions
Can I reuse a halter if one knot comes loose?
It depends. Minor loosening can sometimes be retightened, but if the rope has stretched or the knot structure is compromised, it’s safer to untie and reassemble the entire halter. Compromised integrity increases risk during use.
How tight should the knots be?
Knots must be snug enough to resist movement under load but not so tight that they deform the rope. Once tied, they should not slip or rotate. Test by gently pulling on each segment while holding adjacent parts steady.
Is there a quick-release version of the halter knot?
The diamond knot itself isn’t designed to release quickly. Instead, attach the lead rope with a quick-release knot (like a bowline with a slip loop) so you can disengage rapidly in emergencies. Never rely on the halter knots to untie under stress.
Final Thoughts: Mastery Through Practice
Tying the perfect halter knot isn’t achieved overnight. It requires patience, repetition, and a commitment to precision. Each halter you build strengthens your tactile understanding of rope dynamics and equine ergonomics. Over time, the process becomes second nature—but the discipline of checking symmetry, tension, and fit should never fade.
Remember, a secure halter isn’t just about preventing escape; it’s about fostering clear, compassionate communication with the animal in your care. Whether you’re preparing for groundwork, trail riding, or daily handling, taking the time to master this foundational skill pays dividends in safety, effectiveness, and mutual respect.


 浙公网安备
33010002000092号
浙公网安备
33010002000092号 浙B2-20120091-4
Comments
No comments yet. Why don't you start the discussion?