
Hemming a circle skirt can feel like a daunting task. The curved edge, the risk of puckering, and the challenge of maintaining an even length all contribute to its reputation as a tricky project. Yet, with the right approach, even beginners can achieve a smooth, professional-looking hem. Unlike straight hems on A-line or pencil skirts, a circle skirt’s continuous curve requires special attention to tension, pinning, and stitching technique. This guide walks you through every stage—from measuring and marking to pressing and finishing—so you can confidently create a flawless hem that enhances your garment’s drape and movement.
Understanding the Challenge of Circle Skirt Hems
A circle skirt is constructed from a full or partial circular cut, which means the hemline forms a complete arc. When laid flat, this creates excess fabric at the bottom edge due to the difference in circumference between the waist and hem. If not handled correctly, this fullness can lead to ripples, uneven stitching, or a wavy appearance after washing.
The key to success lies in managing this natural flare without pulling or stretching the fabric during hemming. Fabrics like cotton, rayon, and lightweight knits are particularly prone to distortion, making careful handling essential. Additionally, because the hem must flow smoothly when worn, any irregularities become immediately visible when the skirt spins or moves.
“Hemming a circle skirt isn’t about force—it’s about finesse. Let the fabric guide your hand, not the other way around.” — Lila Montgomery, Professional Seamstress & Pattern Designer
Essential Tools and Materials
Gathering the right supplies before beginning ensures a smoother process and better results. Here’s what you’ll need:
- Fabric scissors or rotary cutter
- Pins or fine hand-sewing needles
- Measuring tape and tailor’s chalk or water-soluble pen
- Iron and ironing board
- Sewing machine with a universal or ballpoint needle (size 70/10)
- Matching thread
- Clear ruler or flexible curve tool (optional but helpful)
- Double-fold bias tape or fusible hem tape (for alternative finishes)
Step-by-Step Guide to Hemming Your Circle Skirt
Follow these steps carefully to achieve a consistent, wrinkle-free hem. Take your time—rushing increases the risk of mistakes.
- Let the skirt hang overnight. Before cutting or folding the hem, put the skirt on a hanger and allow it to hang for at least 8–12 hours. This lets the fabric relax and stretch naturally, especially important for knit or bias-cut materials. Skipping this step may result in a hem that rides up after wearing.
- Determine desired hem length. Put on the skirt with the shoes you plan to wear. Have a helper mark the preferred length using pins or chalk at several points around the hem—front center, sides, and back. Measure from the floor to ensure consistency.
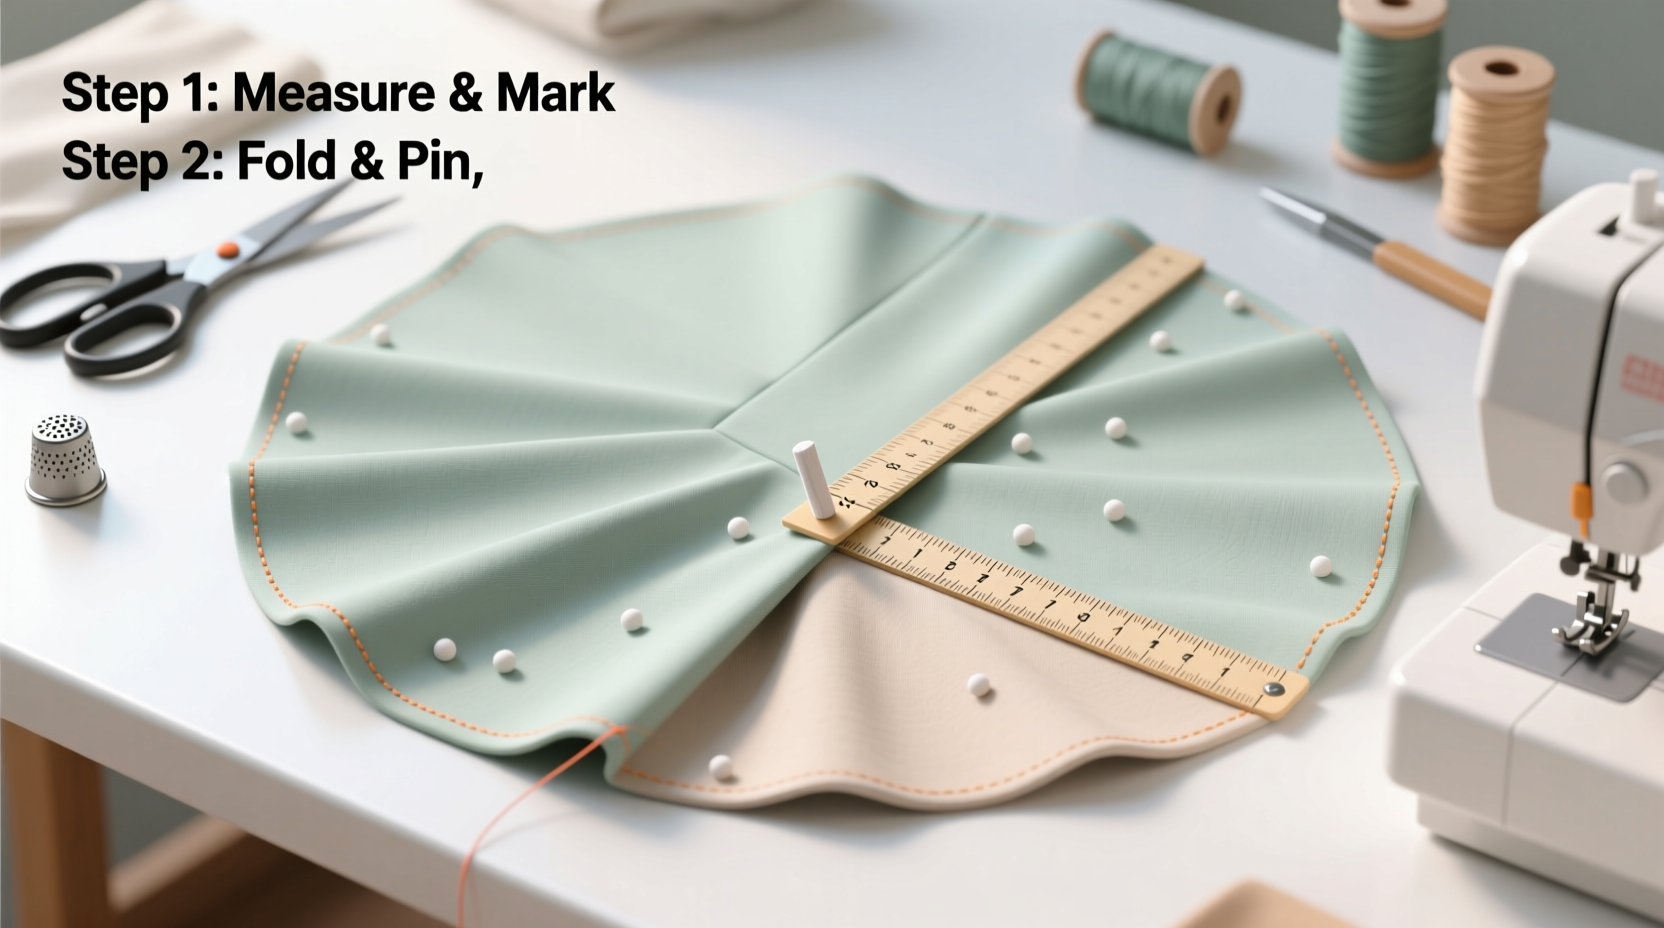
- Measure and mark evenly. Lay the skirt flat on a large surface. Starting at one point, measure up from the raw edge to your chosen hem allowance (typically 1/2 inch or 1.25 cm). Use chalk to mark this line all the way around, checking frequently to maintain uniform distance. A flexible ruler helps maintain accuracy along the curve.
- Cut the excess fabric. Carefully trim the fabric just below your marked line, leaving enough for your hem allowance plus a small margin. Cut slowly to avoid jagged edges.
- Fold and press the hem. Fold the raw edge up by your hem allowance. For best results, fold once by 1/4 inch to encase the raw edge, then fold again by another 1/4 inch. Press thoroughly with an iron. Repeat all the way around. This double-fold method prevents fraying and creates a crisp finish.
- Pin the hem in place. Insert pins perpendicular to the edge, with the heads facing outward. Place them close together—about every inch—to prevent shifting. Avoid stretching the fabric as you pin.
- Sew the hem. Using a straight stitch or narrow zigzag (especially for stretchy fabrics), sew close to the inner folded edge. Go slowly around curves, guiding the fabric gently without pulling. Backstitch at start and end to secure.
- Press again after sewing. Once stitched, lay the skirt flat and press the hem downward to set the stitches and flatten any ridges.
Alternative Hem Finishes for Different Fabrics
Not all hems require traditional folding and sewing. Depending on your fabric type, consider these alternatives:
| Fabric Type | Recommended Hem Method | Why It Works |
|---|---|---|
| Cotton Poplin | Double-fold machine hem | Stable fabric holds crisp folds well |
| Rayon Challis | Narrow rolled hand hem (blind stitch) | Prevents bulk and maintains drape |
| Jersey Knit | Stretch stitch or twin needle hem | Allows elasticity without popping stitches |
| Silk Chiffon | Hand-rolled hem with catch stitching | Minimizes visibility and weight |
| Denim or Heavy Cotton | Topstitched single-fold hem | Adds durability and a clean edge |
Common Mistakes and How to Avoid Them
Even experienced sewers make errors when hemming curved garments. Recognizing these pitfalls early improves outcomes:
- Skipping the hanging period. Untreated fabric continues to stretch after cutting, leading to an uneven hemline over time.
- Stretching while sewing. Pulling the fabric through the machine causes rippling. Let the feed dogs do the work.
- Inconsistent hem allowance. Varying widths create visual imbalance, especially noticeable in solid colors.
- Using the wrong needle. A dull or incorrect needle can snag or damage delicate weaves.
- Ironing instead of pressing. Sliding the iron stretches the curve; lift and lower it instead.
Mini Case Study: From Frustration to Flawless
Sophie, a home sewer in Portland, had attempted three circle skirts before successfully hemming one. Her first two attempts resulted in wavy, uneven hems that bunched at the sides. After researching techniques, she discovered the importance of letting the skirt hang overnight. She also switched from a wide zigzag to a narrow twin needle setup for her jersey fabric. On her third try, she pinned meticulously and sewed slowly, guiding the fabric without pressure. The result was a smooth, professional hem that moved beautifully. “I realized I was fighting the fabric,” she said. “Once I worked with it, not against it, everything changed.”
Pro Checklist: Hemming Success in 7 Steps
Before you begin, review this checklist to ensure you're prepared:
- ✅ Hang the skirt for 8–12 hours before hemming
- ✅ Mark hem length while wearing the skirt and appropriate shoes
- ✅ Use chalk or washable marker for clear, temporary lines
- ✅ Trim excess fabric evenly, leaving correct seam allowance
- ✅ Press folds carefully—don’t slide the iron
- ✅ Pin densely and perpendicularly to the edge
- ✅ Sew slowly, letting the machine feed the fabric
Frequently Asked Questions
Can I hem a circle skirt without a sewing machine?
Yes. A hand-rolled hem using a blind stitch is ideal for lightweight or delicate fabrics. It takes more time but produces an almost invisible finish. Use a fine needle and silk thread for best results.
How do I prevent my hem from flipping to the outside?
Ensure your second fold completely covers the stitching line. Press each fold firmly before sewing. If the hem still flips, try understitching the inner fold slightly toward the garment side to keep it anchored.
What if my hem is already wavy?
Remove the stitches and re-press the hem. Check for areas where the fabric was stretched during sewing. Re-pin carefully and re-stitch slowly. Sometimes, trimming a tiny amount from the fullest part of the curve can help redistribute fullness.
Final Thoughts: Elevate Your Craft One Stitch at a Time
Hemming a circle skirt doesn’t have to be intimidating. With patience, the right tools, and attention to detail, you can transform a frustrating task into a satisfying accomplishment. Each skirt you hem builds your confidence and sharpens your skills. Whether you’re making a playful sundress or a dramatic evening piece, a clean hem completes the look and reflects your craftsmanship.


 浙公网安备
33010002000092号
浙公网安备
33010002000092号 浙B2-20120091-4
Comments
No comments yet. Why don't you start the discussion?