
The press handstand is one of the most visually impressive and technically demanding skills in calisthenics and gymnastics. Unlike a standard handstand entered from a kick-up, the press handstand requires controlled strength, balance, and body alignment as you slowly lift into an inverted position from a plank or L-sit. Mastering it takes patience, precision, and consistent practice. This guide breaks down the progression, identifies critical errors, and provides actionable strategies to help you achieve a clean, stable press handstand.
Understanding the Press Handstand: More Than Just Strength
The press handstand isn’t simply about pushing your body upward—it’s a full-body coordination movement that blends core tension, shoulder stability, and spatial awareness. The motion begins in a front lever-like position on the floor, progresses through a pike or tucked phase, and culminates in a balanced handstand. Because of its complexity, attempting it without proper preparation often leads to strain, poor form, or injury.
Success hinges on two key components: strength ratios (particularly between pressing power and core control) and kinesthetic awareness. You must be able to maintain a hollow body position while shifting your center of mass over your hands gradually and smoothly.
“Strength gets you off the ground, but control keeps you there. The press handstand separates casual practitioners from disciplined athletes.” — Coach Rafael Méndez, Calisthenics Performance Trainer
Step-by-Step Progression to a Full Press Handstand
Rushing into a full press can lead to shoulder impingement or wrist discomfort. Instead, follow this structured progression to build competence safely.
- Master the Hollow Body Hold (on feet and in plank): Lie flat, press lower back into the floor, engage core, lift shoulders and legs slightly. Hold for 30–60 seconds. Repeat daily.
- Wall-Assisted Handstand with Control: Kick up into a handstand against the wall, focusing on active shoulders (pushed into ears), straight arms, and engaged core. Hold for 30+ seconds. Practice dismounts with control.
- Pike Presses (on floor or parallettes): Begin in a pike position with hands close to feet. Lower head toward the floor, then press back up. Builds shoulder strength essential for the press.
- Tuck Planche Lean: From a plank, bring knees toward chest and shift weight forward over hands. Focus on keeping hips high and shoulders ahead of wrists. Builds anterior core and shoulder strength.
- Frog Stand to Headstand Press: In a squat with elbows inside knees, place hands and head on the floor. Push through hands while lifting hips to enter a tuck headstand, then extend to handstand. Teaches weight transfer mechanics.
- Elbow Lever Progressions: Develops balance in a forward-shifted position similar to the mid-phase of a press. Practice holding and rocking gently.
- Assisted Press Drills: Use a resistance band around your waist anchored above or have a spotter support your hips while you attempt slow presses from a tuck or straddle.
- Full Free Press Handstand: Only attempt once all prerequisites are solid. Start in a tuck, engage core, shift shoulders past wrists, and extend legs upward with control.
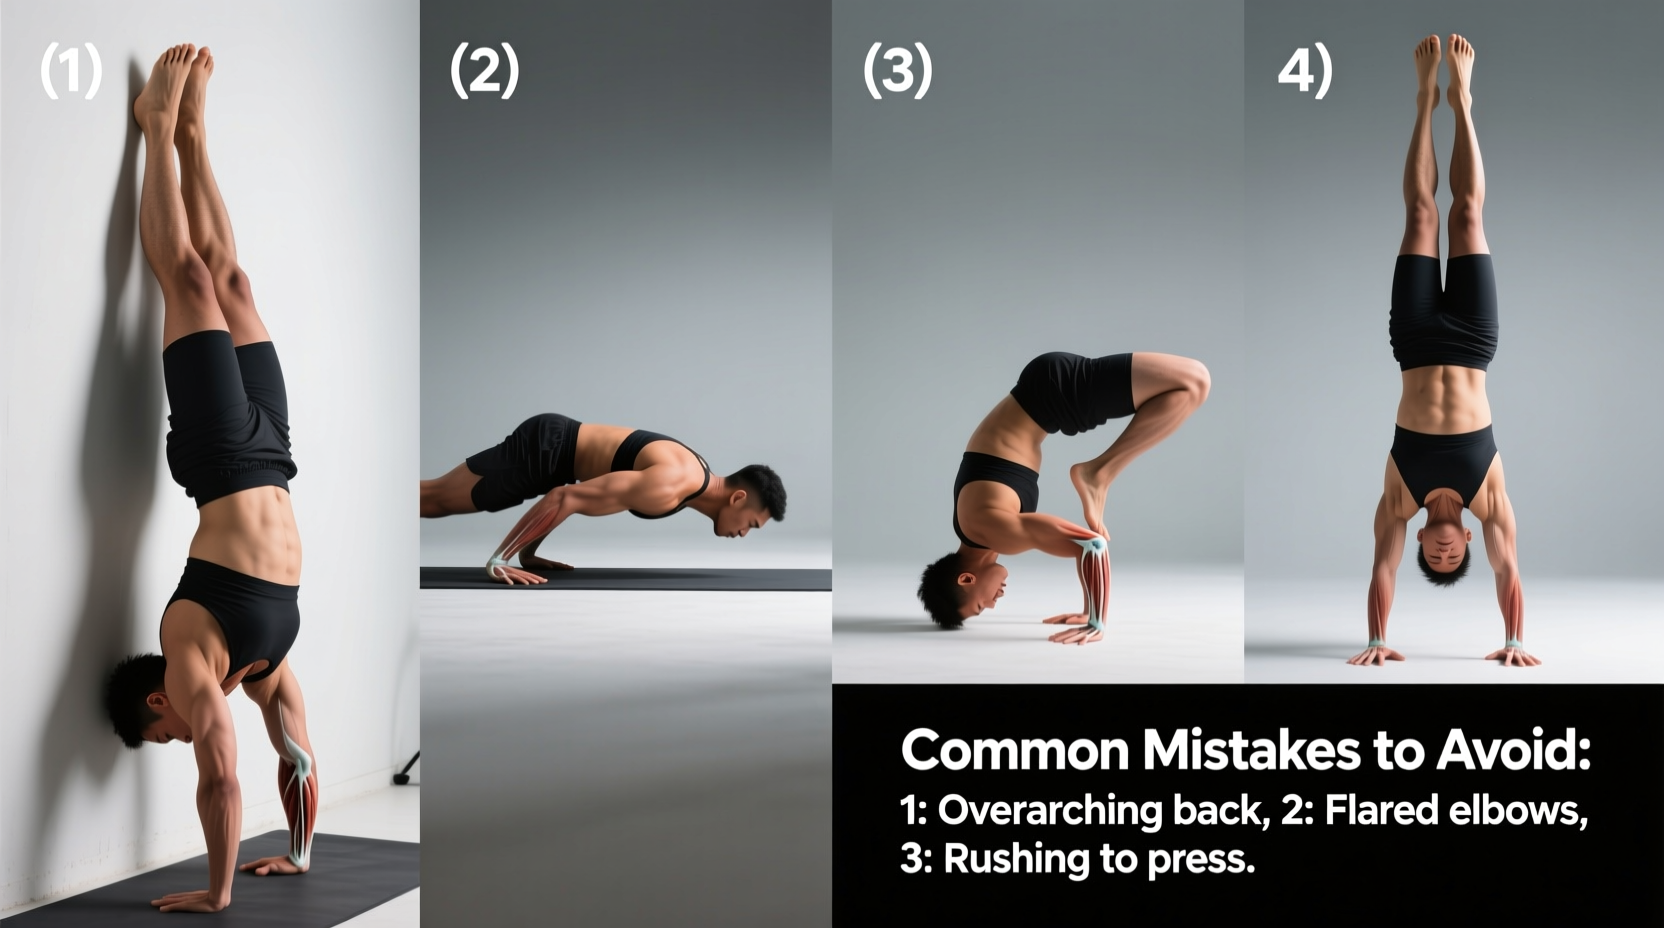
Common Mistakes and How to Fix Them
Even advanced trainees fall into recurring traps. Recognizing these early prevents plateaus and injuries.
| Mistake | Why It's Problematic | Solution |
|---|---|---|
| Arching the lower back | Shifts center of gravity backward, making lift impossible; strains lumbar spine | Drill hollow body holds; cue “ribs down, pelvis tilted” during practice |
| Pressing with bent elbows | Reduces mechanical advantage; increases elbow joint stress | Strengthen triceps via diamond push-ups; focus on locking out early |
| Leading with the hips instead of shoulders | Causes premature leg extension and loss of balance | Practice shoulder-forward leans; use wall drills to feel correct alignment |
| Looking forward or up | Breaks spinal alignment; disrupts balance | Fix gaze between hands; maintain neutral neck position |
| Skipping progressions | Leads to frustration and compensatory patterns | Follow a structured plan; test milestones monthly |
Essential Training Checklist
To ensure steady progress, complete this checklist weekly:
- ✅ Perform 3 sets of 30-second hollow body holds
- ✅ Complete 5 sets of 5 pike presses
- ✅ Hold a freestanding handstand for at least 20 seconds
- ✅ Practice tuck planche leans for 3 sets of 15 seconds
- ✅ Record at least one press attempt for review
- ✅ Stretch wrists and shoulders post-training
- ✅ Train press-specific drills 3 times per week (allow rest days)
Real Example: From Failure to First Clean Press
Jamal, a 28-year-old fitness enthusiast, struggled with his press handstand for months. He could hold a handstand and do pike presses, but every time he attempted the press, he collapsed backward. After filming his attempt, his coach noticed he was arching his back and not shifting his shoulders far enough forward. They corrected his setup: starting with hands closer to his feet, initiating with a strong hollow, and practicing tuck planche leans with emphasis on shoulder protraction. Within four weeks of targeted drills, Jamal achieved his first controlled tuck press handstand—proof that technique refinement beats brute force.
Frequently Asked Questions
How long does it take to learn a press handstand?
For someone with foundational strength (e.g., able to do 10+ push-ups and hold a 20-second handstand), dedicated training can yield results in 3 to 6 months. Beginners may need 9–12 months due to prerequisite strength development.
Can I learn the press handstand without parallettes?
Yes, but parallettes offer advantages: increased range of motion, better wrist alignment, and clearance for the head during ascent. Floor-only training works but may limit depth and comfort.
Is the press handstand dangerous for the shoulders?
When performed with proper form and adequate preparation, it’s not inherently dangerous. However, pre-existing shoulder instability, lack of mobility, or poor technique increase injury risk. Always warm up and respect pain signals.
Final Thoughts: Consistency Over Intensity
The press handstand is not a milestone measured in days, but in deliberate repetitions and mindful adjustments. It rewards those who prioritize form over ego, progression over shortcuts. Every failed attempt teaches something—if you’re willing to observe and adapt. Shoulder strength will come. Balance will improve. But only if you commit to the process.


 浙公网安备
33010002000092号
浙公网安备
33010002000092号 浙B2-20120091-4
Comments
No comments yet. Why don't you start the discussion?