
The tie is more than an accessory—it's a statement. When tied correctly, it conveys confidence, precision, and attention to detail. Among the most respected knots in men’s formalwear, the Single Windsor stands out for its balanced symmetry, moderate size, and timeless elegance. Unlike bulkier alternatives, it works seamlessly with spread or cutaway collar shirts and delivers a polished appearance suitable for business meetings, weddings, or formal events. Yet, many still struggle with uneven dimples, loose ends, or lopsided loops. The solution lies not in luck, but in technique.
Why the Single Windsor Matters
The Single Windsor—sometimes called the \"Half-Windsor\"—strikes the ideal balance between formality and versatility. It’s fuller than a Four-in-Hand but less broad than a Full Windsor, making it adaptable across collar types and occasions. Its triangular shape frames the shirt placket neatly, drawing the eye upward while maintaining proportion. More importantly, mastering this knot signals sartorial competence. As menswear historian James Sherwood notes:
“The way a man ties his tie often reveals more about his discipline than his suit does about his income.” — James Sherwood, Menswear Historian & Author
Proper execution ensures longevity in style. A well-tied Single Windsor resists loosening throughout the day and maintains its structure through movement and conversation.
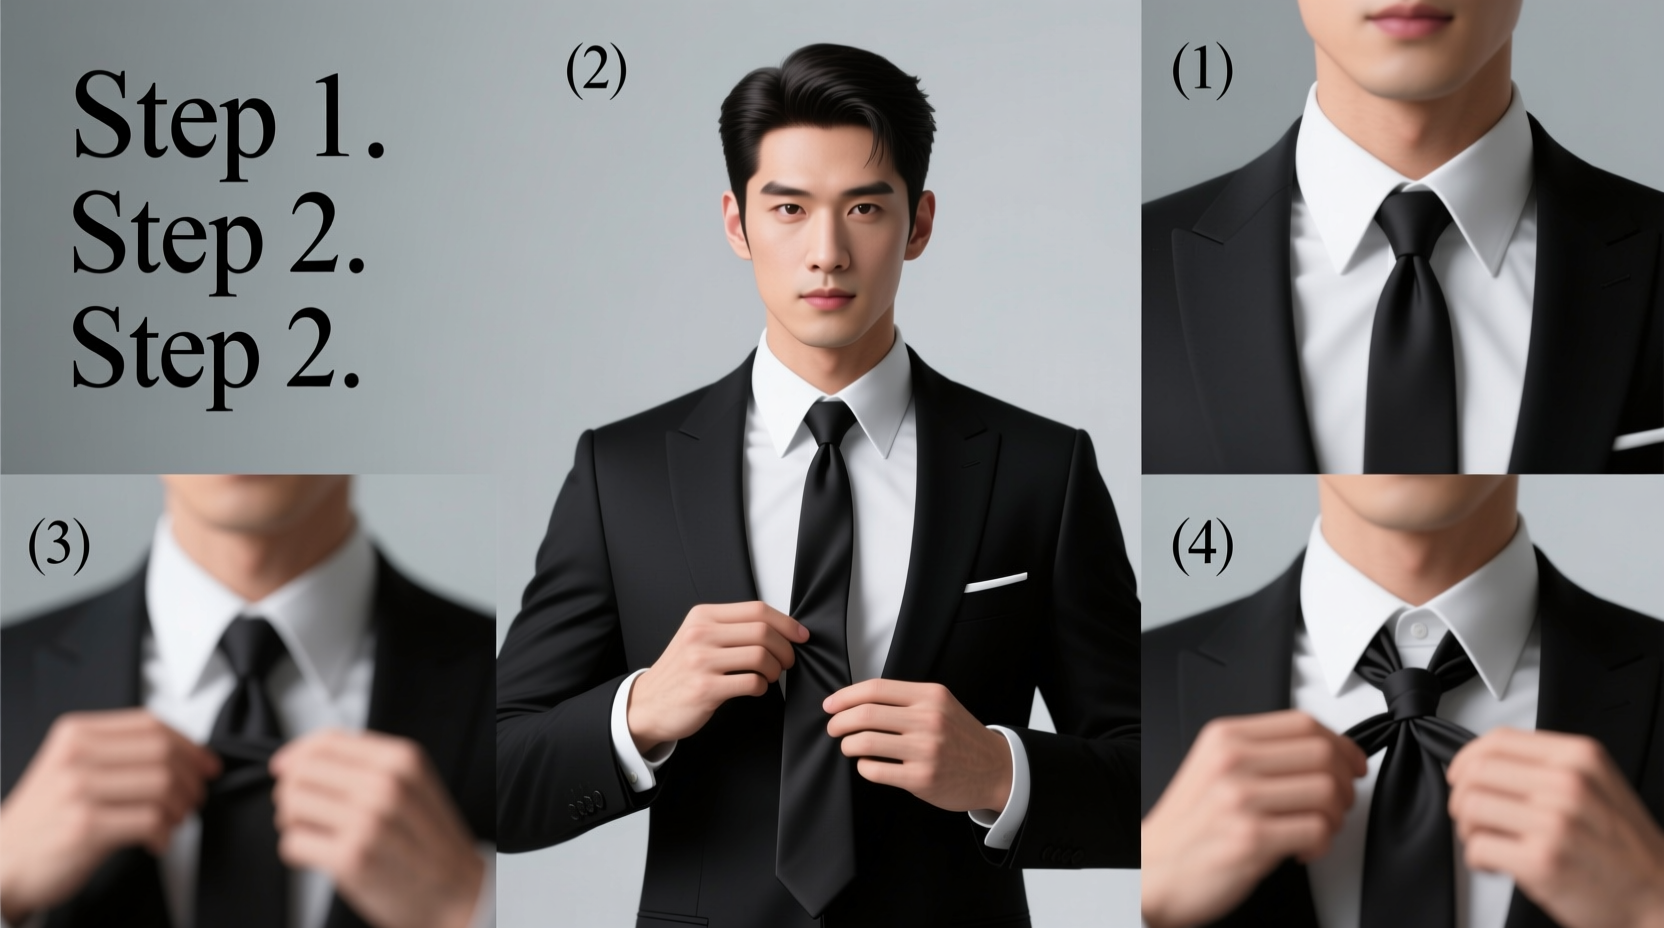
Step-by-Step Guide to the Perfect Single Windsor Knot
Follow these precise steps to achieve a clean, symmetrical Single Windsor every time. Practice in front of a mirror for visual feedback, and use a standard-width silk tie (7–9 cm) for optimal results.
- Start with the wide end on your right. Drape the tie around your neck with the wide end extending about 12 inches (30 cm) below the narrow end. Adjust based on your height and jacket length—ideally, the tip of the wide end should reach your belt buckle when finished.
- Cross the wide end over the narrow end. Form an “X” just below your chin. This crossing creates the foundation of the knot’s symmetry.
- Bring the wide end up through the neck loop. Slide it from underneath, pulling it straight up and then back down.
- Pass the wide end behind the narrow end. Move it horizontally across the back of the initial X, preparing for the next tuck.
- Bring the wide end down vertically over the front. You’ll now see a partial knot forming with a visible triangle at the center.
- Loop the wide end around behind the knot. Guide it under the horizontal band at the base of the triangle, moving from right to left.
- Bring the wide end up through the neck loop again. This second pass through the loop adds volume and stability.
- Slide the wide end down through the front loop. Carefully thread it through the triangular dimple that has formed. Keep tension even as you pull.
- Adjust and tighten. Hold the knot gently between thumb and forefinger. Pull the narrow end downward to snug the knot upward. Simultaneously, slide the knot up toward the collar while smoothing the fabric.
- Create a sharp dimple. Just below the knot, pinch the central fold of the tie and pull slightly downward to create a clean vertical crease—the hallmark of a professionally tied knot.
Common Mistakes and How to Avoid Them
Even experienced wearers make subtle errors that undermine the knot’s appearance. Recognizing these pitfalls improves consistency.
| Mistake | Why It Happens | Solution |
|---|---|---|
| Asymmetrical knot | Uneven tension during looping | Mirror check mid-process; retrace steps if imbalance appears early |
| Knot too loose or too tight | Over-pulling or under-tensioning | Use controlled, gradual tightening; stop when knot meets collar comfortably |
| No dimple or wrinkled fabric | Failing to shape after tying | Always form the dimple by pinching just below the knot |
| Wide end too short or long | Incorrect starting position | Begin with wide end 10–12 inches below narrow end; adjust based on torso length |
Tips for Consistent Results
Refining your technique goes beyond memorizing steps. These practical strategies help internalize muscle memory and elevate your daily routine.
- Practice untied in front of a full-length mirror to observe hand positioning.
- Use a slightly longer tie during practice to allow margin for error.
- Avoid rushing the final adjustment—rushing distorts symmetry.
- Choose ties with a defined spine (interlining) for better knot retention.
- Wash hands before tying to prevent oil transfer onto light-colored silks.
Real-World Application: A Week in the Life of a Consultant
Consider Daniel, a management consultant who presents to clients three days a week. He used to arrive at meetings with loosely tied knots and crooked ends—a subtle distraction that undermined his authority. After dedicating ten minutes each morning for one week to practice the Single Windsor using the method above, he noticed immediate feedback. Clients commented on his “put-together presence,” and colleagues asked where he’d gotten his new ties (they were the same ones, just better tied). The change wasn’t in wardrobe cost, but in craftsmanship. His confidence grew because he knew his appearance matched his expertise.
Checklist: Your Daily Tie-Tying Routine
For those integrating this into a morning ritual, follow this concise checklist:
- ✔️ Ensure collar is fully buttoned and upright
- ✔️ Position wide end 12 inches below narrow end
- ✔️ Cross wide over narrow, then up through neck loop
- ✔️ Pass behind, down front, loop behind, up through neck loop again
- ✔️ Tuck wide end through front loop
- ✔️ Tighten gradually while supporting knot
- ✔️ Form a crisp dimple just below the knot
- ✔️ Confirm both ends hang straight, wide end at belt level
FAQ: Common Questions About the Single Windsor Knot
Can I use the Single Windsor with any shirt collar?
It works best with medium to wide spread collars. Narrow point collars may not accommodate the knot’s width, creating pressure on the fabric. For slim collars, consider a Four-in-Hand instead.
How do I keep my knot centered all day?
Secure the tie bar between the third and fourth buttons of your shirt. This anchors the tie and prevents lateral drift. Also, avoid tugging at the knot during the day—adjust only by pulling the narrow end.
Is the Single Windsor appropriate for black-tie events?
Traditionally, black-tie attire calls for a bow tie. However, in modern business-formal settings where a necktie is acceptable, a dark navy or black Single Windsor on a crisp white dress shirt is perfectly appropriate.
Final Thoughts: Elevate Your Presence One Knot at a Time
Mastering the Single Windsor isn’t about perfection on the first try—it’s about commitment to refinement. In a world where first impressions are formed in seconds, the details matter. A symmetrical knot tells others you care about your craft, your image, and your impact. Whether you're stepping into a boardroom, walking down the aisle, or simply dressing with intention, this knot serves as a quiet testament to self-respect.


 浙公网安备
33010002000092号
浙公网安备
33010002000092号 浙B2-20120091-4
Comments
No comments yet. Why don't you start the discussion?