
A slip leash—also known as a choke chain or check collar—is one of the most misunderstood tools in dog training. When used correctly, it can be an effective aid for communication between handler and dog. However, improper use can lead to discomfort, injury, or behavioral issues. This guide breaks down how to safely and effectively fit and use a slip leash, ensuring both control and comfort for your dog.
Understanding the Slip Leash: What It Is and How It Works
The slip leash is a looped collar made from nylon or metal chain that tightens when pulled and loosens when tension is released. Unlike a standard flat collar, it has no buckle—it slips over the dog’s head and adjusts dynamically. The principle behind its function is based on pressure and release: tension signals correction, while slack rewards correct behavior.
It's commonly used in professional training settings, particularly for dogs that pull or require precise control during walks or obedience drills. Despite misconceptions, the slip leash isn't inherently harsh—it depends entirely on technique. When handled with finesse, it mimics natural canine communication through subtle shifts in tension.
“Used with timing and sensitivity, the slip leash can teach self-correction better than any fixed collar.” — Carlos Mendez, Certified Canine Behaviorist
Step-by-Step Guide to Properly Fitting a Slip Leash
Fitting a slip leash correctly is essential to avoid choking or restricting your dog’s airway. Follow these steps carefully:
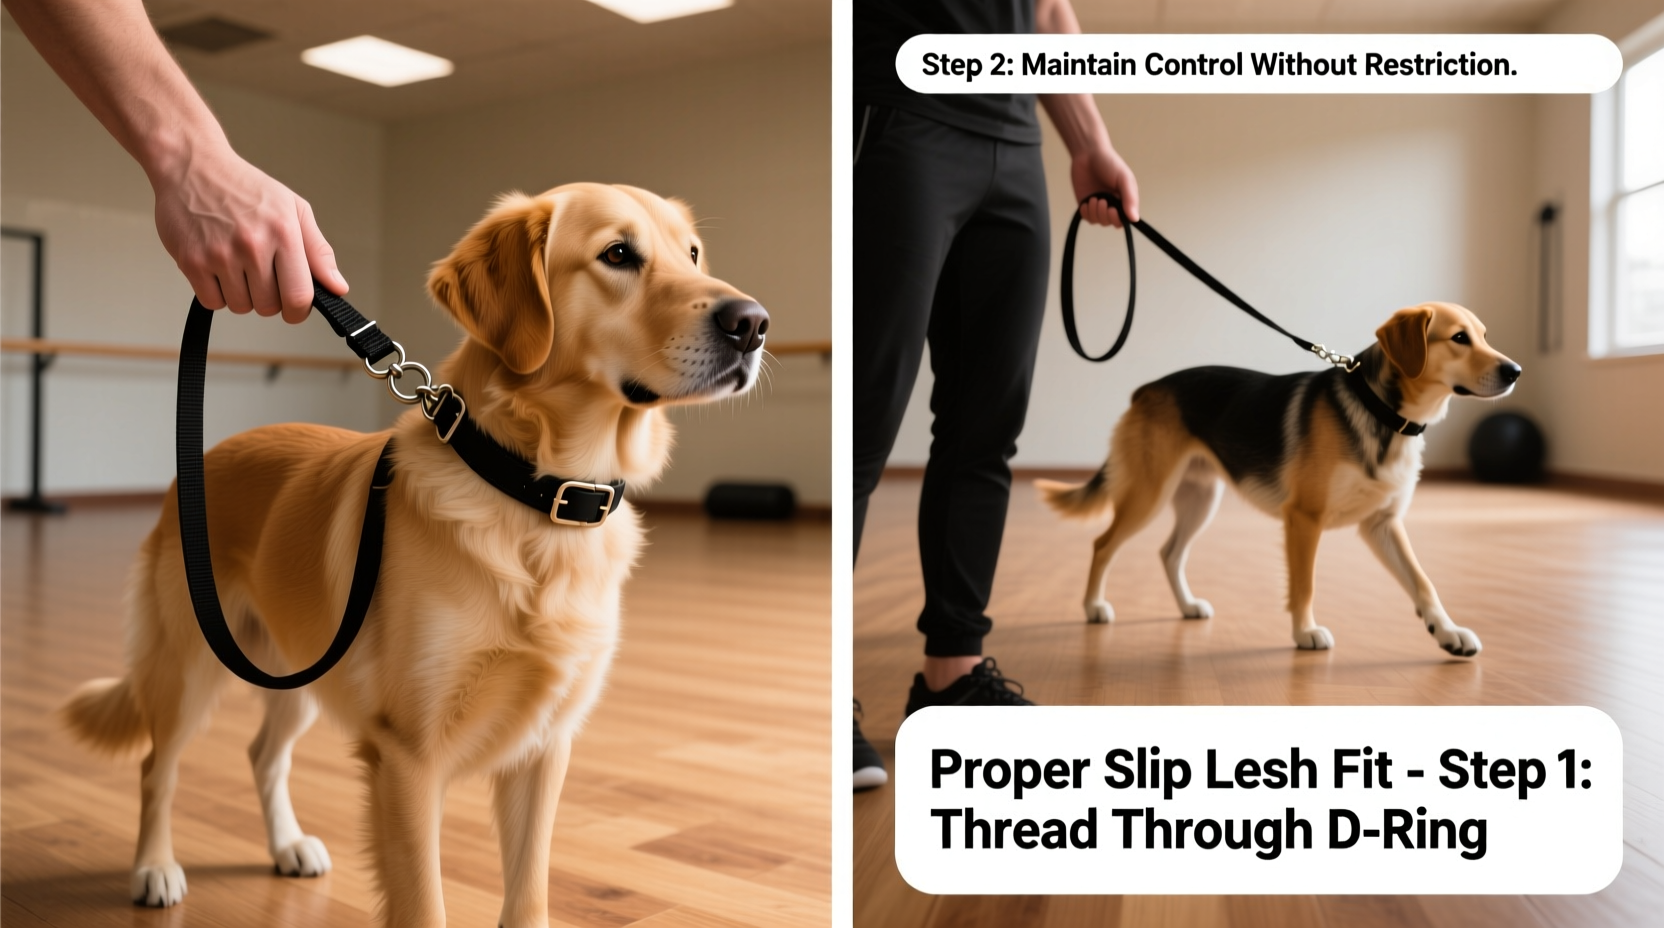
- Hold the leash correctly: Grasp the leash at the end (the handle side), allowing the loop to hang freely.
- Form the double loop: Pass the handle end through the larger loop to create a smaller, secondary loop near your hand.
- Approach calmly: Gently lift the dog’s muzzle slightly to ease the process, especially if they’re nervous.
- Slip over the head: Place the larger loop over your dog’s head, starting from the nose and sliding back past the ears.
- Position high on the neck: The leash should sit snugly just behind the ears and under the jaw—not around the throat. This ensures the tightening force avoids the trachea.
- Test the fit: You should be able to slide two fingers between the leash and your dog’s neck. If it slips off easily, it’s too loose; if you can’t fit fingers, it’s too tight.
- Ensure directional orientation: The “live ring” (where the leash pulls tight) should be at the top of the neck, not hanging below. The dead ring (non-sliding end) stays near the chin.
How to Use the Slip Leash Effectively During Walks
Using a slip leash requires precision and awareness. The goal is not to punish but to communicate boundaries through brief, controlled corrections.
- Maintain slack: Let the leash remain loose when your dog walks beside you. Slack = reward.
- Use quick corrections: If your dog pulls, give a short, upward tug (not a sustained pull) using your wrist. This creates a momentary tightening that releases immediately when they return to heel.
- Avoid jerking downward: Pulling down increases strain on the spine and neck. Always direct force upward and forward.
- Release instantly: The correction must be followed by slack. Timing is everything—delayed release confuses the dog.
- Practice indoors first: Begin training in a distraction-free environment before moving to sidewalks or parks.
Over time, your dog learns that pulling causes discomfort, while walking loosely earns freedom. This builds impulse control and attentiveness.
Common Mistakes and Safety Considerations
Even experienced handlers make errors with slip leashes. Awareness prevents harm and fosters trust.
| Mistake | Why It’s Harmful | Correct Approach |
|---|---|---|
| Leaving the leash tight continuously | Can cause tracheal damage or anxiety | Only apply tension briefly; release immediately |
| Using it like a regular collar | Dog may slip out or get tangled | Never leave unattended; remove when not walking |
| Pulling hard or yanking repeatedly | Causes fear, pain, and learned avoidance | Use light, well-timed corrections only |
| Improper positioning on the neck | Risks choking or nerve compression | Always place high—behind ears, under jaw |
Real Example: Training a Strong-Pulling Labrador
Sarah adopted Max, a two-year-old Labrador Retriever, who pulled so hard on walks that she could barely keep up. Standard harnesses only encouraged more pulling. After consulting a trainer, she switched to a slip leash with proper instruction.
For the first week, Sarah practiced in her backyard. She used treats to lure Max into staying close, applying a light correction only when he surged ahead. Within days, Max began checking in with her during walks. By the third week, he walked politely on a loose leash through the neighborhood. The key wasn’t force—it was consistency and immediate release after each correction.
Today, Max still wears the slip leash during training walks, though Sarah occasionally transitions him to a harness for longer outings. The slip leash gave them the foundation they needed for mutual respect.
Checklist: Using Your Slip Leash Safely and Successfully
- ✅ Confirm the leash is positioned high on the neck, behind the ears
- ✅ Attach the leash to the dead ring, not the live ring
- ✅ Keep the leash loose when the dog is in position
- ✅ Apply only brief, upward tugs—not sustained pressure
- ✅ Release tension the moment the dog responds correctly
- ✅ Practice in low-distraction areas first
- ✅ Remove the slip leash when not actively walking or training
- ✅ Monitor your dog for signs of discomfort or hesitation
Frequently Asked Questions
Is a slip leash cruel?
No—when used properly, a slip leash is not cruel. It functions as a communication tool, not a punishment device. Misuse, such as constant pulling or improper fit, can cause harm. But with correct technique, it teaches dogs to walk politely without long-term discomfort.
Can I leave the slip leash on my dog all day?
No. A slip leash should never be left on unsupervised. There’s a risk of it catching on furniture or fences, which could tighten and injure your dog. Always switch to a flat collar or harness for everyday wear.
Are slip leashes suitable for small dogs?
They can be, but extra caution is needed. Small breeds have delicate tracheas and vertebrae. Use a lightweight nylon version instead of metal, and apply even lighter corrections. Many trainers recommend alternative tools like martingale collars for small dogs.
Final Thoughts: Building Trust Through Technique
The slip leash is not a shortcut or a tool for dominance. It’s a method of teaching balance, focus, and responsiveness. Mastery comes not from strength, but from timing, consistency, and empathy. When used with care, it helps dogs understand expectations clearly and strengthens the bond between pet and owner.
Start slow. Practice daily. Observe your dog’s reactions closely. Adjust your technique as needed. With patience, the slip leash can become a valuable part of your training toolkit—one that promotes safety, confidence, and cooperation.


 浙公网安备
33010002000092号
浙公网安备
33010002000092号 浙B2-20120091-4
Comments
No comments yet. Why don't you start the discussion?