
A clogged toilet is one of the most common household plumbing issues—and one of the most urgent. While many turn immediately to chemical drain cleaners or call a plumber, the truth is that most blockages can be resolved quickly and safely with a simple tool: the plunger. When used correctly, a plunger creates enough pressure and suction to dislodge obstructions without damaging your plumbing. Yet, improper technique often leads to messy overflows or ineffective results. Mastering the art of plunging isn’t just about brute force; it’s about understanding water dynamics, tool selection, and timing.
The Science Behind Effective Plunging
At its core, a plunger works by creating alternating pressure and suction within the drainpipe. When you push down, you compress air and water, forcing fluid against the clog. When you pull up, you create a vacuum that pulls the obstruction back. Repeating this motion loosens and eventually breaks apart the blockage, allowing it to flush downstream.
The key to success lies in maintaining a tight seal between the plunger cup and the toilet bowl. Without this seal, pressure escapes, rendering each stroke ineffective. Equally important is rhythm—short, sharp strokes are less effective than slow, deliberate pushes and pulls that build consistent pressure.
“Most people fail not because the clog is too tough, but because they break the seal or use the wrong type of plunger.” — Carlos Mendez, Master Plumber with 25 years of residential experience
Choosing the Right Plunger: Not All Are Created Equal
There are two primary types of plungers: the cup plunger and the flange (or accordion) plunger. For toilets, only one is truly effective.
| Type of Plunger | Best For | Not Recommended For | Effectiveness on Toilets |
|---|---|---|---|
| Cup Plunger (Flat Rim) | Sinks, showers, tubs | Toilet drains | Poor – lacks proper seal in curved bowl |
| Flange Plunger (Extended Rubber Flap) | Toilets, curved drain openings | Flat surfaces like sinks | Excellent – designed for toilet traps |
The flange plunger features a soft rubber extension that folds into the cup when not in use. When inserted into the toilet drain, this flange unfolds and fits snugly into the trapway, maximizing suction. Always keep a dedicated flange plunger near your bathroom—preferably stored upright in a discreet corner—to ensure quick access during emergencies.
Step-by-Step Guide to Clearing a Clogged Toilet
Follow this proven sequence to clear most toilet clogs efficiently and hygienically.
- Assess the situation. If the bowl is nearly full, stop flushing immediately. Remove excess water with a small container or cup to prevent overflow during plunging.
- Select the correct plunger. Use a flange-style plunger, clean and free of cracks or tears.
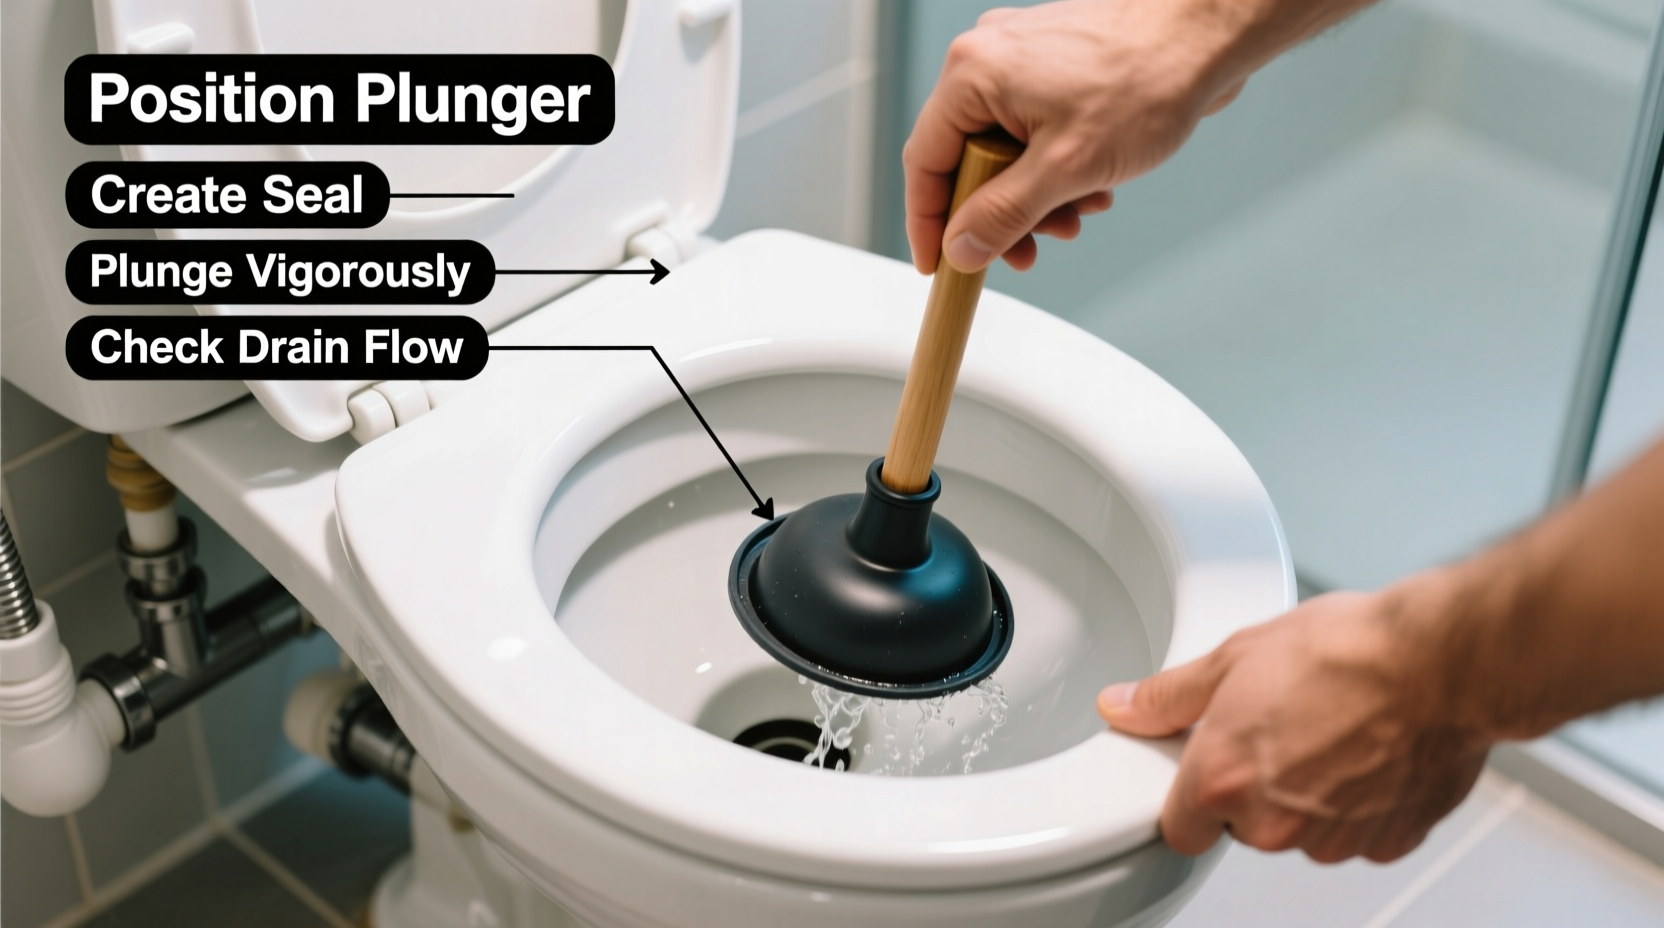
- Create a tight seal. Position the flange directly over the drain hole. Press gently at first to allow the flange to expand into the opening, then press firmly to eliminate air gaps.
- Begin plunging with controlled motion. Push down slowly to compress air, then pull up steadily to generate suction. Avoid jerky movements. Perform 15–20 slow, full strokes.
- Test the drain. Remove the plunger and flush once. If water drains normally, the clog is cleared. If not, repeat the process.
- Sanitize after use. Rinse the plunger thoroughly with hot water and disinfectant. Store it in a clean, dry area.
If after three rounds of plunging the water still doesn’t drain, the clog may be deeper in the system. At this point, consider using a closet auger (toilet snake), but avoid chemical drain cleaners—they can damage pipes and pose health risks.
Common Mistakes That Reduce Plunging Success
- Using too much water: A full bowl increases the risk of splashing and reduces control over pressure buildup.
- Breaking the seal mid-stroke: Lifting the plunger off the surface interrupts pressure cycles. Keep the cup submerged throughout.
- Rushing the motion: Fast pumps create splash without effective pressure. Slow, steady strokes work better.
- Using the wrong plunger: As shown in the table, a flat cup plunger simply won’t perform in a toilet.
- Ignoring hygiene: Failing to clean the plunger afterward breeds bacteria and odors.
Real-World Example: Resolving a Stubborn Blockage
Homeowner Lisa Tran noticed her guest bathroom toilet wasn’t draining after a single flush. The water level stayed high, and attempts to flush again caused minor overflow. She reached for a sink plunger she found under the vanity—cup-style—and tried several rapid plunges. Water splashed onto the floor, but the clog remained.
After cleaning up, she remembered seeing a different plunger in the basement utility closet. Retrieving the flange model, she followed the proper steps: reduced water level, ensured full seal, plunged with slow, deep strokes. By the third set of 20 pumps, she heard a gurgle. Upon flushing, the toilet drained completely.
Lisa later admitted she didn’t know there were different plungers for different fixtures. This experience prompted her to label both tools and store them separately—one upstairs, one downstairs—for future clarity.
Plunging Safety and Maintenance Checklist
To ensure long-term effectiveness and safety, follow this checklist every time you use a plunger:
- ✅ Wear rubber gloves to protect hands from germs.
- ✅ Confirm the plunger is the flange type designed for toilets.
- ✅ Lower water level if the bowl is more than half full.
- ✅ Apply petroleum jelly to the flange occasionally to maintain flexibility.
- ✅ Disinfect the plunger with bleach solution (1:10 bleach-to-water ratio) monthly.
- ✅ Replace the plunger if the rubber becomes cracked, stiff, or torn.
Frequently Asked Questions
Can I use a plunger on a completely full toilet?
No. If the bowl is overflowing or near the rim, bail out excess water first. Attempting to plunge a full bowl will cause uncontrolled spills and reduce plunging efficiency due to limited air compression.
How do I know when a clog is beyond plunging?
If multiple plunging attempts fail and the toilet shows no signs of draining, or if other drains in the house are backing up, the blockage may be in the main sewer line. In such cases, contact a licensed plumber to inspect with a drain camera or auger.
Is it safe to plunge a toilet with children around?
Exercise caution. Keep children and pets out of the bathroom during plunging to avoid accidental splashes. Consider doing it when others are not nearby, and always wash hands thoroughly afterward.
Conclusion: Confidence Starts with the Right Technique
Mastering toilet plumbing begins with a humble tool—the plunger—but hinges on knowledge, patience, and precision. You don’t need expensive chemicals or emergency service calls for most clogs. With the right plunger, a proper seal, and disciplined technique, you can resolve the majority of toilet blockages in under ten minutes. Over time, recognizing early signs of trouble and acting swiftly will save you stress, water damage, and repair costs.


 浙公网安备
33010002000092号
浙公网安备
33010002000092号 浙B2-20120091-4
Comments
No comments yet. Why don't you start the discussion?