
Capturing what’s on your screen is a daily necessity for many—whether you're troubleshooting an error, sharing instructions, or saving a moment from a video call. Windows 11 offers a range of built-in and third-party compatible tools to take screenshots, but knowing how to use them efficiently can save time and improve accuracy. Beyond the basic Print Screen button, there are faster workflows, advanced selection options, and smart organizational habits that turn casual screen capturing into a streamlined process.
This guide dives deep into practical techniques, lesser-known features, and professional-grade strategies to help you master screenshot capture in Windows 11 with precision and speed.
1. Built-In Screenshot Methods and When to Use Them
Windows 11 includes several native ways to capture your screen, each suited to different scenarios. Understanding their differences ensures you pick the right method every time.
- Print Screen (PrtScn): Copies the entire screen to the clipboard. No file is saved automatically unless used with Win + PrtScn.
- Alt + PrtScn: Captures only the active window and copies it to the clipboard.
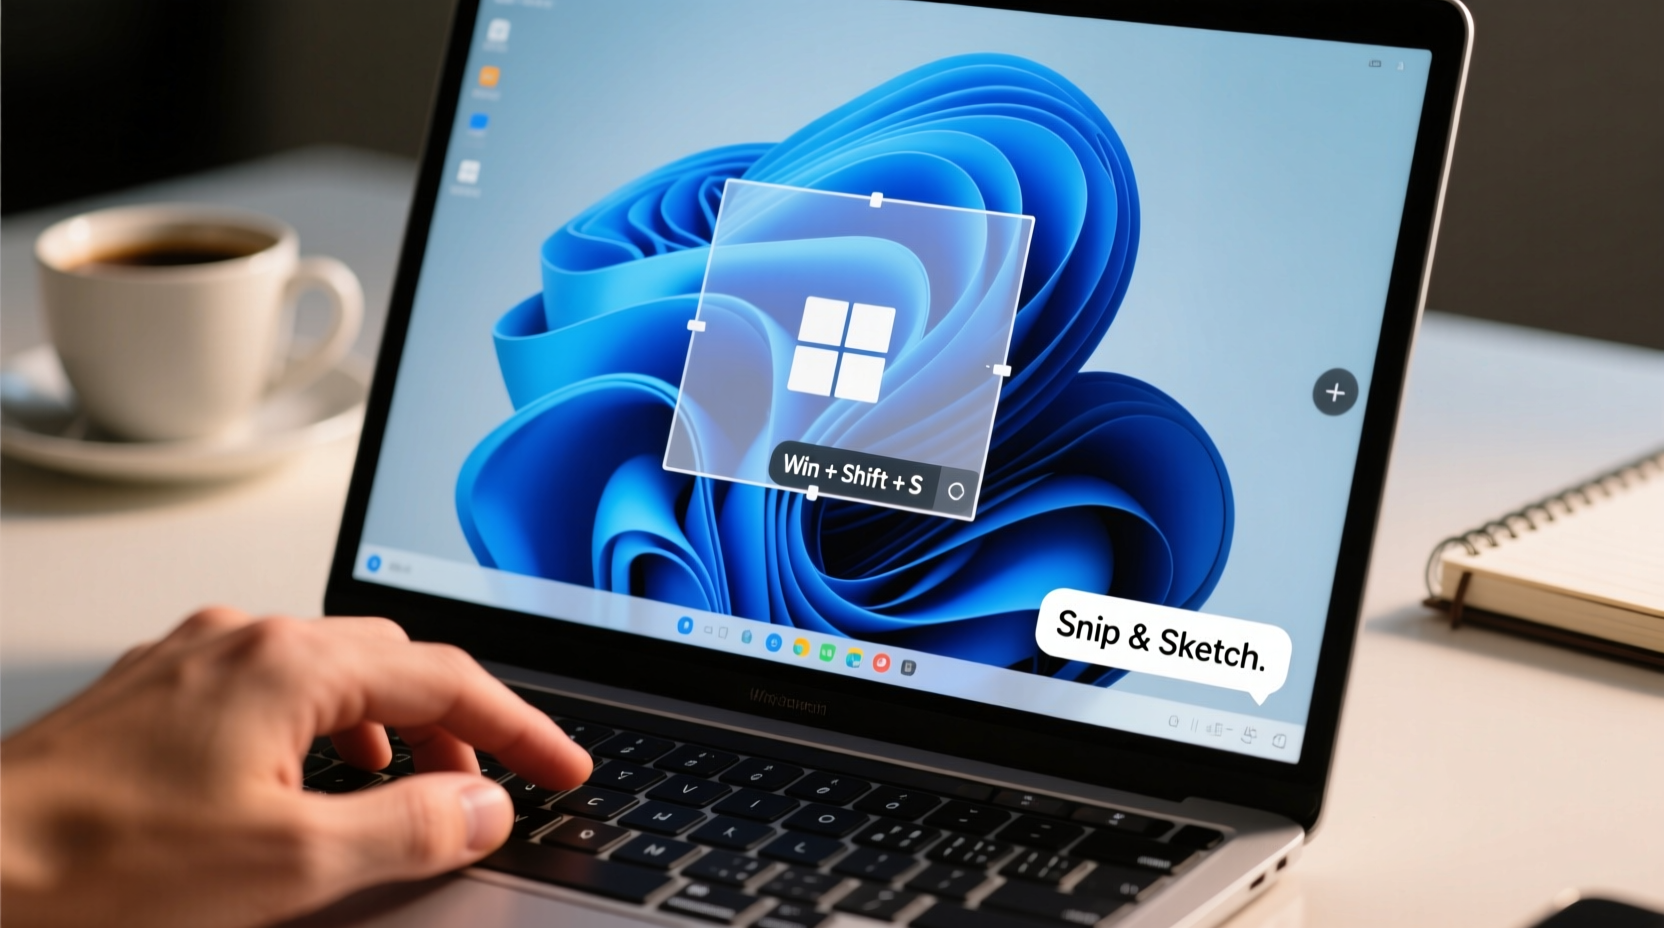
- Win + Shift + S: Opens the Snip & Sketch tool for selective, rectangular, freeform, or window-specific captures.
- Win + PrtScn: Takes a full-screen screenshot and saves it automatically in Screenshots folder under Pictures.
- Game Bar (Win + G): Designed for gamers but useful for capturing app windows, especially UWP apps or fullscreen experiences.
Snip & Sketch: The Power Tool You’re Underusing
The Snip & Sketch utility isn’t just a snipping tool—it's a lightweight editor with delay timers, annotation options, and quick-sharing capabilities. Access it via Win + Shift + S or search “Snip & Sketch” in Start.
Once opened, choose from:
- Rectangular Snip: Drag to select a box area.
- Freeform Snip: Draw any shape around irregular content.
- Window Snip: Click any open window to capture it cleanly.
- Fullscreen Snip: Grab everything visible across all monitors.
2. Optimize Your Workflow with Keyboard Shortcuts and Automation
Speed comes from minimizing mouse movement and clicks. Mastering keyboard combinations lets you capture in seconds without breaking focus.
| Shortcut | Action | Best For |
|---|---|---|
| Win + Shift + S | Open snipping toolbar | Quick partial captures |
| Win + PrtScn | Save full screen instantly | Daily logging or documentation |
| Alt + PrtScn | Capture active window to clipboard | Emails, chats, quick pastes |
| Ctrl + Win + Shift + S | Same as Win + Shift + S (legacy support) | Users with custom keymaps |
| Win + G | Open Game Bar | Capturing games or immersive apps |
“Reducing friction in repetitive tasks like screenshots can reclaim hours over a month.” — David Lin, Productivity Systems Analyst at TechFlow Insights
Create Custom Shortcuts Using PowerToys
Microsoft PowerToys, a free add-on for Windows 11, includes a feature called **Keyboard Manager** that allows remapping keys or creating custom shortcuts. For example, assign Ctrl + 1 to launch Snip & Sketch directly, bypassing multiple keystrokes.
To set this up:
- Download and install Microsoft PowerToys from GitHub.
- Open Keyboard Manager and click “Remap a shortcut.”
- Set Trigger: Ctrl + 1 | Action: Launch Application → snipaste.exe or shell:AppsFolder\\Microsoft.ScreenSketch_...
3. Organize and Edit Screenshots Like a Pro
Taking a screenshot is only half the job. What separates amateurs from professionals is how they store, edit, and share them.
Naming and Folder Strategy
By default, Windows saves screenshots in Pictures > Screenshots. But if you take dozens daily, organization becomes critical. Create dated folders (e.g., “Support_Screenshots_2024-04-10”) or project-based directories. Consider syncing these to cloud storage with version history.
Edit Before Sharing
Raw screenshots often contain sensitive data or unnecessary clutter. Always review before sending. Use the built-in editor in Snip & Sketch to:
- Blur faces, emails, or passwords.
- Add arrows or text highlights.
- Crop tightly around the subject.
- Use the ruler or protractor for design feedback.
4. Real-World Example: Resolving a Software Bug Quickly
Sarah, a technical support specialist, received a report that a client couldn’t log into their CRM dashboard. Instead of asking vague questions, she guided the user through taking a targeted screenshot.
She instructed: “Press Win + Shift + S, then drag around the login box and error message.” Within seconds, she received a clean image showing a ‘Certificate Expired’ warning hidden beneath a collapsed banner.
With visual proof, Sarah escalated to security teams with context. The issue was resolved in under 30 minutes. Without the precise capture, diagnosis could have taken hours of back-and-forth.
This case shows how fast, accurate screenshots reduce miscommunication and accelerate problem-solving in remote work environments.
5. Frequently Asked Questions
Where does Windows 11 save screenshots by default?
When using Win + PrtScn, screenshots are saved in C:\\Users\\[YourName]\\Pictures\\Screenshots. Manual clipboard captures (like PrtScn alone) aren’t saved until pasted into an app like Paint or Word.
Can I change the default screenshot format or quality?
Windows uses PNG by default for lossless quality. While you can't change this natively, third-party tools like Snagit or Greenshot allow JPG, GIF, PDF exports, and compression settings. In-built editing apps let you convert formats after capture.
Why doesn’t my Print Screen key work on some laptops?
Many laptops require you to press Fn + PrtScn instead due to function key layering. Check your manufacturer’s manual. Alternatively, try Win + Shift + S—it works universally regardless of hardware quirks.
Final Checklist: Master Your Screenshot Game
Follow this checklist daily to ensure consistent, high-quality captures:
- ✅ Know which shortcut matches your current need (full screen, window, region).
- ✅ Use delay timer when capturing dropdown menus or tooltips.
- ✅ Annotate or blur sensitive info before sharing.
- ✅ Save screenshots in organized folders with meaningful names.
- ✅ Use PowerToys or AutoHotkey to create custom shortcuts for frequent actions.
- ✅ Test Game Bar for capturing fullscreen applications or videos.
- ✅ Keep Snip & Sketch pinned to taskbar for one-click access.
Take Control of Your Digital Documentation
Screenshots are more than digital snapshots—they’re tools for communication, memory, and efficiency. In Windows 11, the infrastructure is already in place to make capturing seamless. The difference between slow, messy captures and lightning-fast precision lies in deliberate practice and smart configuration.
Start applying these methods today: customize one shortcut, rename your next five screenshots meaningfully, or try freeform snipping for complex UI elements. Small changes compound into significant productivity gains over time.


 浙公网安备
33010002000092号
浙公网安备
33010002000092号 浙B2-20120091-4
Comments
No comments yet. Why don't you start the discussion?