
Digital clocks are everywhere—on microwaves, alarm systems, smartphones, ovens, and even wall units. While they bring convenience, their settings can sometimes feel confusing, especially when it comes to adjusting the time format. Whether you prefer 12-hour or 24-hour (military) time, knowing how to switch between them ensures your devices align with your daily rhythm. This guide breaks down the process clearly, offering practical steps for various common devices, troubleshooting tips, and insights that make managing your digital clocks effortless.
Why Time Format Matters in Daily Life
The way time is displayed affects more than just preference—it influences clarity, coordination, and even safety. A 24-hour format eliminates ambiguity between AM and PM, which is particularly useful in professional environments like healthcare, transportation, and emergency services. Conversely, the 12-hour format remains intuitive for many home users due to its familiarity.
Mismatched time formats across devices can lead to missed appointments, confusion during travel, or errors in scheduling. Ensuring consistency across your digital ecosystem—from bedside alarms to kitchen appliances—reduces mental load and supports better time management.
“Standardizing time display across personal devices reduces cognitive friction and improves punctuality.” — Dr. Alan Reeves, Human Factors & Ergonomics Researcher
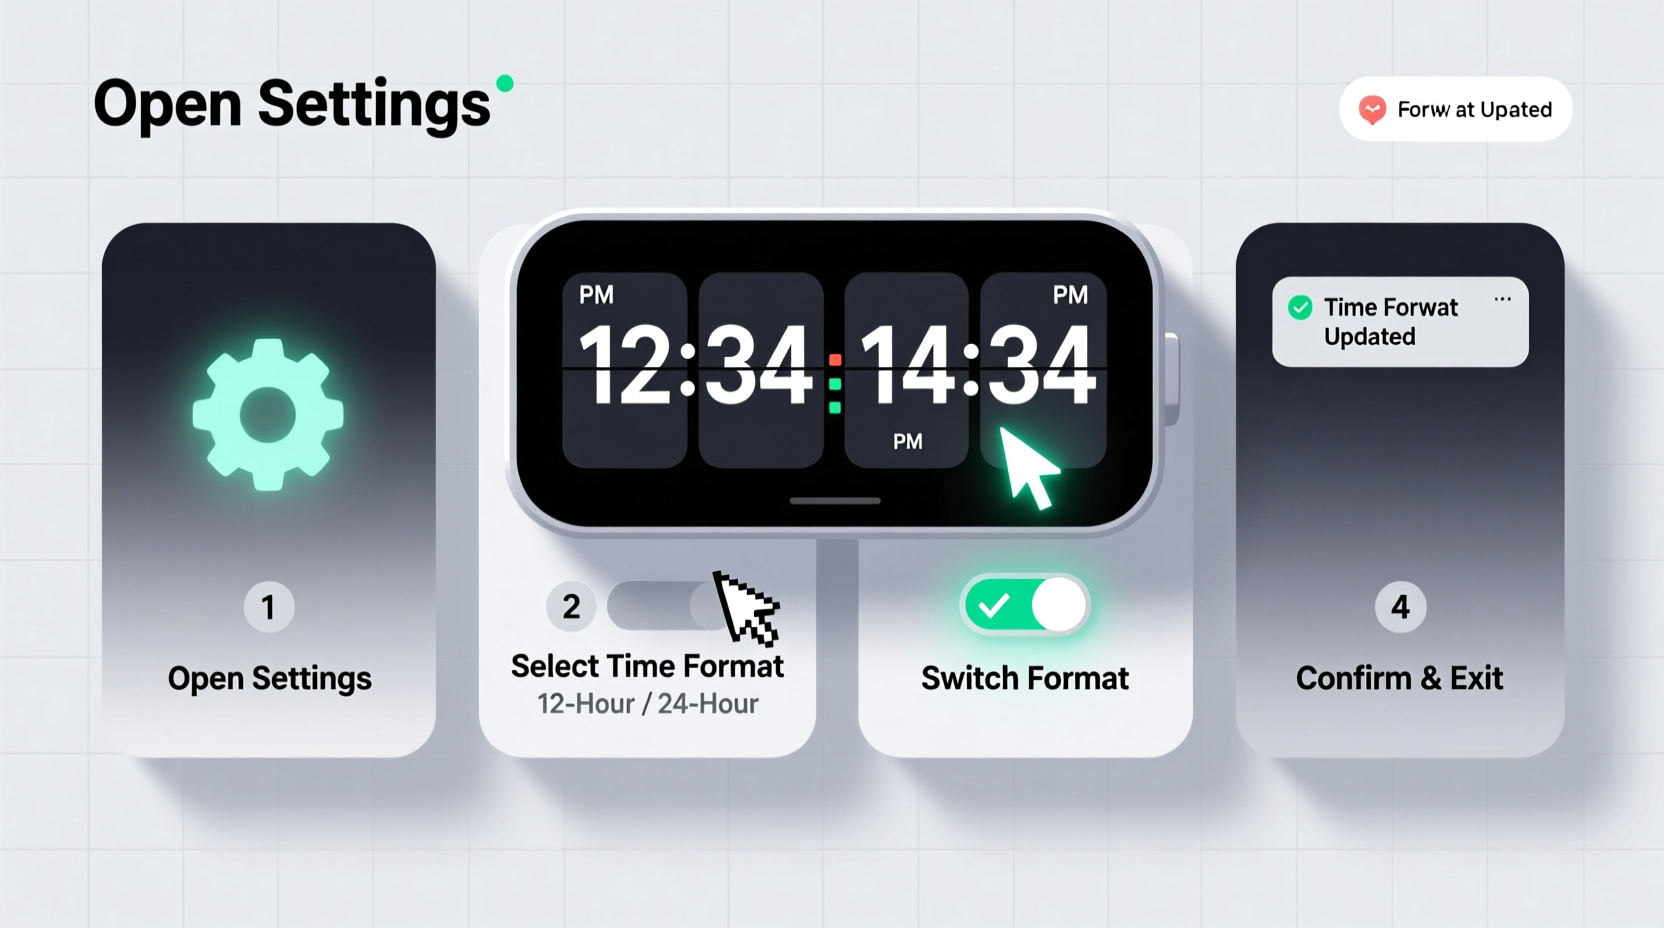
Step-by-Step Guide to Changing Time Format
While interfaces vary, most digital clocks follow a similar logic for accessing and modifying settings. Below is a universal six-step framework applicable to the majority of devices:
- Locate the 'Settings' or 'Clock' Button: Look for labeled buttons such as “Clock,” “Mode,” “Setup,” or “Menu.” On touchscreens, tap the clock display or navigate through system settings.
- Enter Setup Mode: Press and hold the button if required. Some devices need a long press (3–5 seconds) to activate configuration mode.
- Navigate to Time Format Option: Use “+”/“–” or “Up”/“Down” buttons to scroll through menu options until you reach “Time Format,” “12H/24H,” or similar.
- Select Your Preferred Format: Toggle between 12-hour and 24-hour displays. The screen may show \"1:00 PM\" versus \"13:00\" as examples.
- Confirm and Save: Press “Set,” “OK,” or “Enter” to lock in your selection. Some models automatically save after a few seconds of inactivity.
- Exit Settings Mode: Press “Cancel,” “Back,” or wait for auto-exit. Verify the new format is active by observing the main display.
Device-Specific Instructions
Different devices have unique control schemes. Here’s how to adjust the time format on some common types:
Microwave Oven
- Press the “Clock” button once.
- Hold it for 3 seconds until the display flashes.
- Enter current time using number pad.
- Press “Clock” again—some models cycle through 12H and 24H automatically; others require pressing “Option” or “Function” to toggle format.
Alarm Clock (Basic Digital)
- Press and hold “Mode” or “Set” until the hour starts blinking.
- Press “Adjust” or “+” repeatedly until the format changes (look for AM/PM indicator disappearing).
- Release and wait for the clock to return to normal display.
Smartphone (Android & iOS)
- Open Settings.
- Tap General > Date & Time (iOS) or System > Date & Time (Android).
- Toggle off “Set Automatically” if you want manual control.
- Enable “24-Hour Time” for military format; disable for 12-hour.
- Changes apply instantly across all apps.
Wall-Mounted Digital Clocks
Many use a recessed “Setup” button accessed with a paperclip. Press and release, then use “+” and “–” to navigate menus. Look for “Hr” or “Time Mode” to switch formats.
Common Pitfalls and How to Avoid Them
Even simple tasks can go wrong without proper attention. The table below outlines frequent issues and solutions:
| Issue | Possible Cause | Solution |
|---|---|---|
| Clock resets after power outage | No backup battery | Install a CR2032 coin cell or consider upgrading to a model with memory retention |
| Can't find time format option | Hidden in sub-menu or not supported | Consult user manual; check if firmware update adds feature |
| Format reverts after restart | Setting not saved properly | Ensure you exit via correct method—do not unplug mid-setup |
| AM/PM indicator still visible | Device locked in 12-hour mode | Some budget models don’t support 24-hour format—verify specs before purchase |
Real-Life Scenario: Traveler Adjusts Home and Office Clocks
Maya, a flight attendant based in New York, frequently travels to Europe where 24-hour time is standard. After returning from a two-week rotation, she realized her kitchen microwave and bedroom alarm were still set to 24-hour mode, causing confusion during early mornings. She spent ten minutes resetting both devices using the methods described above. For the microwave, she held the “Clock” button, entered the correct time, and cycled through options until “12H” appeared. Her alarm clock required a long press of the “Set” button followed by rapid taps on “Adjust” to toggle the format. Within minutes, both displayed familiar AM/PM notation. This small adjustment restored routine and reduced morning stress.
Checklist: Mastering Your Digital Clock Settings
Use this quick-reference checklist whenever adjusting time format across devices:
- ✅ Identify the model and locate the control panel
- ✅ Find the Settings, Clock, or Mode button
- ✅ Enter setup mode (press and hold if necessary)
- ✅ Scroll to “Time Format,” “12H/24H,” or “Display Mode”
- ✅ Select preferred format (12-hour or 24-hour)
- ✅ Confirm and exit properly
- ✅ Verify the change on the main screen
- ✅ Document settings for future reference (especially useful for shared spaces)
Frequently Asked Questions
Can all digital clocks change time format?
No. While most modern clocks offer a 12H/24H toggle, basic or older models may be fixed in one format. Check product specifications or user manuals to confirm capability.
Why does my phone switch back to automatic time settings?
If “Set Automatically” is enabled, your phone syncs with network time servers, which can override manual changes. Disable this setting temporarily to adjust the format, but re-enable it later for accuracy unless you have a specific reason to keep it off.
Is 24-hour time more accurate than 12-hour?
Both formats are equally accurate. However, 24-hour time prevents misinterpretation—e.g., 14:00 clearly means 2:00 PM, while “2:00” without AM/PM could cause scheduling errors.
Take Control of Your Time Display Today
Changing the time format on your digital clock isn’t just about preference—it’s about creating an environment that matches how you think, work, and live. With clear steps, awareness of device differences, and a few smart habits, you can eliminate confusion and streamline your daily interactions with technology. Don’t let a blinking colon or missing AM/PM indicator slow you down. Apply these techniques today, and enjoy a more consistent, intuitive experience across every digital clock in your life.


 浙公网安备
33010002000092号
浙公网安备
33010002000092号 浙B2-20120091-4
Comments
No comments yet. Why don't you start the discussion?