
G-Shock watches are renowned for their durability, precision, and functionality. Whether you're using one for outdoor adventures, fitness tracking, or daily wear, knowing how to adjust the time correctly is essential. Despite their rugged design, G-Shocks feature intuitive controls — once you understand them. Many users struggle not because the process is overly complex, but because the buttons are small and the interface isn’t immediately obvious.
This guide walks you through every step of adjusting the time on your G-Shock, regardless of model. From identifying your watch type to navigating modes and avoiding common mistakes, you’ll gain full control over your device’s settings. With clear instructions, practical tips, and real-world insights, you'll be setting the time like a pro in minutes.
Understanding Your G-Shock Model and Button Layout
Before making any adjustments, it's crucial to recognize which G-Shock model you own. While most share a similar four-button layout, the exact function of each button can vary slightly between analog-digital hybrids, digital-only, and newer Bluetooth-connected versions.
Standard digital G-Shocks (like the DW-5600, GA-2100, or G-7900) typically have:
- A (Upper Left): Mode – cycles through display functions (time, alarm, stopwatch, etc.)
- B (Lower Left): Adjust – enters setting mode
- C (Upper Right): Illumination – lights up the display
- D (Lower Right): Start/Stop or Record – used during stopwatch; confirms settings when in setup
Analog-digital models (such as the GW-6900 or GMW-B5000) use similar buttons but require extra steps due to moving hands. These will automatically reset hand position after time adjustment.
Step-by-Step Guide to Changing the Time
Follow these universal steps for most standard digital G-Shock watches. This sequence works on popular models including the F-91W-inspired successors, Mudmaster, Gulfmaster, and others in the core lineup.
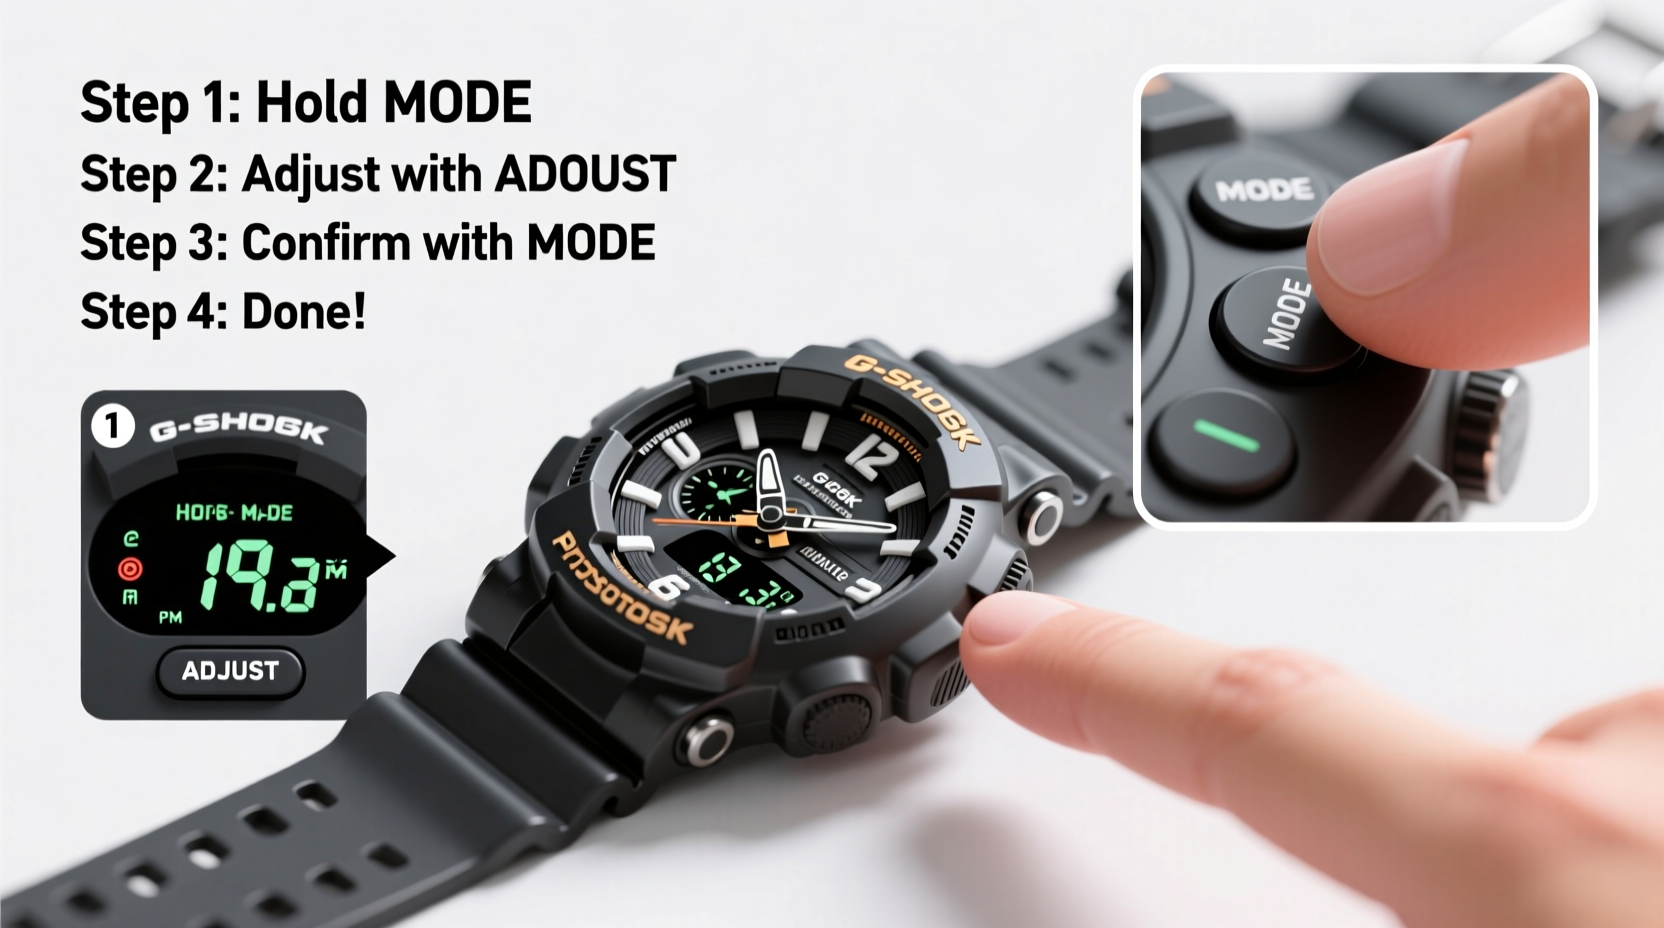
- Enter Timekeeping Mode: Press the Mode button (A) until the main time screen appears. You should see hours, minutes, seconds, date, and day.
- Initiate Time Adjustment: Press and hold the Adjust button (B) for about two seconds. The seconds will start blinking, indicating you’ve entered edit mode.
- Set Seconds: Use the Change button (D) to advance the seconds. Press once to set to “00” (recommended for accuracy).
- Move to Minutes: Press Adjust (B) again. Now the minutes blink.
- Adjust Minutes: Press Change (D) to increase the minute value. Hold it down to scroll quickly.
- Set Hours: Press Adjust (B) once more. The hour digits blink. Use Change (D) to set the correct hour. Note: Some models switch between 12H and 24H format automatically based on your initial setting.
- Adjust Date and Day: Continue pressing Adjust (B) to cycle through month, date, and day. Modify each using Change (D).
- Confirm and Exit: Once all values are correct, press Adjust (B) until the display stops blinking. The watch saves settings automatically.
“Time accuracy starts with proper calibration. Even durable watches need user input to stay synchronized with daily life.” — Hiroshi Nakamura, Casio Product Trainer
Tips for Avoiding Common Mistakes
Even experienced users occasionally make errors when adjusting their G-Shock. Here’s what to avoid:
| Mistake | Why It’s a Problem | Solution |
|---|---|---|
| Pressing buttons too quickly | Causes missed inputs or unintended mode changes | Wait a full second between presses; be deliberate |
| Not resetting seconds to 00 | Leads to drift over time and inaccurate logs | Always zero out seconds during setup |
| Exiting without confirming | Settings may not save properly | Let the display stop blinking naturally before using the watch |
| Confusing 12-hour vs. 24-hour format | Can lead to AM/PM confusion | Set hour just past noon or midnight to verify format |
Real-World Example: Traveler Adjusts Time Across Time Zones
Maya, a frequent traveler from Chicago, lands in Tokyo after an overnight flight. Her G-Shock (model GA-2100) still shows Central Time, causing confusion when scheduling meetings.
Instead of guessing offsets, she follows the standard procedure:
- She presses Mode until the time appears.
- Holds Adjust until seconds blink.
- Sets seconds to 00, then scrolls minutes and hours forward by 14 hours (accounting for JST).
- Updates the date manually since it’s now the next day.
Within 90 seconds, her watch reflects local time accurately. She also switches her Home City setting later via the manual to enable automatic daylight saving adjustments on future trips.
This simple process saved her from relying solely on her phone, reinforcing why mastering basic G-Shock functions enhances reliability in disconnected environments.
Checklist: Quick Reference for Setting G-Shock Time
Keep this checklist handy for future reference:
- ✅ Ensure the watch is in Timekeeping Mode (not stopwatch or alarm)
- ✅ Press and hold Adjust (B) until seconds blink
- ✅ Set seconds to “00” using Change (D)
- ✅ Press Adjust (B) to move to minutes → set with Change (D)
- ✅ Press Adjust (B) to hours → adjust accordingly
- ✅ Cycle through date and day, correcting as needed
- ✅ Wait for display to stop blinking — do not press any buttons
- ✅ Verify time against a trusted source (atomic clock, smartphone)
Frequently Asked Questions
Can I change the time format from 12-hour to 24-hour?
Yes. When setting the hour, continue advancing past 12 PM. If the display jumps to 13, 14, 15, etc., you’re in 24-hour mode. To revert, decrease the hour until it switches back to 12-hour (AM/PM) format. The method varies slightly by model, so consult your manual if uncertain.
My G-Shock isn’t responding when I press the buttons. What should I do?
First, ensure the battery has sufficient charge — weak batteries cause sluggish response. Try pressing each button firmly for 2–3 seconds. If unresponsive, gently clean around the buttons with a dry toothbrush to remove debris. In rare cases, extreme temperature exposure may temporarily affect performance; allow the watch to return to room temperature before retrying.
Do all G-Shock models adjust time the same way?
Most digital models follow the same fundamental steps, but analog-digital hybrids (like the MRG series) require additional hand alignment steps. Bluetooth-enabled models (e.g., GB-6900) can sync time automatically via smartphone apps, reducing manual input. Always confirm your specific model’s procedure in the official Casio manual if available.
Final Thoughts: Take Control of Your G-Shock
Your G-Shock is more than a timepiece — it’s a tool built for resilience and precision. Taking a few moments to learn its functions transforms it from a passive accessory into an active partner in your daily routine. Mastering time adjustment is the first step toward unlocking alarms, countdown timers, world clocks, and other advanced features.
Don’t wait for a missed appointment or travel mix-up to realize the importance of accurate timekeeping. Practice the steps outlined here today, even if just to reset and reconfirm your current settings. The confidence of knowing your watch is always in sync — no matter where you are — is worth the effort.


 浙公网安备
33010002000092号
浙公网安备
33010002000092号 浙B2-20120091-4
Comments
No comments yet. Why don't you start the discussion?