
For mechanical keyboard enthusiasts, the tactile feedback and audible click are part of the appeal. But for others—especially those working in shared spaces or late-night typists—noise can be a problem. Sound dampening has become a popular way to reduce typing noise without sacrificing performance. Two of the most common methods are O-rings and foam modding. While both aim to quiet down your keyboard, they work differently, offer varying results, and come with distinct trade-offs. This article compares O-rings and foam modding in depth, focusing on which method delivers superior noise reduction and overall user experience.
How Mechanical Keyboard Noise Works
Mechanical keyboards produce sound from multiple sources: the switch actuation (click or clack), the keycap hitting the top housing, and the bottom-out impact when the stem hits the PCB or plate. Each contributes to the overall acoustic profile. Dampening techniques target these points to minimize resonance and sharp transients. The goal isn’t always complete silence—it’s often about achieving a more muted, pleasant typing sound that doesn’t disturb others.
Noise reduction strategies fall into two categories: internal modifications and external accessories. O-rings are an external add-on applied to individual switches, while foam modding involves placing damping material inside the keyboard case. Understanding how each affects sound requires looking at their placement, materials, and interaction with the keyboard’s physical structure.
O-Rings: Function, Installation, and Acoustic Impact
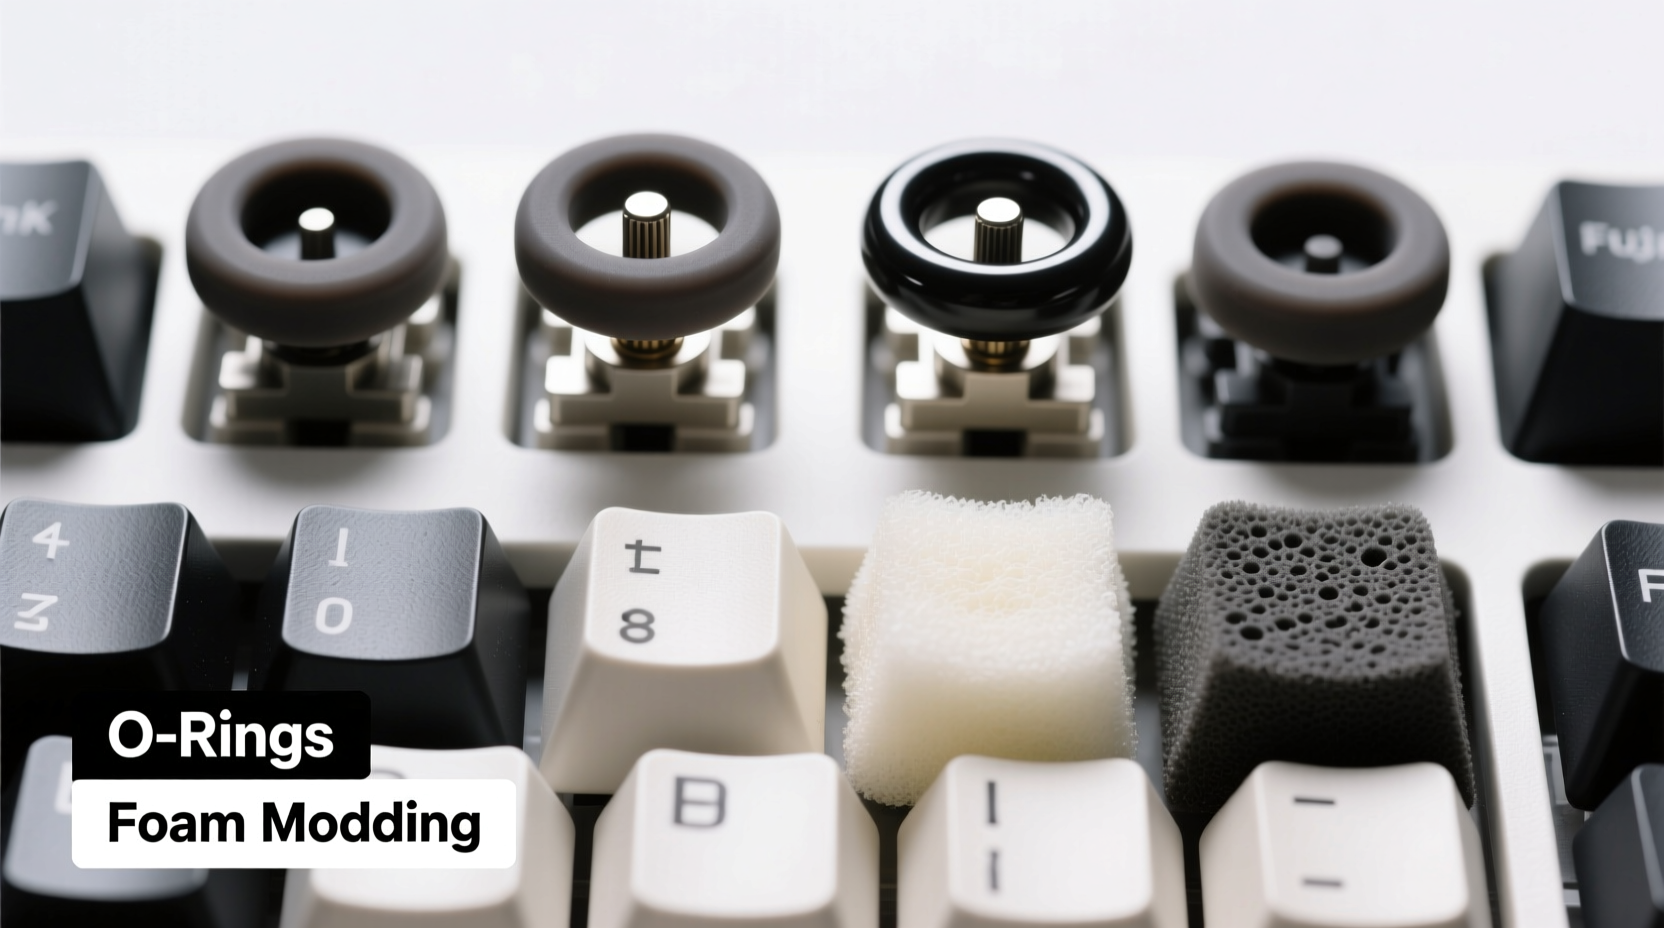
O-rings are small silicone or rubber rings that fit around mechanical switch stems. They sit between the keycap and the switch housing, acting as a cushion during keystrokes. When you press a key, the O-ring absorbs some of the energy from the downward motion, reducing the sound of the keycap colliding with the switch housing and slightly softening bottom-out.
Installation is straightforward: remove the keycap, slide the O-ring onto the switch stem, then reattach the keycap. Most O-rings come in different thicknesses—typically 0.25mm, 0.5mm, or 1.0mm—allowing users to fine-tune the level of dampening. Thicker rings provide more cushioning but may slightly alter key travel and tactile feel.
The primary benefit of O-rings is convenience. They’re non-invasive, reversible, and don’t require disassembling the keyboard. However, their dampening effect is limited. Because they only address the top-end impact (keycap-to-housing), they do little to reduce the deeper, hollow \"ping\" or echo caused by internal resonance within the case. In many cases, users report a slight change in timbre rather than a substantial drop in volume.
Foam Modding: Inside Dampening for Deeper Noise Reduction
Foam modding involves placing closed-cell acoustic foam inside the keyboard case, typically between the PCB/plate and the case walls. The foam absorbs internal vibrations and prevents sound waves from bouncing around the hollow cavity—a major contributor to the \"echo\" or \"ping\" often heard in plastic cases.
This mod requires disassembling the keyboard: removing the keycaps, switches (if hot-swappable), and sometimes the plate. Foam strips are cut to size and placed along the inner edges of the case, under the PCB, or around screw posts. High-density foams like Sorbothane or specialized keyboard damping foams (e.g., Poron, EVA) are preferred for their durability and sound absorption properties.
Unlike O-rings, foam modding targets the root cause of resonance. By eliminating air gaps and dampening structural vibrations, it produces a noticeably denser, more muted sound profile. Many users describe the result as “thockier” or “deeper,” with reduced high-frequency ringing. Volume reduction is typically more significant than with O-rings alone.
“Foam modding changes the entire acoustic signature of a keyboard. It’s not just quieter—it sounds more premium.” — Jordan Lee, Mechanical Keyboard Designer at Typewise Labs
Comparative Analysis: O-Rings vs Foam Modding
| Feature | O-Rings | Foam Modding |
|---|---|---|
| Noise Reduction Level | Moderate (top-end impact) | High (resonance and echo) |
| Installation Difficulty | Easy (no tools needed) | Moderate to Hard (requires disassembly) |
| Reversibility | Fully reversible | Mostly reversible |
| Impact on Key Feel | Slight (softer top-out) | Negligible |
| Cost | $5–$10 | $10–$20 (foam + tools) |
| Durability | May degrade over time | Long-lasting if properly installed |
| Best For | Quick fix, temporary use | Permanent, high-quality dampening |
As the table shows, foam modding outperforms O-rings in nearly every category related to sound quality and long-term effectiveness. While O-rings are easier to install, their dampening is superficial compared to the comprehensive resonance control offered by internal foam.
Can You Combine Both Methods?
Yes—and many enthusiasts do. Combining O-rings with foam modding creates a layered dampening effect. Foam handles internal echo, while O-rings soften the top-end impact. The result is one of the quietest possible mechanical keyboard setups without switching to ultra-quiet switches like Gateron Silent Reds or using external desk mats.
However, pairing both methods may overly dampen the typing experience for some users. The combined effect can make keys feel mushy or less responsive, especially with thick O-rings. A better approach is to use thin O-rings (0.25mm) with high-quality foam for balanced sound and feel.
Step-by-Step Guide to Foam Modding Your Keyboard
If you're ready to try foam modding, follow this proven process:
- Gather Materials: Closed-cell foam (1–3mm thickness), scissors or craft knife, tweezers, rubbing alcohol, and lint-free cloth.
- Disassemble the Keyboard: Remove keycaps, then switches if hot-swappable. Unscrew the case and separate the layers (case, PCB, plate).
- Clean the Interior: Wipe down all surfaces with alcohol to remove dust and oils that could affect foam adhesion.
- Cut the Foam: Measure and cut foam strips to fit along the inner walls, screw post areas, and under the PCB. Avoid covering mounting holes or stabilizer cutouts.
- Install the Foam: Place strips snugly against the case walls. For under-PCB foam, ensure even thickness to avoid warping.
- Reassemble Carefully: Reinstall the PCB, plate, and switches. Screw the case back together gently to avoid crushing foam.
- Test and Adjust: Type across all keys. If any feel sticky or inconsistent, check foam alignment and compression.
Real-World Example: Office Worker Reduces Keyboard Noise
Mark, a software developer working from home, used a standard tenkeyless mechanical keyboard with Blue switches. His wife complained about the constant clicking during calls and late-night coding sessions. He first tried O-rings, which softened the top-end noise slightly but didn’t eliminate the loud, echoing “clack” she found disruptive.
After researching foam modding, Mark purchased a foam modding kit and spent an hour disassembling and lining his keyboard’s case. Post-mod, the difference was immediate. The board sounded deeper and quieter, with no hollow resonance. His wife noted it now sounded like a laptop keyboard. Encouraged, he added thin O-rings for extra refinement. The final setup reduced perceived noise by over 60%, making cohabitation much smoother.
Frequently Asked Questions
Are O-rings bad for my switches?
No, O-rings are generally safe if made from quality silicone and installed correctly. Poor-quality rubber rings may degrade and leave residue, but reputable brands use inert materials. Avoid overly thick rings that prevent full key travel, as this can lead to switch wear over time.
Does foam modding void my warranty?
In most cases, yes. Opening the case usually breaks tamper-proof seals or voids manufacturer warranties. Check your keyboard’s policy before proceeding. Some brands, like Drop and Keychron, are more lenient toward user modifications.
Which method is quieter: O-rings or foam modding?
Foam modding is significantly quieter. It reduces the core source of noise—internal resonance—while O-rings only dampen surface-level impacts. For maximum quietness, combine both, but prioritize foam for real acoustic improvement.
Expert Tips for Optimal Sound Dampening
- Use PTFE lubricant on switch stems if combining O-rings to maintain smooth travel.
- Choose dense, non-compressible foam—cheap craft foam collapses quickly and loses effectiveness.
- Consider case material: aluminum cases naturally dampen sound better than plastic, reducing the need for extensive mods.
- Add a silicone o-ring gasket (if compatible) for even greater vibration isolation in gasket-mounted boards.
- Pair dampening mods with sound-absorbing desk pads for cumulative noise reduction.
Conclusion: Choosing the Right Dampening Strategy
When it comes to mechanical keyboard sound dampening, foam modding is objectively quieter than O-rings. It addresses the fundamental issue of internal resonance, producing a richer, more contained sound. O-rings offer a quick, non-permanent fix but deliver only marginal volume reduction and can alter key feel.
For casual users seeking minor adjustments, O-rings are a low-risk option. But for serious typists, streamers, or anyone in shared environments, foam modding provides a lasting, professional-grade solution. The initial effort pays off in dramatically improved acoustics and typing satisfaction.


 浙公网安备
33010002000092号
浙公网安备
33010002000092号 浙B2-20120091-4
Comments
No comments yet. Why don't you start the discussion?