
A dirty microwave isn’t just unsightly—it can harbor bacteria, cause lingering odors, and even affect the efficiency of your appliance. Over time, splatters from reheated meals build up into stubborn grime that seems impossible to remove without scrubbing for ages. But what if you could deep clean your microwave thoroughly in less than 10 minutes? With the right technique, you can achieve a spotless interior using simple ingredients already in your kitchen. This guide reveals a proven, no-scrub method backed by cleaning experts and real-world results.
The Steam-Cleaning Principle: Why It Works
The secret to fast, effective microwave cleaning lies in steam. When water is heated to boiling point inside a confined space like a microwave, it produces vapor that softens dried-on food particles, grease, and residue. This natural process loosens grime so it wipes away effortlessly—no harsh chemicals or elbow grease required.
Steam penetrates every crevice, including hard-to-reach corners and the ceiling of the microwave where splatters often accumulate. The heat also helps neutralize odors caused by spoiled food or strong-smelling dishes like fish or garlic. Unlike traditional wiping methods that only address surface stains, steam treatment cleans at a deeper level while being gentle on the microwave’s interior coating.
“Steam is one of the most underrated tools in home cleaning. It sanitizes, lifts debris, and reduces cleaning time dramatically.” — Dr. Lena Patel, Environmental Health Scientist
Step-by-Step Guide: Deep Clean Your Microwave in Under 10 Minutes
This method uses only two common kitchen staples and takes fewer than ten minutes from start to finish. Follow these steps precisely for optimal results.
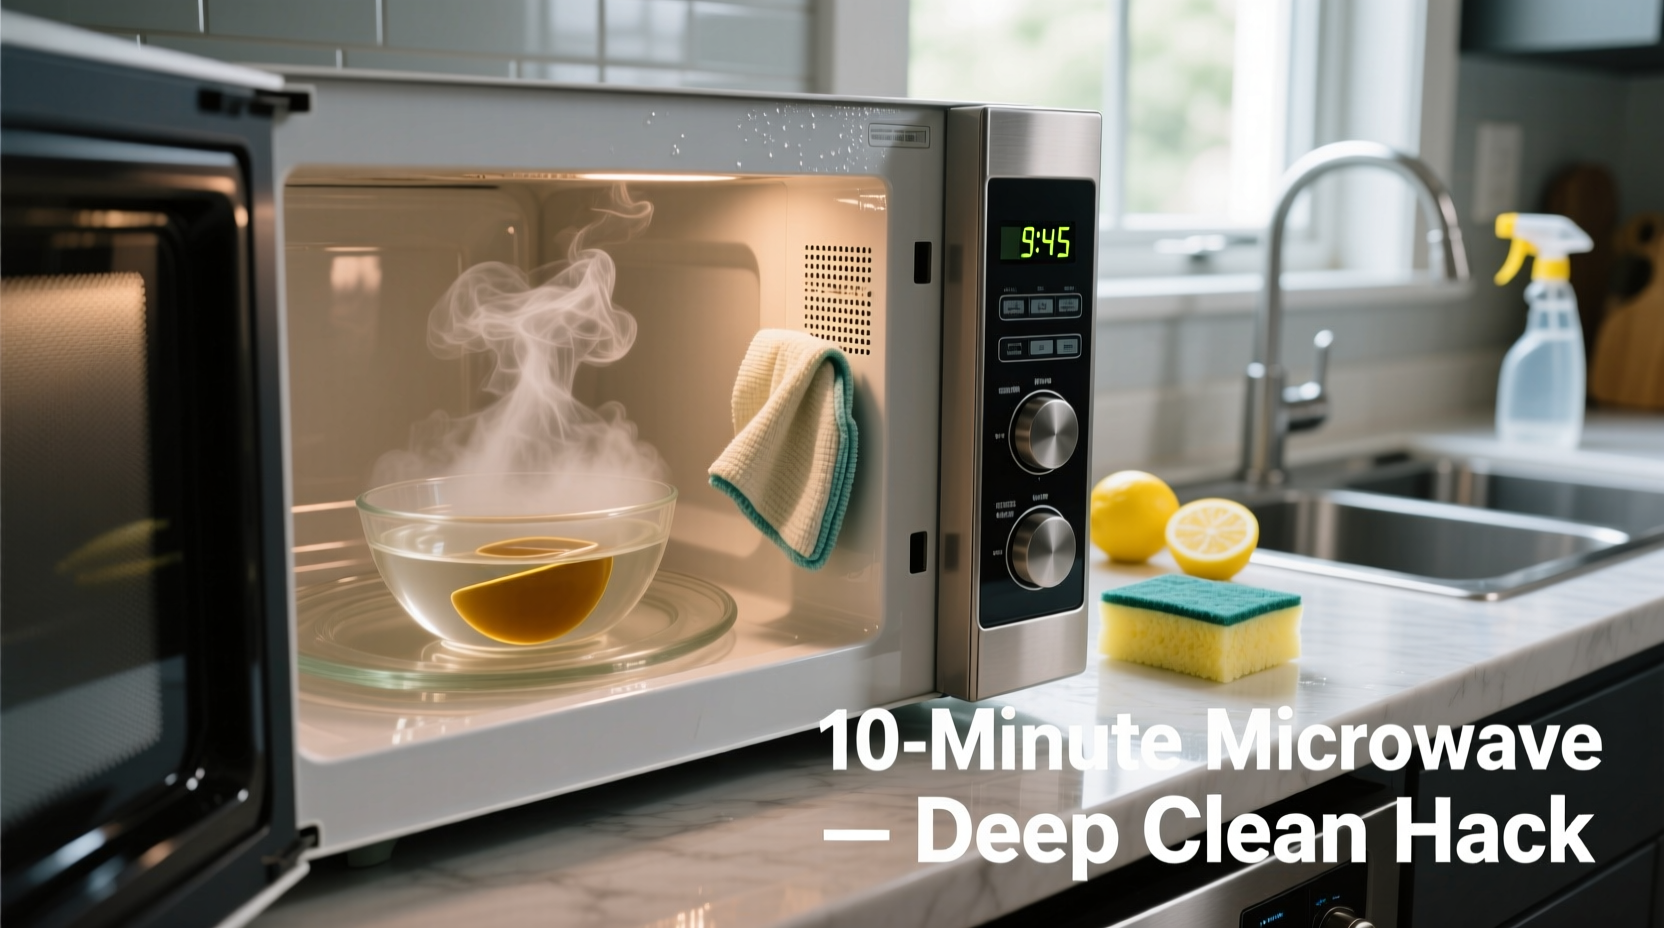
- Prepare the Cleaning Solution: Fill a microwave-safe bowl with 1 cup (240 ml) of water. Add 2 tablespoons of white vinegar or the juice of half a lemon. Both ingredients enhance steam effectiveness—vinegar cuts through grease and deodorizes, while lemon adds a fresh scent and mild acidity.
- Heat the Mixture: Place the bowl in the center of the microwave. Close the door and set the microwave to high power for 5 minutes. As the liquid heats, steam will begin to condense on the interior walls, ceiling, and turntable.
- Let It Sit: Once the timer stops, do not open the door immediately. Allow the steam to continue working for 2–3 additional minutes. This dwell time ensures maximum softening of stuck-on messes.
- Wipe Down the Interior: Carefully remove the bowl (it will be hot). Using a microfiber cloth or sponge, wipe all interior surfaces—including the door, seal, ceiling, and sides. Most grime should come off with minimal pressure. For tougher spots, hold the cloth against the area for a few seconds to let residual steam do the work.
- Clean the Turntable: Remove the glass turntable and wash it separately with warm, soapy water. Dry thoroughly before replacing.
- Final Touches: Wipe down the exterior, including the control panel and handle, with a damp cloth. Avoid spraying liquid directly onto electronic components.
Comparison Table: Common Microwave Cleaning Methods
Not all cleaning hacks are created equal. Here's how the steam method stacks up against other popular techniques.
| Method | Time Required | Effort Level | Effectiveness | Safety Notes |
|---|---|---|---|---|
| Steam + Vinegar/Lemon | 8–10 minutes | Low | Excellent | Safe for all interiors; non-toxic |
| Commercial Spray Cleaners | 15–20 minutes | Medium | Good | May leave chemical residue; avoid near food zones |
| Baking Soda Paste | 20+ minutes | High | Fair to Good | Can scratch plastic coatings if scrubbed aggressively |
| Dry Wiping Only | 5 minutes | Very Low | Poor | Spreads germs; doesn’t sanitize |
| Steam with Plain Water | 10 minutes | Low | Fair | Less effective on greasy residues |
Real Example: From Sticky Mess to Spotless in 9 Minutes
Jamie, a busy parent of two in Portland, Oregon, had avoided cleaning her microwave for over three months. Between school lunches and quick dinners, the interior was covered in melted cheese splatter, sauce drips, and an unpleasant sour smell. She tried wiping it once but gave up after five minutes of scrubbing with little progress.
After reading about the steam method, she decided to try it during her coffee break. She combined water and lemon juice in a bowl, microwaved it for five minutes, waited three more, then wiped the inside with a dishcloth. “I couldn’t believe it,” she said. “All the gunk came off in one pass. Even the ceiling looked brand new. Total time was nine minutes, including washing the turntable.”
Now, Jamie cleans her microwave weekly using this method, preventing buildup before it becomes overwhelming. Her advice? “Don’t wait until it looks gross. Ten minutes now saves you an hour later.”
Checklist: Quick Microwave Deep-Clean Routine
Use this checklist each time you perform a deep clean to ensure consistent results:
- ☐ Gather supplies: microwave-safe bowl, water, white vinegar or lemon, microfiber cloth
- ☐ Mix 1 cup water + 2 tbsp vinegar or juice of half a lemon
- ☐ Microwave on high for 5 minutes
- ☐ Wait 2–3 minutes before opening the door
- ☐ Wipe all interior surfaces gently
- ☐ Remove and wash the turntable
- ☐ Dry all parts completely before use
- ☐ Wipe exterior and control panel
- ☐ Dispose of used liquid safely
Do’s and Don’ts of Microwave Maintenance
To keep your microwave functioning efficiently and looking clean between deep cleans, follow these best practices.
| Do’s | Don’ts |
|---|---|
| Wipe spills immediately after they occur | Leave food residue to harden overnight |
| Cover dishes with a microwave-safe lid or paper towel | Reheat uncovered messy foods regularly |
| Use the steam method weekly for maintenance | Use abrasive pads or steel wool |
| Unplug before cleaning if concerned about electrical safety | Spray cleaners directly onto electronic panels |
| Inspect the door seal monthly for cracks or debris | Ignore persistent burning smells or sparking |
“Prevention is better than cure when it comes to appliance care. A minute of wiping after use saves ten minutes of scrubbing later.” — Carlos Mendez, Appliance Repair Technician with 18 years of experience
FAQ: Common Questions About Microwave Cleaning
Can I use apple cider vinegar instead of white vinegar?
Yes, but white vinegar is more effective due to its higher acetic acid concentration (typically 5–7%). Apple cider vinegar works in a pinch but may leave a faint color or scent behind, especially if not rinsed well.
Is it safe to microwave vinegar?
Yes, as long as it’s diluted with water and used in a microwave-safe container. Never heat undiluted vinegar for extended periods, as concentrated fumes can irritate the respiratory system. The small amount used in this method poses no risk when properly ventilated.
How often should I deep clean my microwave?
For average household use, a deep clean every 1–2 weeks maintains hygiene and appearance. Households that reheat meals daily or cook sticky foods frequently should aim for weekly cleaning. Light users may extend to every three weeks, but don’t go beyond a month without a thorough clean.
Conclusion: A Cleaner Microwave Starts Today
You don’t need special products, hours of effort, or complicated tools to restore your microwave to pristine condition. The steam-based cleaning hack outlined here leverages science and simplicity to deliver dramatic results in under 10 minutes. Whether your microwave is stained, smelly, or just overdue for attention, this method offers a fast, safe, and sustainable solution.
Maintaining a clean microwave isn’t just about aesthetics—it supports better food safety, extends the life of your appliance, and improves your cooking environment. By incorporating this quick routine into your household schedule, you eliminate one of the most overlooked sources of kitchen contamination.


 浙公网安备
33010002000092号
浙公网安备
33010002000092号 浙B2-20120091-4
Comments
No comments yet. Why don't you start the discussion?