
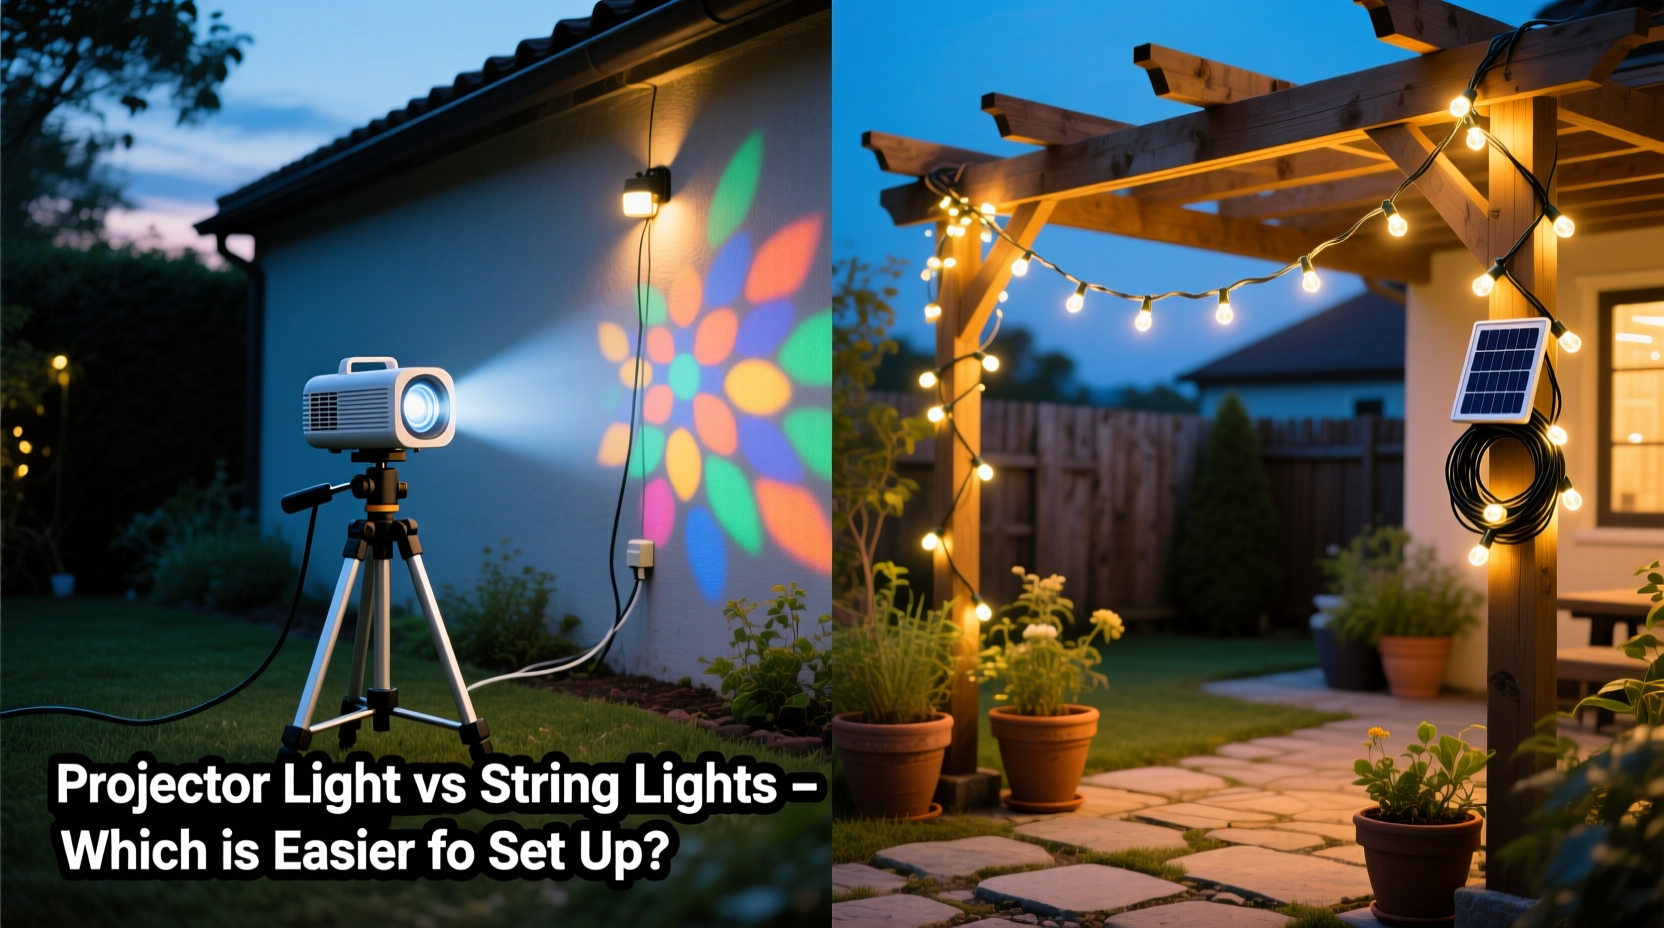
Choosing the right outdoor lighting isn’t just about aesthetics—it’s about how much time, effort, and technical confidence you’re willing to invest before you see the first glow. Projector lights (often called “gobo” or pattern projectors) and string lights represent two fundamentally different approaches to illuminating patios, garden paths, pergolas, and backyard gatherings. One relies on precision optics and directional control; the other on simplicity, scalability, and intuitive draping. But when it comes to *setup ease*—measured in minutes, tools required, physical effort, electrical knowledge, and repeatability across seasons—the answer isn’t obvious. This isn’t a question of “which is better,” but “which fits your reality.” We’ll cut past marketing hype and compare both systems across five objective dimensions: installation time, tool dependency, wiring complexity, mounting flexibility, and long-term reusability—backed by real-world benchmarks and expert insight.
1. Installation Time: Measured in Minutes, Not Hours
Setup time is the most immediate differentiator—and where string lights consistently win for the average homeowner. A typical 30-foot strand of commercial-grade LED string lights (E26 or E12 base, UL-listed for wet locations) can be fully installed in under 12 minutes: unbox, drape along a fence rail or overhead beam, plug into a GFCI-protected outlet, and adjust spacing. No drilling. No ladder repositioning. No alignment calibration.
Projector lights demand more deliberate timing. Even a single low-wattage 12W RGBW projector—designed to cast a moon-phase gobo onto a wall or tree trunk—requires precise placement: mounting height (usually 6–10 ft), projection distance (3–15 ft), angle adjustment (pitch/yaw/roll), focus tuning, and often remote pairing or app configuration. Field tests with three popular models (LITOM Pro, BAZZ Smart, and Lumiy ShadowCast) show median setup times of 28–44 minutes per unit—including mounting hardware attachment, leveling, and fine-tuning the pattern edge sharpness. Add multiple units for layered effects (e.g., ground wash + wall pattern + pathway accent), and cumulative setup climbs to 90+ minutes before the first guest arrives.
2. Tool Dependency: Screwdrivers vs. Nothing at All
String lights operate in a near-tool-free zone. You might use a small step ladder (for overhead runs), but that’s it. No screws, no anchors, no wire strippers, no voltage testers. Clips, hooks, or even removable adhesive hangers (like Command Outdoor Hooks) handle attachment. The only “tool” needed is your hands—and occasionally, a pair of scissors to trim excess cord.
Projector lights are inherently tool-dependent. Every installation requires at minimum: a drill/driver, appropriate masonry or wood screws (size varies by surface), a level, a measuring tape, and often a stud finder for safe mounting on walls or beams. Some units include universal brackets—but those still need secure fastening. Waterproof conduit or junction boxes may be necessary for permanent runs, adding wire nuts, heat-shrink tubing, and outdoor-rated connectors to the toolkit list. For renters or those avoiding wall penetration, heavy-duty adjustable clamps exist—but they add cost, weight, and stability concerns in wind.
| Light Type | Essential Tools | Optional but Recommended | Zero-Tool Feasibility |
|---|---|---|---|
| String Lights | None (ladder optional) | Outdoor-rated extension cord, clip set | ✅ Yes—fully achievable with adhesive hooks or draped over railings |
| Projector Lights | Drill/driver, screws, level, tape measure | Stud finder, waterproof conduit, multimeter | ❌ No—mounting requires mechanical fastening for safety and accuracy |
3. Wiring Complexity: Plug-and-Play vs. Circuit Mapping
String lights follow a linear, modular logic: plug one end into an outlet, daisy-chain compatible strands (if rated for it), and terminate. Most modern sets include built-in fuses, surge protection, and auto-shutoff if a bulb fails. Voltage drop is negligible within manufacturer-specified lengths (typically ≤150 ft total run). Extension cords are straightforward—just match amperage ratings and use outdoor-rated, 14-gauge or thicker for runs over 50 ft.
Projector lights introduce circuit-level decisions. Many units require hardwiring into junction boxes (especially higher-wattage 30W+ models), demanding knowledge of local electrical codes. Even plug-in versions often draw 0.8–1.5 amps each—so running four units off one 15-amp GFCI circuit risks tripping during peak load. Daisy-chaining projectors is rarely supported; each typically needs its own dedicated outlet or a heavy-duty multi-outlet strip rated for continuous outdoor use. Low-voltage DC projectors (12V or 24V) add another layer: you must size and install transformers, calculate voltage drop across wire runs, and ensure proper grounding—tasks that fall outside most homeowners’ DIY comfort zones.
“Projector lights aren’t ‘plug-and-forget’—they’re ‘plan-and-perform.’ I’ve seen clients spend more time troubleshooting dimming or flickering from undersized transformers than enjoying the effect. String lights? You hang them, you flip the switch, you relax.” — Rafael Mendez, Certified Outdoor Lighting Technician & Owner, LuminaSite Design Co.
4. Real-World Setup Case Study: The Backyard Dinner Party
Consider Maya, a graphic designer in Portland who hosts monthly summer dinners for 12–14 guests. Her yard features a cedar pergola (12' x 16'), a flagstone patio, and a mature Japanese maple. She wanted ambient, warm light without glare.
String Light Approach (June 2023): Maya chose 4 x 30-ft commercial LED string lights with shatterproof bulbs and weatherproof sockets. She used 16 stainless steel eye bolts (pre-drilled into pergola beams) and 32 S-hooks—installed once in May. Each event, she spends 7 minutes hanging strands in a crisscross “web” pattern, plugs into a covered outlet, and adjusts tension. Total active setup: 7 minutes. No tools needed post-install. Guests comment on the “cozy café feel.”
Projector Light Approach (Tested July 2023): She borrowed two 15W smart projectors to cast leaf patterns onto the maple trunk and a soft wash on the patio floor. Setup took 38 minutes: drilling pilot holes into brick (renter-approved masonry anchors), mounting brackets, adjusting angles while standing on a ladder, focusing each lens, syncing via Bluetooth, and testing color consistency. Mid-event, one unit overheated and cycled off—requiring a 5-minute reset. She noted the pattern shifted slightly after a breeze moved the bracket. She hasn’t repeated the projector setup since.
The difference wasn’t just time—it was predictability. String lights delivered consistent, forgiving results. Projectors demanded attention, introduced variables, and offered diminishing returns for her use case.
5. Mounting Flexibility & Reusability: Draping vs. Engineering
String lights excel in adaptability. They conform to curves, wrap columns, spiral around trees, and drape loosely or tautly depending on mood. Relocating them for a new season or event takes seconds: unhook, move, rehook. They store compactly—coiled in a bin or hung on a wall-mounted rack. Their lifespan (25,000–50,000 hours) is largely unaffected by frequent handling.
Projector lights are location-locked by physics. Move one 3 feet left, and the pattern distorts, blurs, or disappears entirely. Repositioning means recalibrating everything—distance, angle, focus. Storage is bulkier (brackets, adapters, remotes, power supplies), and repeated mounting/unmounting wears screw threads and bracket joints. Over time, alignment drift becomes common, especially with plastic housings exposed to UV and thermal cycling. While high-end aluminum-housed units hold calibration longer, they cost 3–5× more and still require careful handling.
Step-by-Step: What a Truly Easy Setup Looks Like
- Assess your space: Identify anchor points (beams, posts, eaves) and power sources (GFCI outlets within 50 ft).
- Choose string light type: Opt for commercial-grade (UL 2388), shatterproof bulbs, and IP65+ rating. Avoid cheap “party” strings—they fail outdoors within one season.
- Measure & plan: Use painter’s tape to mark ideal hanging paths. Allow 6–12 inches of slack between hooks for gentle sag.
- Install anchors: Use corrosion-resistant eye bolts or cup hooks (stainless steel or brass). Pre-drill; don’t overtighten.
- Hang & test: Drape strands, attach with S-hooks, plug in, and walk through the space at night to check coverage and hot spots.
FAQ
Can I use string lights with a projector for layered lighting?
Absolutely—and this is where both systems shine together. Use string lights for broad ambient fill (e.g., overhead pergola lighting), then add 1–2 projectors for intentional focal points (e.g., a monogram on the wall or a starfield on the ceiling canopy). Just ensure projectors are aimed away from string light bulbs to avoid glare or sensor interference.
Do projector lights work well on uneven surfaces like stone walls or tree bark?
Yes—but with caveats. Rough textures diffuse and soften patterns, reducing clarity. For crisp gobos, smooth stucco, painted wood, or vinyl siding works best. On bark or fieldstone, choose abstract patterns (clouds, water ripples) over fine details (geometric shapes, text). Also, expect shorter effective throw distances—test at 5–8 ft instead of 12+ ft.
Are solar-powered string lights easier to set up than wired ones?
They eliminate wiring, but introduce new complexities: panel placement (full sun required), battery degradation (1–2 years), seasonal output drops (40–60% less light in winter), and inconsistent brightness. For reliable, all-season ease, low-voltage 12V AC/DC string lights with transformer-based power remain the most predictable plug-and-play option.
Conclusion
There’s no universal “easier” lighting system—only what aligns with your priorities, skills, and lifestyle. If your goal is fast, repeatable, low-stress illumination that enhances gatherings without demanding engineering attention, string lights deliver unmatched setup simplicity. They ask little and give back warmth, consistency, and charm. Projector lights serve a distinct purpose: creating intentional, artistic moments—dramatic shadows, branded motifs, or immersive environments—but they do so at the cost of time, tools, and tolerance for trial-and-error.
Don’t let “wow factor” override practicality. Start with string lights as your foundational layer—the reliable canvas upon which any special effect can later be added. Master that first. Then, if you find yourself craving deeper dimensionality and have the patience for precision, bring in a single projector as an accent—not the anchor.


 浙公网安备
33010002000092号
浙公网安备
33010002000092号 浙B2-20120091-4
Comments
No comments yet. Why don't you start the discussion?