
As the holiday season approaches, many homeowners look for creative ways to bring winter wonderland magic into their homes. One of the most enchanting effects is the illusion of gently falling snow—soft, shimmering flakes drifting down from above, transforming ordinary rooms into festive dreamscapes. While real snow may be scarce indoors, technology and decor offer compelling alternatives. Two popular methods stand out: using a projector with a snow animation or layering string lights to simulate a snowy glow. Each has its strengths, limitations, and ideal use cases. Understanding the differences helps you choose the right option based on your space, budget, and desired atmosphere.
How Projectors Create a Falling Snow Effect
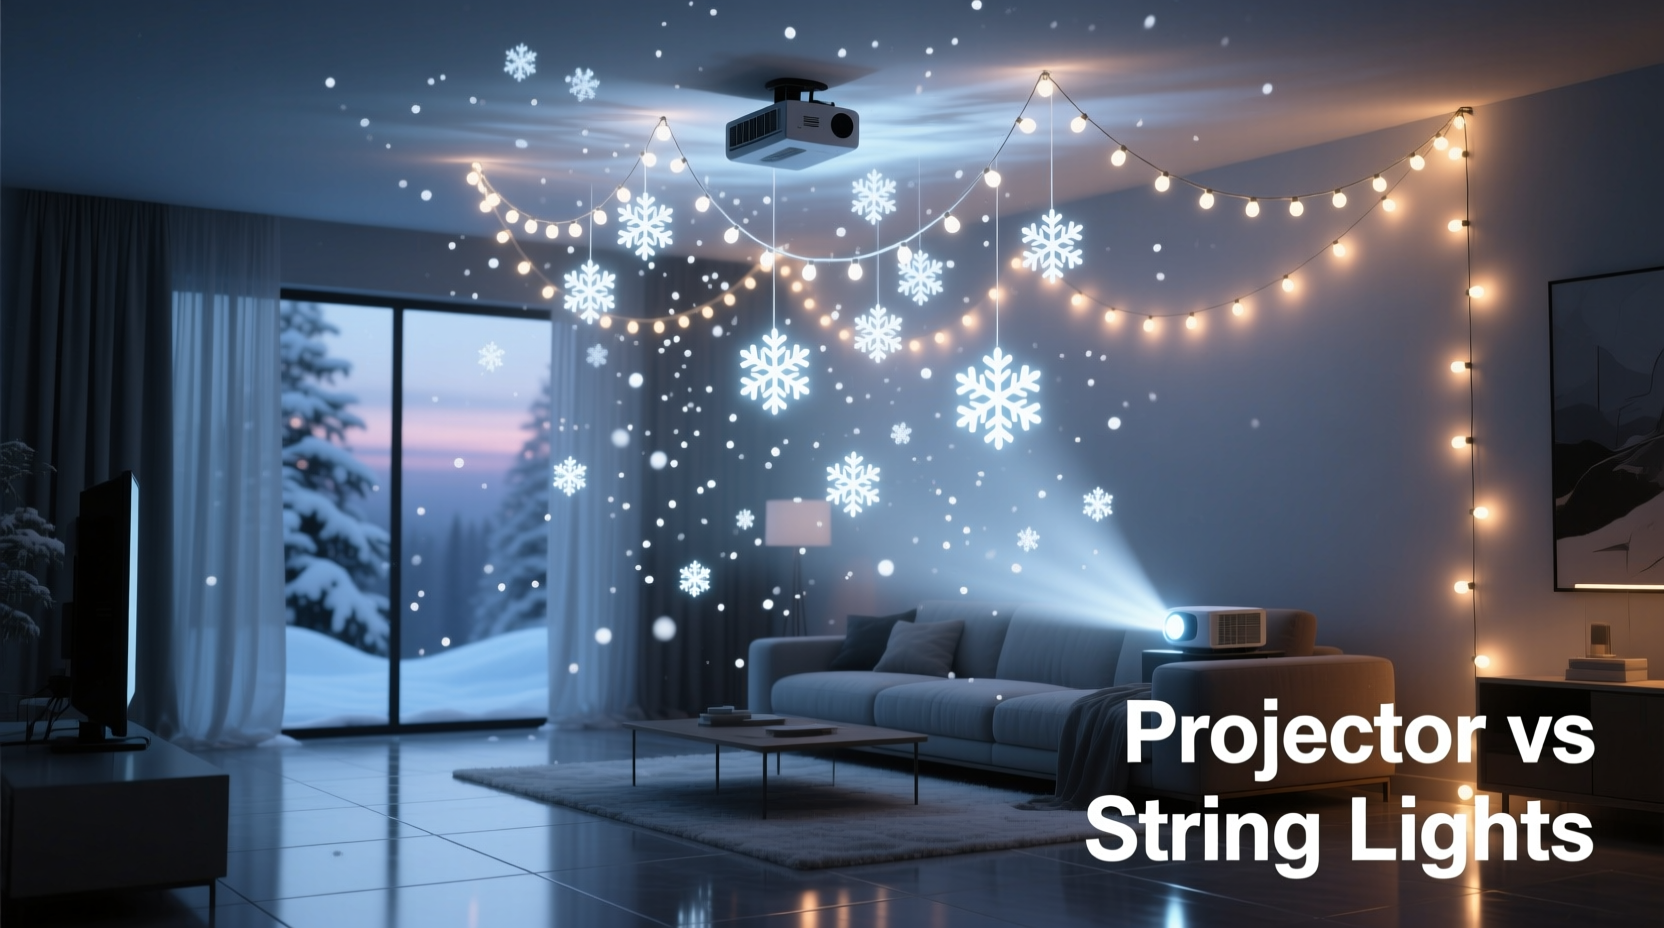
Digital projectors designed for holiday use can project high-resolution animations of falling snow directly onto walls, ceilings, and floors. These devices often come with built-in loops of snowflakes in motion, sometimes accompanied by soft music or ambient sounds like crackling fireplaces or distant sleigh bells. Modern models connect to apps or support SD cards, allowing customization of speed, density, and color temperature.
The key advantage of a projector lies in its ability to generate movement. Unlike static decor, it mimics the natural randomness of snowfall—flakes appear at different sizes, speeds, and trajectories. When properly positioned, such as in a corner pointing upward toward the ceiling, the projection can create an immersive dome-like effect, making it seem as though snow is drifting down from above throughout the room.
Projectors are particularly effective in larger spaces like living rooms, dining areas, or even indoor patios. They require minimal setup—just plug in, adjust the angle, and let the visuals do the work. Some advanced units even include motion sensors that activate the display only when someone enters the room, conserving energy and enhancing surprise.
Using String Lights to Simulate a Snowy Ambiance
String lights, especially those labeled “snowfall” or “twinkle,” take a different approach. Rather than simulating actual falling motion, they rely on optical illusions created by flickering warm-white or cool-white LEDs. When strung densely across a ceiling or around window frames, these lights mimic the scattered sparkle of snow reflecting under moonlight or lamplight.
Certain specialty string lights go further. Models with rotating discs or motorized diffusers pass light through cutouts shaped like snowflakes, casting moving shadows on walls and ceilings. As the disc spins, the projected shapes shift and glide, giving a kinetic sense of falling snow without any digital imagery. These are often battery-powered or USB-operated, making them easy to install in hard-to-reach areas.
While not a literal simulation of snowfall, this method excels in subtlety and ambiance. The warmth of incandescent-style bulbs or the crispness of cool LEDs can evoke different moods—one cozy and nostalgic, the other crisp and wintry. Layering multiple strands at varying heights enhances depth, creating a three-dimensional field of light that suggests snow-laden air.
“Lighting is emotional design. What people remember isn’t the fixture—it’s how the space made them feel.” — Lena Torres, Interior Lighting Consultant
Comparative Analysis: Projector vs String Lights
To determine which method suits your needs, consider performance across several key factors. The table below outlines a direct comparison between projectors and string lights for creating an indoor falling snow illusion.
| Feature | Projector | String Lights |
|---|---|---|
| Realism of Motion | High – animated flakes fall at variable speeds | Low to Medium – relies on flicker or shadow play |
| Installation Effort | Low – one device, plug-and-play | Medium to High – requires draping, securing, hiding wires |
| Coverage Area | Up to 100 sq ft depending on model | Flexible – scalable with more strands |
| Energy Use | Moderate – 15–30 watts | Low – LED strands use 2–10 watts total |
| Cost (Initial) | $40–$120 | $15–$50 (for quality sets) |
| Reusability & Storage | Easy – compact unit stores in box | Tricky – prone to tangling; needs careful coiling |
| Customization | High – change speed, color, sound | Low – limited to brightness and flicker mode |
Step-by-Step Guide: Setting Up Each Option
For Projectors
- Choose location: Place near a wall or corner, ideally elevated (on a shelf or tripod) pointing upward at a 45-degree angle toward the ceiling.
- Clear the projection path: Ensure no furniture or decor blocks the beam. Close curtains if ambient light interferes.
- Power on and calibrate: Turn on the projector and adjust focus until snowflakes appear sharp. Use remote or buttons to select preferred mode (e.g., slow snowfall, blue tint).
- Test coverage: Walk around the room to confirm even distribution. Reposition if needed.
- Enable automation (if available): Set timer or motion activation to conserve bulb life.
For String Lights
- Measure your space: Determine how many feet of lights you’ll need. A general rule: 100 lights per 25 sq ft for dense coverage.
- Select the right type: Choose cool-white micro-LEDs or fiber-optic strands for a frosty look. For motion effects, include a snowflake projector disc accessory.
- Plan layout: Decide whether to drape across the ceiling, frame windows, or wrap beams. Sketch a rough plan.
- Install safely: Use adhesive clips or clear hooks—never nails or tape that damages paint. Keep cords away from foot traffic.
- Connect and test: Plug in all strands, ensuring connections are secure. Turn off room lights to evaluate the glow effect.
- Add layers: Combine static strings with flickering ones to enhance dimensionality.
Real Example: A Cozy Living Room Transformation
Sarah, a homeowner in Portland, wanted to create a magical holiday vibe in her 18-foot-long living room without overwhelming her minimalist decor. She first tried string lights, installing three 50-light strands across the ceiling in a zigzag pattern. While the result was pleasant, she felt it lacked movement and didn’t fill the tall space effectively.
The following year, she invested in a $70 indoor snow projector with adjustable focus and sound options. She placed it on a bookshelf in the far corner, angled toward the ceiling. The difference was immediate: snowflakes appeared to drift down from all directions, filling the entire vaulted area with gentle motion. Her children loved the effect, and guests frequently commented on the immersive atmosphere. Sarah now uses the projector every December and stores it in a padded pouch with other seasonal electronics.
Checklist: Choosing the Right Method for Your Space
- ☐ Assess ceiling height and color—light projectors need reflective surfaces.
- ☐ Determine your budget—projectors cost more upfront but save time.
- ☐ Consider ease of installation—renters may prefer non-invasive solutions.
- ☐ Think about storage—tangled lights are frustrating to manage yearly.
- ☐ Evaluate existing lighting—dim rooms enhance both effects, but bright spaces favor projectors with higher lumens.
- ☐ Decide on mood—do you want dynamic animation (projector) or subtle sparkle (lights)?
- ☐ Check safety—ensure all devices are UL-listed, especially near children or pets.
Frequently Asked Questions
Can I use a snow projector in a room with dark walls?
Yes, but effectiveness decreases. Projectors work best on light or white surfaces. If your walls are dark, aim the beam primarily at the ceiling and use supplementary lighting to boost visibility.
Are string lights safe to leave on overnight?
Modern LED string lights are generally safe for extended use, provided they are certified (look for ETL or UL labels) and not covered by flammable materials like fabric or paper. However, it’s wise to turn them off when leaving the house or sleeping, especially if they’re older or non-branded sets.
Do snow projectors damage walls or ceilings over time?
No. Most holiday projectors use low-heat LED or LCD light sources that do not emit UV radiation or significant heat. Prolonged exposure won’t cause fading or material degradation under normal conditions.
Final Recommendation: Match the Method to Your Goal
If your priority is realism and ease, a projector is likely the superior choice. It delivers authentic motion, covers large areas quickly, and requires almost no physical alteration to your space. It’s ideal for renters, busy households, or anyone who values convenience without sacrificing visual impact.
On the other hand, string lights offer charm, flexibility, and reusability beyond the holiday season. They integrate seamlessly into broader decor schemes and can be repurposed for birthdays, weddings, or evening lounging. For those who enjoy hands-on decorating and value ambiance over animation, string lights remain a timeless option.
In some cases, the best solution is a hybrid: use a projector as the centerpiece for snowfall motion and layer in string lights along baseboards or shelves to deepen the wintry glow. This combination leverages the strengths of both technologies, creating a multidimensional experience that feels both magical and inviting.
“The most memorable interiors aren’t the most elaborate—they’re the ones that make you pause and smile.” — Marcus Reed, Residential Design Editor, *Haven Home Magazine*
Take Action This Holiday Season
Don’t wait until December 20th to figure out your holiday lighting. Test your chosen method now—whether projector or string lights—while stores still have inventory and return policies are flexible. Try different placements, brightness levels, and timing settings to find what works best in your unique space. Whether you go high-tech or handcrafted, the goal remains the same: to create moments of quiet wonder in the comfort of your home. Start planning today, and let the first 'snowfall' of the season be one you’ll remember.


 浙公网安备
33010002000092号
浙公网安备
33010002000092号 浙B2-20120091-4
Comments
No comments yet. Why don't you start the discussion?