
The Nintendo Switch Lite is a compact, portable powerhouse for gamers on the move. Its vibrant screen delivers crisp visuals, but it’s also vulnerable to scratches, smudges, and accidental drops. A high-quality screen protector is one of the most effective ways to preserve its display. However, even the best protector can be ruined by one frustrating issue: air bubbles. Applying a screen protector without bubbles requires patience, precision, and the right technique. This guide walks you through every essential step, tool, and tip to ensure a flawless installation.
Why Screen Protection Matters for Your Switch Lite
The Switch Lite’s 5.5-inch capacitive touchscreen is central to gameplay, menu navigation, and touch-based features in certain titles. Unlike the original Switch, the Lite doesn’t have a detachable screen or kickstand—it’s built for handheld use only. That means the screen faces more direct contact from fingers, pockets, bags, and surfaces.
Over time, micro-scratches accumulate from everyday handling. These may seem minor at first, but they scatter light and degrade clarity. A screen protector acts as a sacrificial layer, absorbing wear so your actual display stays pristine. High-quality tempered glass protectors also improve touch sensitivity and reduce glare, enhancing both durability and usability.
“Even minor surface damage can compromise long-term readability and resale value. A properly applied screen protector is non-negotiable for serious handheld gamers.” — Jordan Lee, Electronics Care Specialist
Essential Tools and Materials You’ll Need
Success starts before you even unbox the protector. Rushing the process or using subpar supplies increases the risk of dust contamination and misalignment—two leading causes of bubbles. Gather these items ahead of time:
- High-quality screen protector kit (preferably tempered glass with alignment tray)
- Microfiber cleaning cloth (lint-free, soft)
- Alcohol wipes or isopropyl alcohol (70% or higher) and cotton swabs
- Sticky lint roller or adhesive tape (for dust removal)
- Plastic card or squeegee tool (included in most kits)
- Tweezers (fine-tipped, optional for debris removal)
- Well-lit, dust-minimized workspace
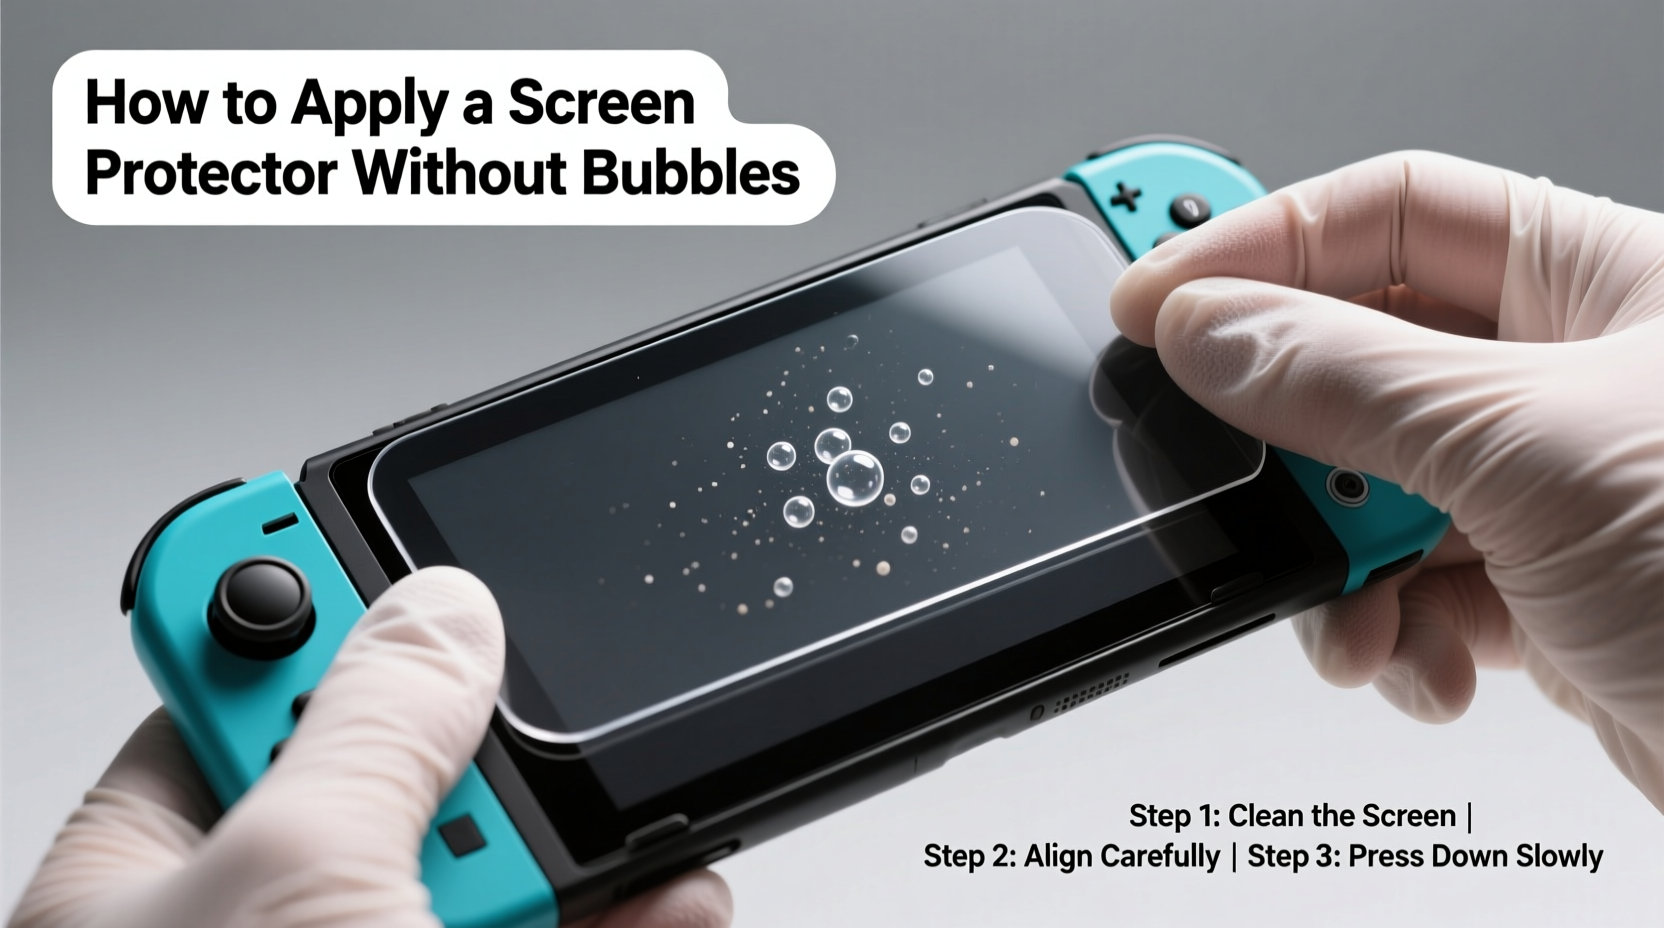
Step-by-Step Guide to Bubble-Free Application
A perfect fit begins with preparation. Follow this timeline to eliminate variables that lead to bubbles and misalignment.
- Power down your Switch Lite. Turn off the device completely to avoid accidental inputs and make the screen easier to inspect during setup.
- Clean the screen thoroughly. Wipe the display with a dry microfiber cloth to remove fingerprints. Then, use an alcohol wipe to disinfect and dissolve oils. Let it dry completely—do not skip this step.
- Remove residual dust. Use a sticky lint roller over the screen surface. Pass it slowly two to three times. Alternatively, wrap a piece of adhesive tape around your finger (sticky side out) and gently dab the screen. This picks up microscopic particles invisible to the eye.
- Inspect under bright light. Tilt the device under a lamp or phone flashlight. Look for any lingering specks. If you see anything, repeat the dust removal step.
- Prepare the alignment tray (if included). Many premium kits come with a plastic frame that snaps onto the Switch Lite’s bezel. This ensures perfect centering. Attach it carefully according to instructions.
- Peel the backing from the protector. Most tempered glass protectors have two layers: one on each side. Remove the bottom layer first (the one that touches the screen). Hold the protector by the edges to prevent fingerprints.
- Align and place gently. If using an alignment tray, slide the protector into the slots. If applying freehand, position it just above the screen, then lower it slowly starting from one edge—like lowering a piece of paper onto water. This “wet lay” method reduces trapped air.
- Press from center outward. Once placed, use the squeegee or a flat plastic card to smooth the protector. Start at the center and move outward in circular motions. Apply firm, even pressure to push air toward the edges.
- Check for bubbles. Small bubbles often disappear within 24–48 hours as the adhesive settles. Persistent ones indicate trapped dust or improper adhesion. For large bubbles, lift the protector slightly with tweezers and reseat it.
- Final wipe and test. Clean the surface with a dry microfiber cloth. Power on the device and navigate menus to confirm touch responsiveness and visual clarity.
Common Mistakes and How to Avoid Them
Even experienced users make errors that result in bubbles or poor adhesion. Awareness helps prevent frustration.
| Mistake | Why It’s a Problem | Solution |
|---|---|---|
| Skipping dust removal | Dust particles create lift points, causing bubbles and peeling | Always use a lint roller or tape after cleaning |
| Rushing the placement | Leads to misalignment and trapped air pockets | Take your time—hover and adjust before committing |
| Touching the adhesive side | Oils from skin reduce stickiness and attract debris | Handle only by the edges |
| Using low-quality protectors | Poor adhesive, inconsistent thickness, no anti-fingerprint coating | Invest in reputable brands like JETech, amFilm, or ESR |
| Applying in a dusty environment | Airborne particles settle instantly on exposed adhesive | Choose a closed room, turn off fans, and work quickly |
Real Example: The Weekend Gamer’s Fix
Mark, a college student and avid Mario Kart player, bought a budget screen protector online. He applied it on his dorm bed while music played in the background. Within minutes, he noticed multiple bubbles along the top edge. Frustrated, he removed it—only to find dust stuck to the adhesive. After reading a forum post about proper prep, he tried again the next day. This time, he cleaned the screen with alcohol, used a lint roller, and applied the new protector at his desk with a flashlight for inspection. The second attempt was flawless. His screen now resists scratches from keys in his backpack, and touch response feels unchanged.
Choosing the Right Screen Protector
Not all protectors are created equal. The type you choose impacts ease of application and long-term performance.
Tempered Glass: Offers the best protection against drops and scratches (typically rated 9H hardness). Thicker than film, but maintains excellent touch sensitivity. Ideal for users who want maximum defense and a smooth swipe feel.
TPU (Thermoplastic Polyurethane) Film: Flexible, ultra-thin, and self-healing for minor scuffs. Conforms easily to curved edges. More forgiving during installation but less scratch-resistant than glass.
Hybrid Protectors: Combine a rigid core with flexible edges. Designed specifically for devices with slight screen curvature. Often include alignment trays for foolproof setup.
For the Switch Lite, which has a flat, rectangular screen, tempered glass with an alignment frame is the top recommendation. Look for features like oleophobic coating (resists fingerprints), anti-glare finish, and precise cutouts for the front camera and speakers.
Frequently Asked Questions
Can I reuse a screen protector if I mess up the first time?
No. Once the adhesive is exposed to air or touched, its bonding strength diminishes significantly. Dust and oils compromise adhesion, increasing the chance of bubbles and peeling. Always use a fresh protector after a failed attempt.
What should I do if small bubbles don’t go away?
Most tiny bubbles resolve within 48 hours as the adhesive layer fully bonds. If they persist, try pressing down gently with a fingertip for 30 seconds. For larger bubbles caused by debris, lift the corner slightly with tweezers, remove the particle, and reapply. Do not slide the protector—this creates wrinkles.
Do screen protectors affect touchscreen accuracy?
High-quality protectors have no noticeable impact on responsiveness. The Switch Lite uses a capacitive touchscreen that works seamlessly with thin conductive layers. Avoid thick, low-grade films that may interfere with input detection.
Pro Checklist for Flawless Installation
Before you begin, run through this checklist to ensure readiness:
- ✅ Device powered off
- ✅ Work area clean and well-lit
- ✅ Microfiber cloth and alcohol wipe ready
- ✅ Lint roller or tape on hand
- ✅ Squeegee or plastic card available
- ✅ Screen free of smudges and dust (verified under light)
- ✅ Alignment tray attached (if applicable)
- ✅ Hands clean and dry
- ✅ No fans or open windows nearby
- ✅ Fresh screen protector unsealed
Final Thoughts: Protect Now, Preserve Later
Your Switch Lite is an investment in entertainment, convenience, and portability. A single scratch can be a constant visual distraction; a cracked screen can render the device unusable. Taking 15–20 minutes to apply a screen protector correctly pays off in long-term reliability and resale value. Bubbles aren’t inevitable—they’re preventable with attention to detail and the right approach.
By following this guide, you’re not just adding a layer of defense—you’re ensuring the screen remains responsive, clear, and protected through daily commutes, travel, and intense gaming sessions. Whether you're a casual player or a competitive Splatoon strategist, a bubble-free protector enhances both function and peace of mind.


 浙公网安备
33010002000092号
浙公网安备
33010002000092号 浙B2-20120091-4
Comments
No comments yet. Why don't you start the discussion?