
Setting up a new iPhone should be exciting, not frustrating. Yet many users encounter glitches—missing data, app crashes, or incomplete transfers—when moving from an old device. The method you choose matters more than you think. Two primary options dominate the setup process: Quick Start and restoring from an iTunes (or Finder) backup. While both promise a seamless transition, their reliability varies significantly depending on your circumstances.
Understanding the strengths and weaknesses of each approach helps avoid common pitfalls. This guide breaks down how each method works, compares their stability, and identifies which one offers the smoothest, most reliable experience for most users.
How Quick Start Works
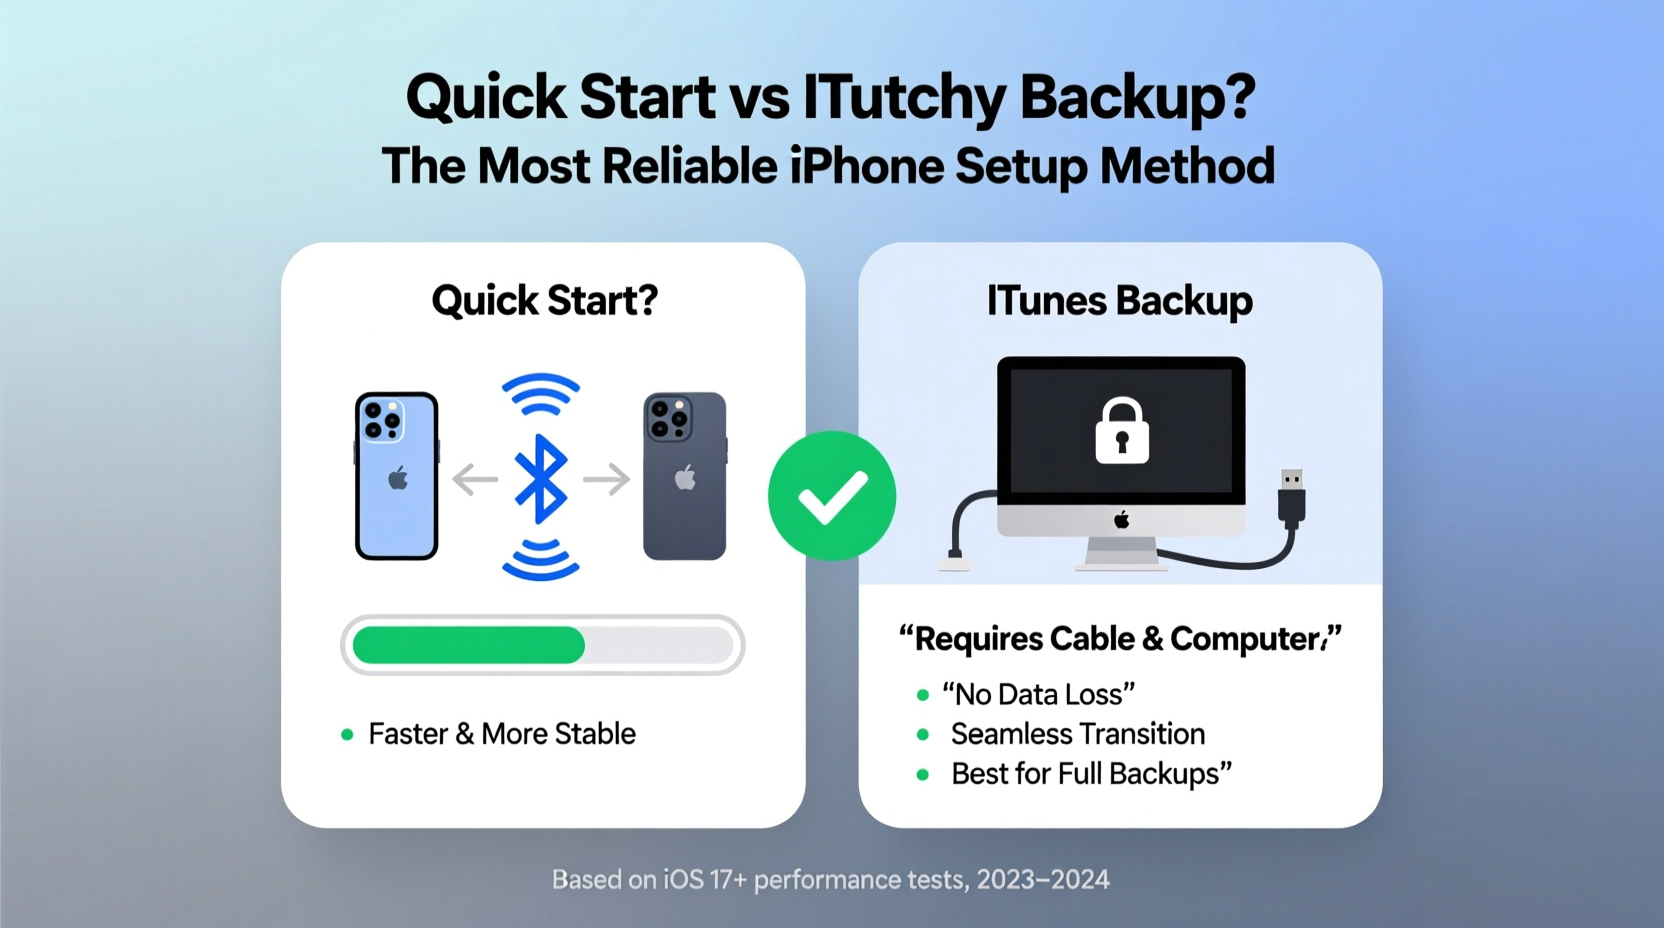
Introduced with iOS 11, Quick Start streamlines the transfer process using Bluetooth and Wi-Fi Direct between devices. When you power on your new iPhone near your current one, a prompt appears asking if you’d like to use your current device to set up the new one. If accepted, encryption keys, Apple ID details, Wi-Fi passwords, and some settings are transferred wirelessly.
The actual user data—photos, messages, apps—isn’t copied over during this initial phase. Instead, the new phone begins downloading content directly from iCloud while simultaneously syncing with the old device in the background. This hybrid approach reduces reliance on local storage but increases dependency on internet speed and server performance.
iTunes Backup: The Traditional Approach
Before Quick Start existed, restoring from an iTunes backup was the gold standard for iPhone migrations. This method involves connecting your old iPhone to a computer, creating a full encrypted backup via iTunes (on Windows or macOS Mojave and earlier) or Finder (macOS Catalina and later), then restoring that backup onto the new device.
An encrypted iTunes backup includes nearly everything: app data, settings, messages, health data, passwords, and even HomeKit configurations. Unlike iCloud backups, which may exclude large media files due to storage limits, local iTunes backups capture your entire device state—provided there’s enough disk space.
Because the data travels directly from one device to another through a wired connection, this method avoids potential network hiccups. However, it requires access to a trusted computer and can take hours depending on backup size.
“Local backups via iTunes remain the most comprehensive and stable option for transferring sensitive or complex data.” — David Lin, Senior iOS Support Analyst at AppleInsider Tech Services
Comparing Reliability: Glitch Risk by Category
To determine which method is less prone to glitches, consider real-world pain points users report: missing messages, corrupted app data, failed photo imports, and authentication loops.
| Issue | Quick Start Glitch Frequency | iTunes Backup Glitch Frequency |
|---|---|---|
| Messages not transferring | High (especially iMessage threads) | Low (if backup is recent and complete) |
| Photos missing after setup | Moderate (depends on iCloud sync status) | Very Low (full library restored locally) |
| App login credentials lost | Moderate (some apps fail to restore keychain) | Low (keychain preserved in encrypted backup) |
| Wi-Fi networks not saved | Occasional | Rare |
| Health data missing | Frequent (unless iCloud Health enabled) | Nearly always preserved |
| Setup interrupted by poor signal | Common (requires strong Bluetooth/Wi-Fi) | None (wired connection ensures continuity) |
The data shows a clear trend: iTunes backups provide higher fidelity and fewer inconsistencies, especially when dealing with sensitive or system-level information.
Step-by-Step: Choosing the Smoothest Setup Path
Follow this decision timeline to minimize glitches based on your priorities:
- Evaluate your data sensitivity. If you rely heavily on Health data, passwords, or work-related messages, lean toward iTunes backup.
- Check available storage. Ensure your computer has enough free space for a full backup (often 20–50GB+).
- Decide on convenience vs. completeness. Quick Start takes 10–30 minutes for basic setup; iTunes may take several hours but delivers fuller results.
- Create an encrypted iTunes backup. Go to iTunes/Finder > Summary > Back Up Now > Check \"Encrypt local backup\" (include Health & passwords).
- Set up new iPhone using Quick Start for initial pairing, then immediately switch to restore from the iTunes backup instead of iCloud.
This hybrid strategy combines the ease of wireless initiation with the reliability of a local restore—a best-of-both-worlds approach recommended by many enterprise IT departments.
Real-World Example: Sarah’s Upgrade Gone Wrong
Sarah upgraded from an iPhone XR to an iPhone 15 Pro. Excited by Apple’s promise of “effortless setup,” she used Quick Start without prepping a separate backup. The process completed in under 20 minutes. But within hours, she noticed critical issues: her banking app wouldn’t log in, workout history in the Health app was gone, and dozens of text messages from her sister were missing.
She contacted Apple Support, who confirmed that Quick Start had skipped certain encrypted payloads due to a brief Wi-Fi dropout. Restoring from her last iTunes backup (created two weeks prior) recovered all lost data—but cost her two days of reconfiguration. Her takeaway: never trust a single migration path without verification.
When to Use Each Method
- Use Quick Start if: You prioritize speed, have a strong internet connection, don’t rely on Health data, and are okay with minor data gaps.
- Use iTunes Backup if: You need full data integrity, handle sensitive information, lack consistent iCloud storage, or have experienced failed transfers before.
- Avoid both if: Your old phone is malfunctioning. In such cases, use iCloud Backup as a fallback.
Essential Checklist Before Setting Up Your New iPhone
- Back up old iPhone via iTunes/Finder with encryption enabled
- Ensure computer has sufficient storage space
- Charge both devices to at least 75%
- Disable Low Power Mode on both phones
- Turn off Find My iPhone temporarily (optional, speeds transfer)
- Update old iPhone to latest iOS version
- Sign into same Apple ID on both devices
- Verify iCloud settings (e.g., Photos, Messages, Health) are synced
- Start setup using Quick Start interface, but select “Restore from Mac or PC”
- After setup, validate all critical data before wiping the old device
Frequently Asked Questions
Can I combine Quick Start and iTunes backup?
Yes—and it’s often the smartest move. Use Quick Start to initiate the process, then choose “Restore from Mac or PC” when prompted. This gives you the intuitive interface of Quick Start with the robustness of a local backup.
Why did my passwords not transfer?
Passwords reside in the iCloud Keychain. If you didn’t sign in properly or skipped the keychain transfer step during setup, they won’t appear. An encrypted iTunes backup preserves local keychain data, making it more reliable for password retention.
Is iCloud Backup better than iTunes for avoiding glitches?
No. iCloud backups are convenient but limited by storage plans and network conditions. They often exclude large video libraries and may fail silently. For maximum reliability, local iTunes backups outperform iCloud in consistency and completeness.
Final Recommendation: Minimize Risk, Maximize Results
While Quick Start offers undeniable convenience, it sacrifices reliability for speed. Glitches related to message loss, broken app states, and missing health records are too common to ignore. iTunes backups, though slower and less flashy, deliver a more complete and stable migration.
The least glitchy way to set up a new iPhone is to begin with Quick Start’s interface but opt to restore from an encrypted iTunes (or Finder) backup rather than relying on iCloud sync. This method maintains the user-friendly flow Apple designed while anchoring the transfer in the most dependable data source available.
Don’t gamble with your digital life. A few extra hours spent on a wired restore today can save days of frustration tomorrow.


 浙公网安备
33010002000092号
浙公网安备
33010002000092号 浙B2-20120091-4
Comments
No comments yet. Why don't you start the discussion?