
LEGO lighting kits bring static builds to life, transforming displays into dynamic centerpieces. Whether you're illuminating a Hogwarts castle, the Millennium Falcon, or a custom city skyline, proper power delivery is critical—not just for performance, but for safety and longevity. Many builders make avoidable mistakes: using mismatched voltages, daisy-chaining too many modules, or relying on weak batteries that dim prematurely. Understanding how to power your setup correctly ensures consistent brightness, prevents damage to LEDs, and keeps your investment glowing for years.
Understanding Your LEGO Lighting Kit’s Power Needs
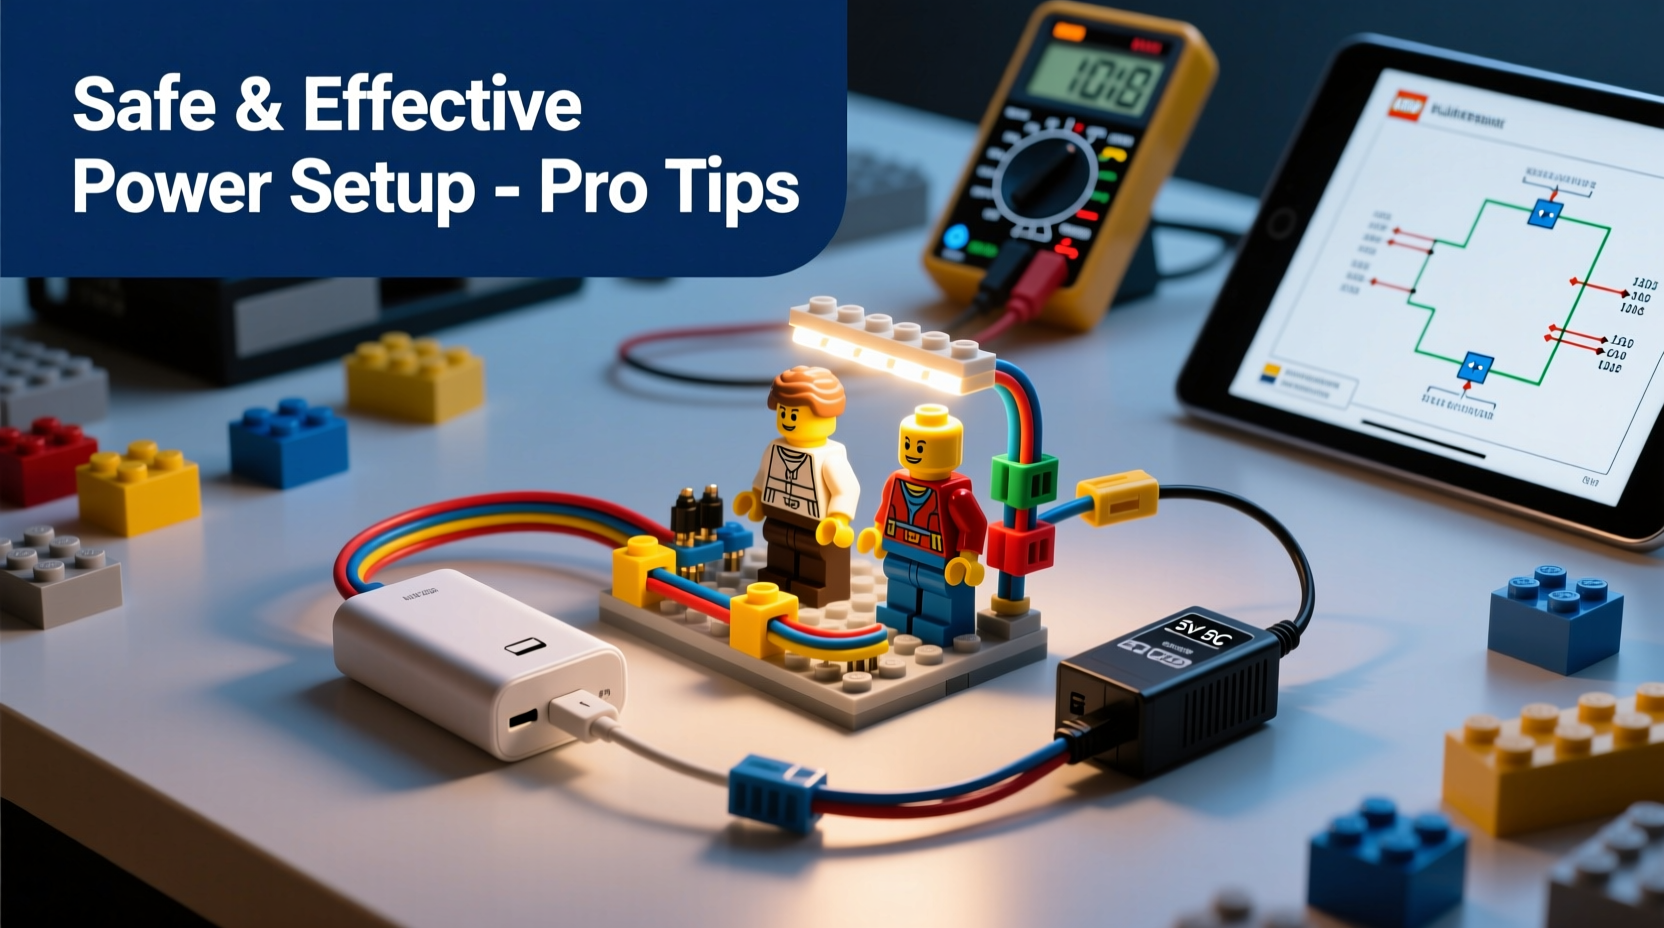
Most third-party LEGO lighting kits—such as those from Lightailing, Briksmax, or IllumiNation—are designed to operate at 3V to 5V DC, drawing minimal current (typically under 500mA per segment). These systems use either surface-mount LEDs (SMDs) or flexible light strips connected via micro cables. While some kits come with proprietary battery boxes, others support multiple input options. The key is matching voltage and current to manufacturer specifications.
Exceeding voltage can burn out LEDs instantly; falling short results in dim or flickering lights. Always check the label on your control box or instruction manual. If no specs are available, assume 3V–5V unless stated otherwise. USB-powered systems are typically 5V, making them ideal for stable external power sources.
Best Power Sources for LEGO Lighting Kits
The right power source depends on your build's complexity, location, and whether it’s permanent or portable. Here’s a breakdown of reliable options:
- AA/AAA Battery Boxes: Convenient for small setups. Most provide 3V (from two AA batteries) and are easy to hide within larger LEGO structures. However, voltage drops as batteries deplete, leading to gradual dimming.
- Rechargeable USB Battery Packs: Ideal for medium-sized installations. A standard 5V/1A power bank delivers stable output and can be discreetly placed beneath display cases.
- Wall Adapters (USB Chargers): Best for permanent displays. Use a regulated 5V/1A or 5V/2A adapter with a micro-USB or USB-C cable, depending on your kit’s connector.
- Powered USB Hubs: Useful when powering multiple kits simultaneously. Choose a hub with individual port current regulation to prevent overloading.
“Stable voltage is more important than high amperage. A clean 5V supply will outperform a fluctuating 9V source every time.” — Daniel Reeves, Electronics Engineer & LEGO MOC Designer
Step-by-Step Guide to Connecting a Stable Power Source
Follow this sequence to safely integrate an external power supply without damaging your kit:
- Identify the input type: Check if your control box uses a barrel jack, USB port, or direct wire connection.
- Select a compatible adapter: For USB inputs, any certified 5V/1A–2A phone charger works. For barrel jacks, match both voltage and polarity (usually center-positive).
- Test before installation: Connect the kit outside the model first. Ensure all LEDs illuminate evenly without flickering.
- Route cables cleanly: Use LEGO Technic pins or clips to secure wires along internal supports. Avoid sharp bends.
- Secure the power source: Place adapters or power banks underneath or behind the display. Use Velcro dots for removable attachment.
- Add a switch (optional): Install a low-profile toggle switch in-line with the positive wire for easy on/off control without unplugging.
Do’s and Don’ts: Power Safety Checklist
| Do’s | Don’ts |
|---|---|
| Use regulated 5V power supplies for USB-based kits | Never use unregulated AC adapters or mismatched voltages |
| Check polarity symbols on connectors | Avoid forcing plugs that don’t fit easily |
| Limit daisy-chained segments to manufacturer limits (usually 3–5) | Don’t overload a single power source beyond its rated output |
| Insulate exposed solder joints with heat shrink tubing | Never leave bare wires touching conductive surfaces |
| Turn off power before adjusting connections | Don’t run cables under heavy foot traffic or near heat sources |
Real Example: Powering a Large Modular Display
Tom, a LEGO enthusiast from Portland, built a sprawling downtown city scene combining five modular buildings, each with interior and street-level lighting. Initially, he used separate battery packs for each structure. After six months, inconsistent performance and frequent battery replacements frustrated him.
He upgraded to a centralized system: a 5V/3A USB hub powered by a wall adapter, with individual micro-USB cables running to each building’s control box. He labeled each cable, added inline switches, and routed everything through a false basement level made of LEGO plates. The result? Uniform brightness, silent operation, and the ability to turn the entire city on with one switch. Maintenance dropped from weekly to quarterly.
Expert Tips for Long-Term Reliability
To keep your illuminated LEGO creations performing like new, consider these advanced practices:
- Use a voltage regulator module if adapting non-standard sources (e.g., 9V battery packs). A buck converter can step down voltage safely to 5V.
- Monitor temperature in enclosed spaces. LEDs generate minor heat; poor ventilation in sealed cases can shorten lifespan.
- Invest in ferrite cores on power cables to suppress electromagnetic interference, especially if near audio equipment.
- Keep firmware updated if using smart controllers (Bluetooth/Wi-Fi enabled). Some brands release brightness optimization updates.
Frequently Asked Questions
Can I use my phone charger to power a LEGO lighting kit?
Yes, if the kit accepts USB input. Most modern phone chargers output 5V, which is safe for compatible LED systems. Ensure the connector fits securely and avoid fast-charging adapters unless specified as safe by the kit manufacturer.
Why do my lights flicker after a few hours?
Flickering often indicates insufficient power. With battery boxes, this usually means depleted cells. With wall adapters, it may point to an underpowered supply or loose wiring. Test with a fresh set of batteries or a higher-amperage adapter.
Is it safe to leave my lit LEGO set on overnight?
Generally yes—if using a regulated 5V source and the kit is undamaged. LEDs consume little power and produce minimal heat. However, for peace of mind, use a timer plug to limit runtime to 8–12 hours daily, especially in display cabinets.
Final Thoughts: Light It Right
Powering a LEGO lighting kit effectively isn’t about complexity—it’s about precision and foresight. Choosing the right source, respecting electrical limits, and planning cable management upfront saves time, money, and potential frustration. Whether you’re enhancing a child’s playset or curating a museum-grade display, professional-grade illumination starts with intelligent power design.


 浙公网安备
33010002000092号
浙公网安备
33010002000092号 浙B2-20120091-4
Comments
No comments yet. Why don't you start the discussion?