
Finding a large tick embedded in your dog’s skin can be alarming. These parasites not only cause discomfort but also carry diseases like Lyme disease, anaplasmosis, and ehrlichiosis. Removing a large tick improperly can lead to infection, retained mouthparts, or unnecessary trauma for your pet. The key is acting swiftly, calmly, and correctly. With the right tools and technique, you can safely extract the tick while minimizing stress for both you and your dog.
Why Proper Tick Removal Matters
A tick that has been feeding for more than 24–48 hours significantly increases the risk of disease transmission. Larger ticks are often engorged, meaning they’ve been attached for several days and may have transmitted pathogens. However, even if the tick is large, prompt and careful removal reduces further exposure.
Improper techniques—such as squeezing the tick’s body, using petroleum jelly, or lighting it on fire—can force harmful bacteria into your dog’s bloodstream or leave behind infected mouthparts. A clean, controlled extraction using fine-tipped tweezers or a tick remover tool is the gold standard.
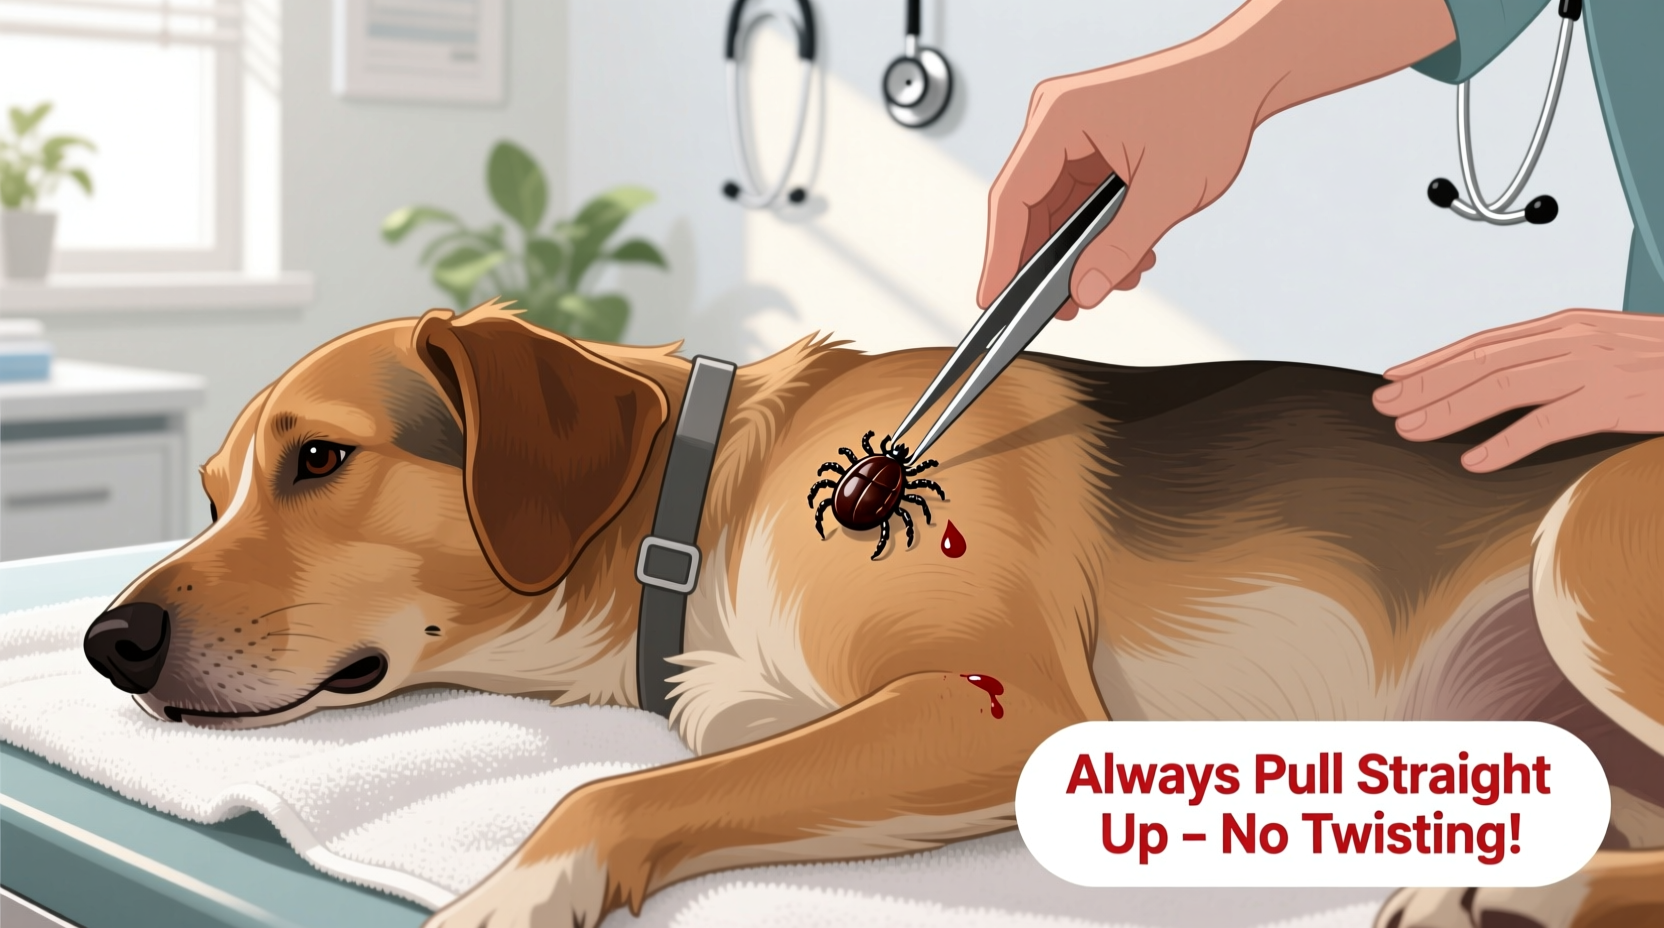
“Never twist or jerk a tick during removal. Slow, steady upward pressure ensures the entire tick is removed without breaking apart.” — Dr. Laura Bennett, DVM, Veterinary Parasitology Specialist
Step-by-Step Guide: Removing a Large Tick Safely
Follow this detailed process to remove a large tick from your dog with minimal discomfort and maximum safety.
- Prepare Your Supplies: Gather fine-tipped tweezers or a tick-removal tool (like a Tick Twister), rubbing alcohol, cotton balls, gloves, and a sealed container for disposal.
- Calm Your Dog: Choose a quiet area. Offer treats or gentle petting to keep your dog relaxed. If necessary, enlist help to gently restrain your pet without causing fear.
- Locate the Tick’s Head: Part the fur and identify where the tick’s mouthparts enter the skin. Avoid grabbing the bloated body, which can squeeze toxins into your dog.
- Grasp Close to the Skin: Position the tweezers or tool as close to the skin as possible, gripping the tick’s head or neck region—not its swollen abdomen.
- Pull Upward with Steady Pressure: Apply slow, even tension straight upward. Do not twist, crush, or wiggle abruptly. The tick should release within a few seconds.
- Check for Completeness: Inspect the tick. If legs continue moving and the body is intact, full removal was successful. If the head remains embedded, consult your vet.
- Disinfect and Monitor: Clean the bite site with antiseptic. Watch for redness, swelling, or discharge over the next week.
- Dispose of the Tick Properly: Drop it into alcohol to kill it, then seal it in a container. Consider saving it for testing if your dog develops symptoms later.
Do’s and Don’ts of Tick Removal
| Do’s | Don’ts |
|---|---|
| Use fine-tipped tweezers or a dedicated tick tool | Use fingers bare-handed—ticks carry pathogens |
| Pull straight up with steady pressure | Twist or jerk the tick out violently |
| Disinfect the bite area after removal | Apply heat, nail polish, or petroleum jelly |
| Save the tick in alcohol for possible testing | Flush it down the toilet where it may survive |
| Monitor your dog for illness signs in the next 30 days | Ignore symptoms like lethargy, fever, or lameness |
Real Example: Bella the Labrador’s Tick Incident
Bella, a 4-year-old yellow Lab, returned from a weekend hike with her family showing mild scratching near her shoulder. Upon closer inspection, her owner found a large, grayish tick deeply embedded in her neck. Remembering a vet seminar on parasite safety, the owner remained calm, gathered tweezers and gloves, and used steady upward traction to remove the tick completely. The site was cleaned, and the tick stored in alcohol. Two weeks later, Bella became listless and refused to walk. Her vet tested the saved tick and confirmed Lyme disease presence. Early antibiotic treatment prevented long-term complications. This case highlights how proper removal and preservation can aid diagnosis and improve outcomes.
Tips for Reducing Stress During Tick Removal
Dogs can sense anxiety, which may make them tense or resistant. Minimizing stress ensures smoother handling and safer results.
- Practice handling your dog’s body regularly so they’re accustomed to being touched in sensitive areas.
- Offer high-value treats during and after the procedure to create positive associations.
- Speak in a soft, reassuring tone throughout the process.
- If your dog is highly reactive, consider wrapping them in a towel (leaving only the affected area exposed) to reduce movement.
- Work quickly but deliberately—prolonged attempts increase anxiety.
When to Call the Veterinarian
While most ticks can be removed at home, certain situations require professional help:
- The tick’s head remains embedded after removal.
- Your dog shows signs of infection: pus, increasing redness, pain, or swelling.
- You’re unsure whether the entire tick was removed.
- Your dog develops symptoms such as fever, joint stiffness, loss of appetite, or fatigue within weeks of the bite.
- You’re dealing with multiple ticks or suspect a tick infestation.
Veterinarians can remove stubborn ticks under controlled conditions and may prescribe preventive antibiotics if disease risk is high.
Prevention: Stopping Ticks Before They Attach
The best way to protect your dog is preventing tick attachment altogether. Use veterinarian-approved preventives year-round, especially in wooded or grassy regions.
Options include:
- Topical treatments (e.g., Frontline, Advantix)
- Oral medications (e.g., NexGard, Bravecto)
- Tick collars (e.g., Seresto)
- Environmental control: mow lawns, clear leaf litter, and use pet-safe yard sprays.
Perform daily tick checks after outdoor activity. Focus on warm, hidden areas: ears, armpits, groin, between toes, and under the collar.
FAQ
Can I get sick from touching a tick?
Yes—some tick-borne pathogens can enter through cuts or mucous membranes. Always wear gloves or use tools when handling ticks. Wash hands thoroughly afterward.
What if the tick is already dead when I find it?
Even a dead tick should be removed carefully. It may still harbor bacteria, and decomposing tissue can cause local irritation or infection if left in place.
How long does a tick need to be attached to transmit disease?
Most diseases require 24–48 hours of feeding before transmission occurs. However, some pathogens (like those causing Powassan virus) can transfer in as little as 15 minutes. Prompt removal is critical.
Final Checklist: Safe Tick Removal at a Glance
- Wear gloves and prepare cleaning supplies.
- Calm your dog with voice and treats.
- Use fine-tipped tweezers or a tick tool.
- Grasp the tick close to the skin.
- Pull upward steadily—no twisting.
- Inspect the tick for completeness.
- Disinfect the bite site and wash your hands.
- Store the tick in alcohol for potential testing.
- Monitor your dog for illness signs for 30 days.
- Contact your vet if symptoms arise or removal was incomplete.
Take Action Today for a Healthier, Happier Dog
Removing a large tick doesn’t have to be stressful—with knowledge, preparation, and a calm approach, you can protect your dog effectively. By mastering safe removal techniques and maintaining consistent prevention, you reduce the risk of tick-borne illness and strengthen your role as a proactive pet guardian. Share these steps with fellow dog owners, keep a tick kit handy, and stay vigilant all year round.


 浙公网安备
33010002000092号
浙公网安备
33010002000092号 浙B2-20120091-4
Comments
No comments yet. Why don't you start the discussion?