
Removing an all-inclusive iPhone case might seem straightforward, but doing it incorrectly can lead to scratches on your phone, cracked casing, or even damage to ports and buttons. Many modern cases fit snugly to offer full protection, making them challenging to take off—especially after months of use. Whether your case has become discolored, no longer fits properly, or you simply want to switch styles, using safe removal methods is essential. This guide outlines practical, tested techniques that preserve both your iPhone and its protective cover.
Why Proper Case Removal Matters
An all-inclusive iPhone case typically wraps around the entire device, covering the screen, back, and sides. Some models even include built-in screen protectors or magnetic closures. While these features enhance protection, they also increase the risk of damage during removal if force is applied incorrectly. Over time, dust and debris can get trapped between the case and the phone, creating friction points. Pulling too hard may stress the phone’s frame, especially around sensitive areas like volume buttons, charging ports, or camera modules.
Apple itself recommends avoiding excessive pressure when handling accessories. According to iFixit repair analysts, over 30% of DIY case-related damages occur not during installation but during removal—often due to impatience or improper technique.
“Taking a few extra seconds to remove a case correctly can prevent costly repairs down the line.” — Jordan Lee, Mobile Device Technician with 12 years of experience in consumer electronics maintenance
Step-by-Step Guide: Removing Your All-Inclusive Case Safely
Follow this detailed sequence to minimize risk and ensure smooth removal every time.
- Power Down Your iPhone (Optional but Recommended)
While not always necessary, turning off your iPhone reduces the chance of accidental input during removal, especially if the case covers touch-sensitive areas. - Clean the Edges
Use a soft-bristled brush or dry microfiber cloth to remove dust and lint from the seams where the case meets the phone. Built-up grime increases resistance and can cause slipping fingers to scratch surfaces. - Start at the Bottom Edge
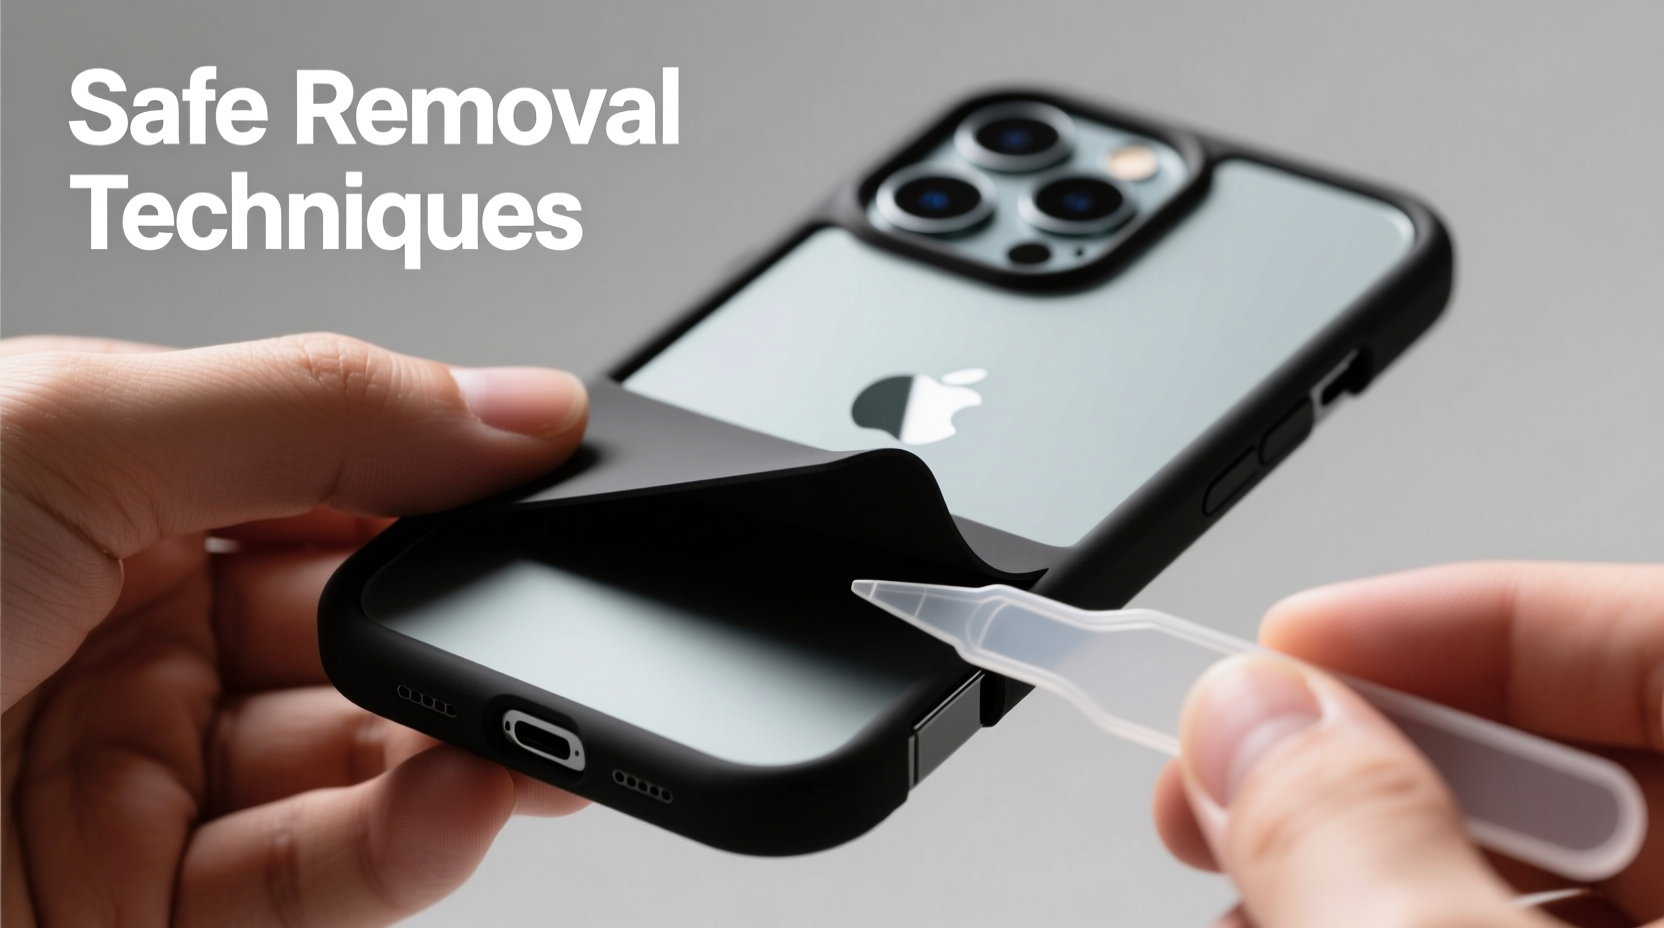
Most all-inclusive cases are designed with slightly looser tolerances near the charging port. Gently insert a plastic pry tool—or better yet, a guitar pick—between the case and the phone’s edge. Avoid metal tools; they can gouge aluminum frames. - Pry Slowly and Rotate Around
Work your way clockwise or counterclockwise, lifting small sections at a time. Do not try to pop one corner completely free before moving to the next. The goal is gradual release, not sudden detachment. - Free the Top Near the Camera
Once three sides are loose, carefully work around the top edge. Pay close attention to the camera bump—if the case fits tightly here, apply minimal upward pressure to avoid stressing lens alignment. - Lift Off Completely
With all edges separated, gently slide the case upward or downward (depending on design) to fully remove it. Never twist or bend the case while still partially attached.
Do’s and Don’ts of Case Removal
| Do’s | Don’ts |
|---|---|
| Use a plastic opening tool or fingernail (if clean) | Use keys, knives, or screwdrivers |
| Work slowly around the perimeter | Rush the process or apply brute force |
| Clean the phone and case afterward | Leave dirt buildup unattended |
| Inspect the case for wear before reusing | Reuse a warped or cracked case |
| Wash hands first to avoid transferring oils | Handle the phone with greasy or wet fingers |
Real Example: A Close Call with a MagSafe-Compatible Case
Samantha, a graphic designer in Portland, had used a third-party all-inclusive case with MagSafe compatibility for nearly nine months. When she decided to upgrade to a new silicone model, she attempted to remove the old case by prying at the side with a butter knife. Within seconds, she noticed a faint scuff along the iPhone’s polished edge. Alarmed, she switched to a plastic spudger and finished the job carefully—but the minor scratch remained visible under bright light.
After consulting her local Apple technician, she learned that many aftermarket cases develop stronger adhesion over time due to material degradation. Her experience highlights the importance of using non-abrasive tools and starting gently—even if the case seems stuck.
Checklist: Safe Case Removal Preparation
- ✅ Wash and dry your hands thoroughly
- ✅ Gather a plastic pry tool or guitar pick
- ✅ Ensure adequate lighting and a stable surface
- ✅ Power off the iPhone (recommended)
- ✅ Clear any debris from case edges
- ✅ Have a soft cloth ready to place the phone on
- ✅ Set aside enough time—don’t rush
Frequently Asked Questions
Can I use my fingernails to remove an all-inclusive case?
Yes, if your nails are short and clean. Long nails can catch and tear at rubberized edges or leave micro-scratches on the aluminum frame. For best results, use a flexible plastic tool instead.
Why does my case feel tighter than when I first put it on?
Over time, materials like TPU (thermoplastic polyurethane) can compress and conform more closely to the phone’s shape. Dust accumulation and slight warping from heat exposure also contribute to increased grip. Gentle warming and careful prying usually resolve this.
Is it safe to reuse an all-inclusive case after removing it?
Only if it shows no signs of warping, cracking, or stretched corners. A compromised case won’t provide proper protection and may interfere with wireless charging or button responsiveness. Inspect both interior and exterior surfaces before reuse.
Expert Tips for Long-Term Case Maintenance
To make future removals easier, incorporate routine care into your device maintenance schedule. Experts recommend removing and cleaning your case every two to three weeks. This prevents grime buildup and allows inspection for early signs of wear.
If your case includes a flip cover or screen shield, clean the hinge mechanism with a cotton swab dipped in isopropyl alcohol (70% concentration). Let it dry completely before reattaching. Regular cleaning preserves elasticity and ensures smoother detachment when needed.
Conclusion
Removing an all-inclusive iPhone case doesn’t have to be risky. With the right tools, patience, and technique, you can protect your investment and keep your device looking pristine. From starting at the bottom edge to avoiding metal instruments, each step plays a role in preventing avoidable damage. Whether you're switching styles or giving your phone a deep clean, treating the removal process with care pays off in longevity and performance.


 浙公网安备
33010002000092号
浙公网安备
33010002000092号 浙B2-20120091-4
Comments
No comments yet. Why don't you start the discussion?