
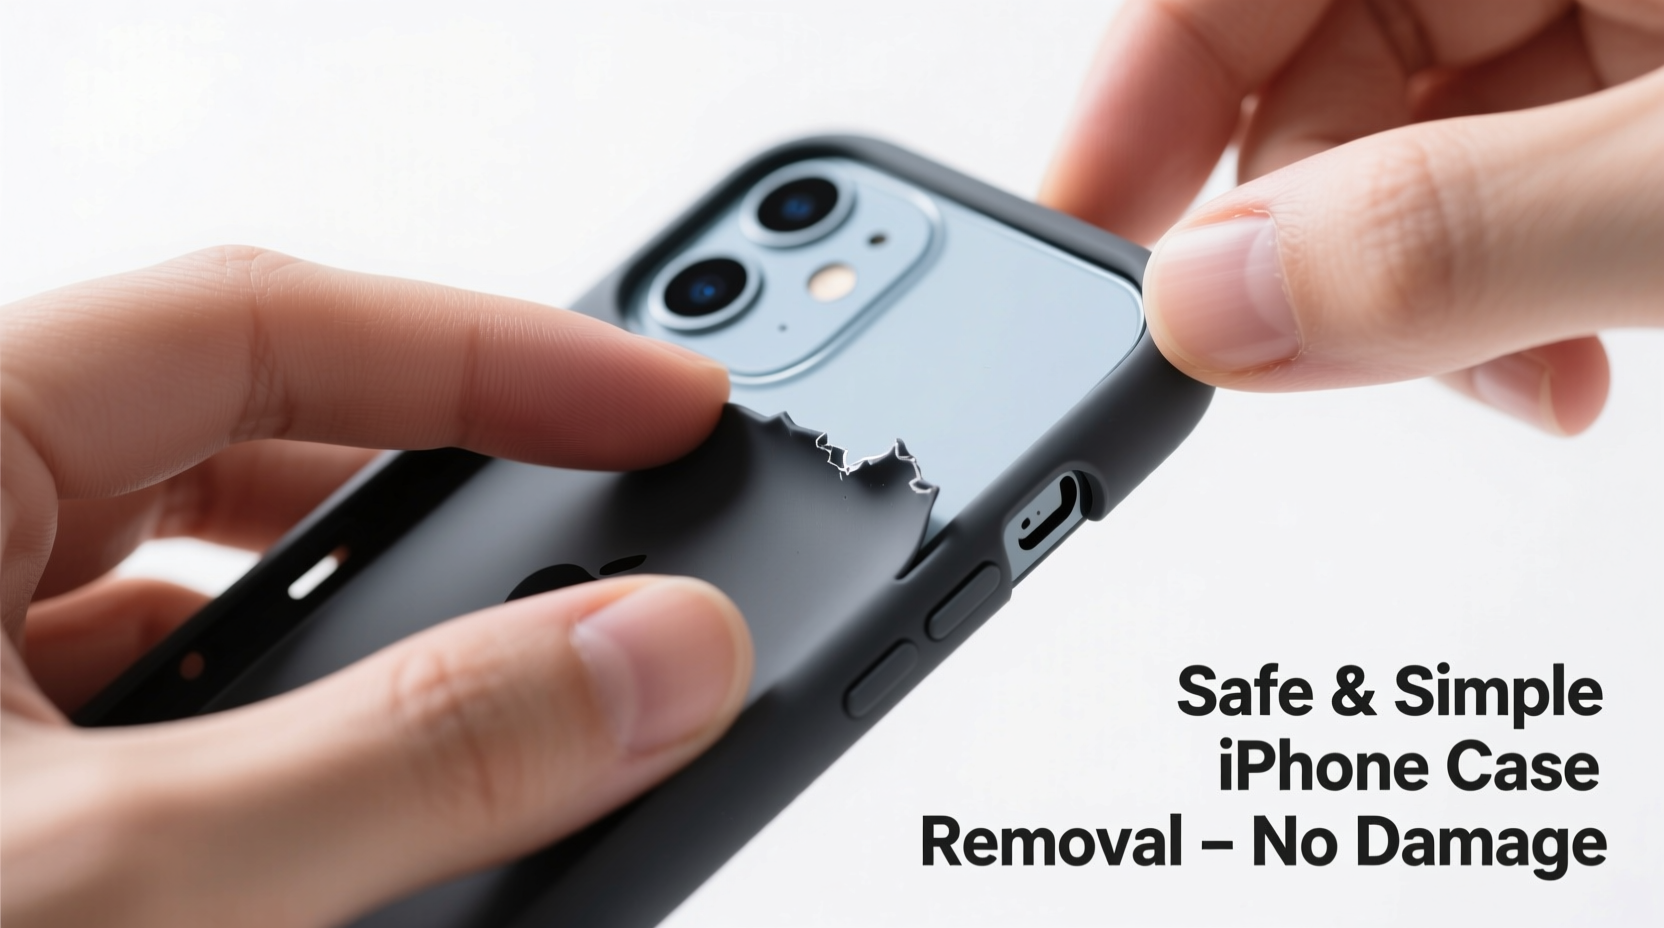
Removing an iPhone case might seem like a straightforward task—until you hear the dreaded creak of plastic, see a corner bend, or worse, notice a scratch on your screen. Many users underestimate how easily a poorly executed removal can compromise both the case and the phone’s finish. With increasingly sleek designs and premium materials, today’s iPhones deserve careful handling. Whether you’re switching cases for style, cleaning residue, or inspecting your device, doing it right matters. This guide delivers practical, tested methods to remove your iPhone case safely, preserve its integrity, and extend the life of both your phone and accessories.
Why Proper Case Removal Matters
An iPhone case does more than protect—it enhances grip, adds personal flair, and can even improve drop resistance. However, frequent removal and reattachment can strain the case’s elasticity and put pressure on the phone’s delicate edges and buttons. Over time, aggressive tugging or using sharp tools may lead to:
- Cracked or warped case corners
- Scratches along the frame or camera bump
- Button misalignment or reduced responsiveness
- Accidental screen contact from fingernails or tools
Apple’s design philosophy emphasizes precision engineering. The tight fit between the case and device ensures optimal protection but also demands a thoughtful approach when removing it. A gentle technique preserves not only aesthetics but also functional performance.
Step-by-Step Guide: Safe Removal Techniques
Follow this detailed sequence to minimize stress on your device and case. These steps apply to most common case types, including silicone, TPU (thermoplastic polyurethane), hybrid, and snap-on hard shells.
- Wash and dry your hands. Oils and dirt can make the case slippery or leave smudges. Clean hands provide better grip and reduce the risk of dropping the phone.
- Power down the device (optional). While not always necessary, turning off the iPhone prevents unintended touches or button activations during handling.
- Start at the bottom edge. Most cases have slightly looser tolerances near the charging port. Use your thumbs to gently lift the lower corners outward, away from the phone.
- Peel one side slowly. Once one corner is free, work diagonally upward, using your fingers to gradually separate the case from the frame. Avoid twisting motions that could bend the case.
- Clear the camera module carefully. If your case has a raised bezel around the camera, ensure it lifts straight up without catching on lenses or microphones.
- Release the top last. The speaker grille and front sensors are sensitive areas. Gently ease the final section over the top edge, keeping the phone parallel to the surface below in case it slips.
This method prioritizes controlled separation over speed. Rushing increases the chance of snapping a clip or gouging the aluminum band.
Do’s and Don’ts of iPhone Case Handling
| Do’s | Don’ts |
|---|---|
| Use flat fingertips to distribute pressure evenly | Use keys, knives, or metal tools to pry |
| Remove the case over a soft surface (e.g., bed or couch) | Remove it while holding the phone over hard floors |
| Clean the case regularly to prevent grit buildup | Leave the case on for months without inspection |
| Store the case in a dust-free container when not in use | Stretch or twist the case aggressively |
| Check for wear every few weeks | Force a swollen or deformed case back on |
Adhering to these guidelines helps maintain structural integrity and reduces long-term wear on both the phone and case.
Expert Insight: Engineering Behind the Fit
The snug fit of modern iPhone cases isn’t accidental—it’s engineered. Manufacturers design cases with precise cutouts and flexible sidewalls to absorb impact while maintaining access to ports and controls. According to mobile accessory designer Marcus Lin, “A well-fitted case should require deliberate effort to install and remove, but never force. If it feels stuck, something’s likely compromised—either the case material has degraded, or debris is lodged beneath.”
“Over time, exposure to heat, UV light, and pocket lint causes micro-tears in rubberized cases. That changes their flexibility and makes removal riskier.” — Marcus Lin, Product Designer at Apex Mobile Gear
This insight underscores why routine maintenance and mindful removal matter. Even high-quality cases degrade, especially if exposed to extreme conditions.
Real Example: The Cost of Carelessness
Jamie, a freelance photographer in Portland, used a third-party TPU case on her iPhone 14 Pro for nearly nine months without removing it. When she finally decided to clean it, she attempted to pry it off with a credit card. Midway through, the edge snapped near the volume buttons. Worse, the tool slipped and left a fine scratch along the stainless steel frame. The damage wasn’t covered under warranty, and replacement parts cost over $70. A simple weekly wipe-down and proper removal technique could have prevented both the grime buildup and physical harm.
This scenario illustrates how neglect and improper handling compound risks. Regular care reduces the need for forceful intervention later.
Checklist: Preparing for Safe Case Removal
Before removing your iPhone case, run through this quick checklist to ensure safety and efficiency:
- ✅ Wash and dry your hands thoroughly
- ✅ Power off the device (recommended for older models or sensitive users)
- ✅ Place the phone on a soft, stable surface (pillow, towel, or padded desk mat)
- ✅ Inspect the case for cracks, swelling, or trapped debris
- ✅ Have a clean microfiber cloth ready for immediate wiping
- ✅ Keep replacement case nearby if switching immediately
Completing these steps sets the stage for a smooth, damage-free experience.
Frequently Asked Questions
Can I use water or lubricant to help remove a tight case?
No. Introducing moisture or oils—even in small amounts—can seep into the charging port or speaker mesh, leading to corrosion or malfunction. Stick to dry, manual removal techniques only.
My case won’t budge. What should I do?
If the case feels abnormally stuck, stop forcing it. Check for debris around the edges using a flashlight. Sometimes lint or sand compacts over time, increasing friction. Use a soft-bristled brush (like a clean toothbrush) to gently dislodge particles before attempting removal again.
How often should I remove my iPhone case?
Aim to remove and clean both the case and phone every 2–4 weeks. This prevents dust accumulation, eliminates odor-causing bacteria, and allows you to inspect for early signs of wear or discoloration.
Final Thoughts: Small Habits, Lasting Protection
Protecting your iPhone goes beyond buying a high-end case. It includes how you handle, clean, and remove it daily. The techniques outlined here are simple but effective—rooted in understanding material behavior and respecting design precision. By adopting a consistent, gentle approach, you extend the lifespan of your accessories and maintain your phone’s pristine condition.


 浙公网安备
33010002000092号
浙公网安备
33010002000092号 浙B2-20120091-4
Comments
No comments yet. Why don't you start the discussion?