
Nail patches, especially trendy ones like Shiny Love Nail Patches, offer a quick, damage-free way to achieve salon-quality manicures at home. They’re adhesive-based, easy to apply, and come in dazzling designs that last for days. But when it’s time to take them off, many people make the mistake of peeling or forcing them off, which can lead to thinning, peeling, or weakened nails. The good news is that with the right approach, you can remove these patches safely and preserve the health of your natural nails. This guide walks through gentle, effective techniques backed by nail care professionals.
Why Proper Removal Matters
The structure of your natural nail is delicate. The top layer, known as the nail plate, is made of keratin and can be compromised by harsh chemicals, excessive moisture, or mechanical stress. When nail patches are removed improperly—such as by picking or peeling—they can lift layers of the nail along with them, leading to brittleness and ridges over time.
Shiny Love Nail Patches use a strong but flexible adhesive designed to stay put during daily activities. While this ensures longevity, it also means they shouldn’t be treated like stickers. Gentle dissolution of the bond is key to protecting your nail surface.
“Many clients come in with damaged nails after removing decorative patches too aggressively. A slow, moisturizing approach prevents micro-tears and keeps the nail bed healthy.” — Dr. Lena Torres, Licensed Esthetician & Nail Health Specialist
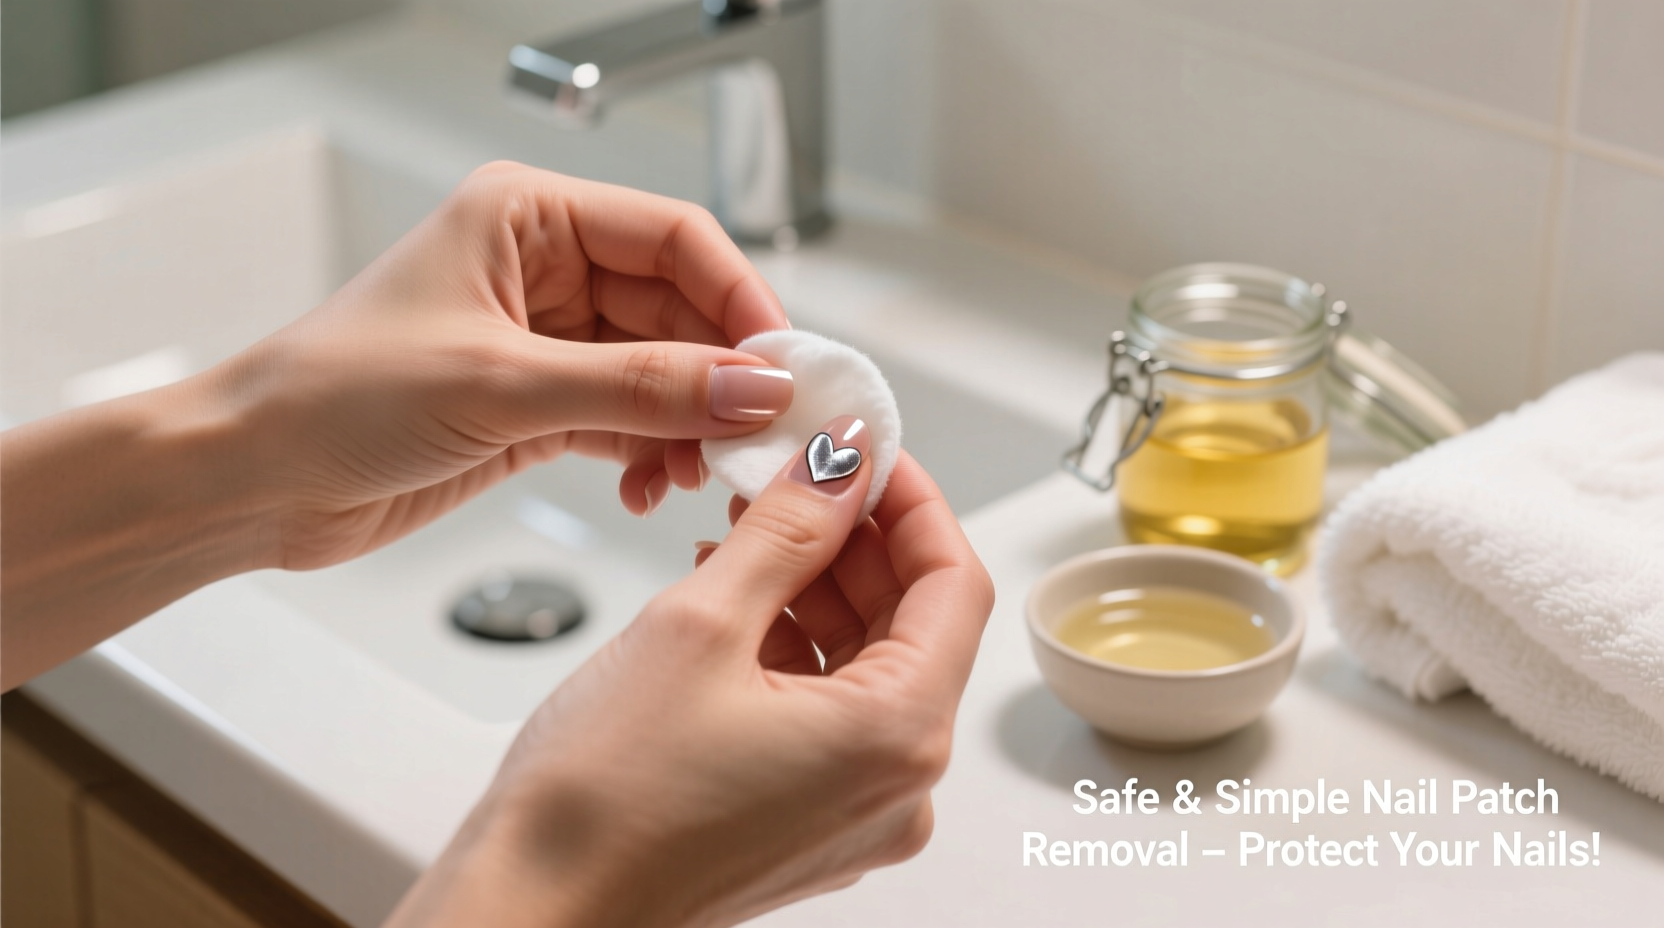
Step-by-Step Guide: Safe Removal Process
Follow this detailed method to remove your nail patches without compromising nail integrity.
- Prepare Your Tools: Gather cotton pads, acetone-free nail polish remover (or olive oil), aluminum foil, a cuticle pusher, and a nourishing cuticle oil.
- Trim Excess Length: If the patch extends beyond your nail edge, gently trim it with nail scissors to avoid snagging during removal.
- Soak a Cotton Pad: Use an acetone-free remover or warm olive oil. Acetone can dry out nails, so avoiding it helps maintain moisture balance.
- Apply to Each Nail: Place the soaked cotton pad over one nail, ensuring full coverage of the patch.
- Wrap with Foil: Fold a small piece of aluminum foil around the fingertip to hold the cotton in place. Repeat for all fingers.
- Wait 10–15 Minutes: Let the solution soften the adhesive. Do not rush; patience prevents forceful removal.
- Gently Slide Off: After soaking, use a wooden cuticle pusher to nudge the edge of the patch. It should lift easily without resistance.
- Clean Residue: If any sticky residue remains, wipe gently with a fresh cotton pad dampened with oil or remover.
- Moisturize Immediately: Apply cuticle oil and massage into the nail and surrounding skin to restore hydration.
Alternative Methods for Sensitive Nails
If you have naturally thin or sensitive nails, consider even gentler options:
- Warm Water Soak: Submerge fingertips in warm, soapy water for 15–20 minutes. The adhesive loosens gradually, allowing patches to slide off.
- Baby Oil or Coconut Oil: These natural oils break down adhesives slowly. Apply generously, cover with gloves for 20 minutes, then gently wipe away.
- Hairdryer Method (Low Heat): Warm air can soften the glue. Hold a dryer on low, 6 inches from nails, for 30 seconds per finger, then try lifting the corner gently.
These alternatives are ideal for those avoiding chemical exposure or managing nail conditions like psoriasis or eczema around the cuticles.
Do’s and Don’ts of Nail Patch Removal
| Do’s | Don’ts |
|---|---|
| Use acetone-free removers or natural oils | Peel or pick at the patches aggressively |
| Allow ample soaking time | Use metal tools to scrape off residue |
| Maintain hydration with cuticle oil post-removal | Leave patches on beyond 7–10 days (risk of moisture trapping) |
| Inspect nails afterward for signs of thinning or irritation | Apply new patches immediately without giving nails a break |
| Give nails 24–48 hours to breathe between applications | Expose softened nails to harsh detergents right after removal |
Real Example: Sarah’s Recovery Routine
Sarah, a 29-year-old graphic designer, loved using Shiny Love Nail Patches for client meetings but noticed her nails were becoming increasingly brittle. After three consecutive weeks of wear, she tried peeling one off and ended up with a thin, white streak across her ring finger nail.
She consulted a nail technician who advised a two-week break and a strict regimen: nightly cuticle oil massages, weekly olive oil soaks, and never wearing patches longer than eight days. She adopted the foil-wrap removal method and within a month, her nails regained strength and shine. “I didn’t realize how much damage I was doing just by rushing the removal,” she said. “Now I treat my nails like delicate skin—gentle care makes all the difference.”
Essential Post-Removal Care Checklist
To keep your nails resilient and ready for future wear, follow this recovery checklist:
- ✔️ Apply vitamin E or jojoba oil twice daily for 3–5 days after removal
- ✔️ Avoid gel polish or acrylics for at least 48 hours
- ✔️ Wear gloves when washing dishes or cleaning
- ✔️ Buff nails lightly only if needed—never over-buff
- ✔️ Drink plenty of water and maintain a protein-rich diet to support keratin production
- ✔️ Limit patch use to 5–7 days per application cycle
Frequently Asked Questions
Can I reuse Shiny Love Nail Patches?
No, these patches are designed for single use. Once removed, the adhesive loses its grip and may harbor bacteria from skin contact. Reusing them increases the risk of uneven adhesion and infection.
What if the patch won’t come off even after soaking?
Extend the soak time by 5–10 minutes. If still stuck, switch to a different oil (like almond or castor) which may penetrate the adhesive better. Never force it—continued resistance may indicate the patch has bonded too tightly due to prolonged wear.
How often can I safely wear nail patches?
It’s best to follow a cycle: wear patches for up to 7 days, then allow your nails to rest for 2–3 days. This prevents moisture buildup under the patch, which can lead to fungal issues or softening of the nail plate.
Protect Your Nails, Preserve Your Style
Beautiful nails don’t have to come at the cost of nail health. With mindful removal techniques and consistent aftercare, you can enjoy the convenience and glamour of Shiny Love Nail Patches without sacrificing strength or natural beauty. Treat your nails with the same care you’d give to fine fabrics or delicate skin—because they are living structures that reflect your overall wellness.
Start today: the next time you remove a patch, do it slowly, hydrate thoroughly, and listen to what your nails tell you. Small habits build long-term resilience.


 浙公网安备
33010002000092号
浙公网安备
33010002000092号 浙B2-20120091-4
Comments
No comments yet. Why don't you start the discussion?