
Attaching a lifting rope to a water bottle might sound like an unusual task, but it’s surprisingly common in fitness routines, outdoor survival kits, and improvised training systems. Whether you're using a water bottle as a makeshift weight for resistance exercises, creating a pulley system for lifting gear, or preparing a compact solution for hydration access in remote areas, the key is ensuring the attachment is both secure and durable. A poorly secured rope can lead to spills, equipment loss, or even injury. This guide breaks down practical, tested methods to fasten a rope to a standard water bottle safely and effectively—without compromising structural integrity or functionality.
Why Secure Rope Attachment Matters
The importance of a reliable connection between rope and container becomes clear when force is applied. In fitness contexts, swinging or lifting a water-filled bottle multiplies stress on the attachment point. Outdoors, raising a bottle to a tree branch for animal-safe storage demands a knot that won’t slip under tension. Even minor leaks from a loose wrap can ruin supplies or create hazards. The goal isn’t just to tie something—it’s to create a bond that withstands dynamic loads, movement, and environmental factors like moisture and friction.
Most plastic water bottles aren’t designed for load-bearing tasks, so success lies in distributing force intelligently and avoiding weak points such as the cap or neck threads, which are prone to failure under stress.
Key Principles for Safe and Durable Attachment
Before diving into specific techniques, understand these foundational principles:
- Distribute Load Evenly: Avoid concentrating pressure on one part of the bottle. Use wraps or harnesses that spread tension across broader surfaces.
- Avoid Stress on the Cap: The cap and neck are structurally weak. Never rely solely on threading rope through the cap loop unless reinforced.
- Use Non-Slip Knots: Choose knots known for holding firm under variable loads, such as the bowline, taut-line hitch, or double fisherman’s bend.
- Test Before Use: Always simulate real-world forces by gently pulling and shaking the setup before full deployment.
- Match Rope to Task: Nylon or polyester ropes offer strength and mild stretch; avoid frayed or low-diameter cords.
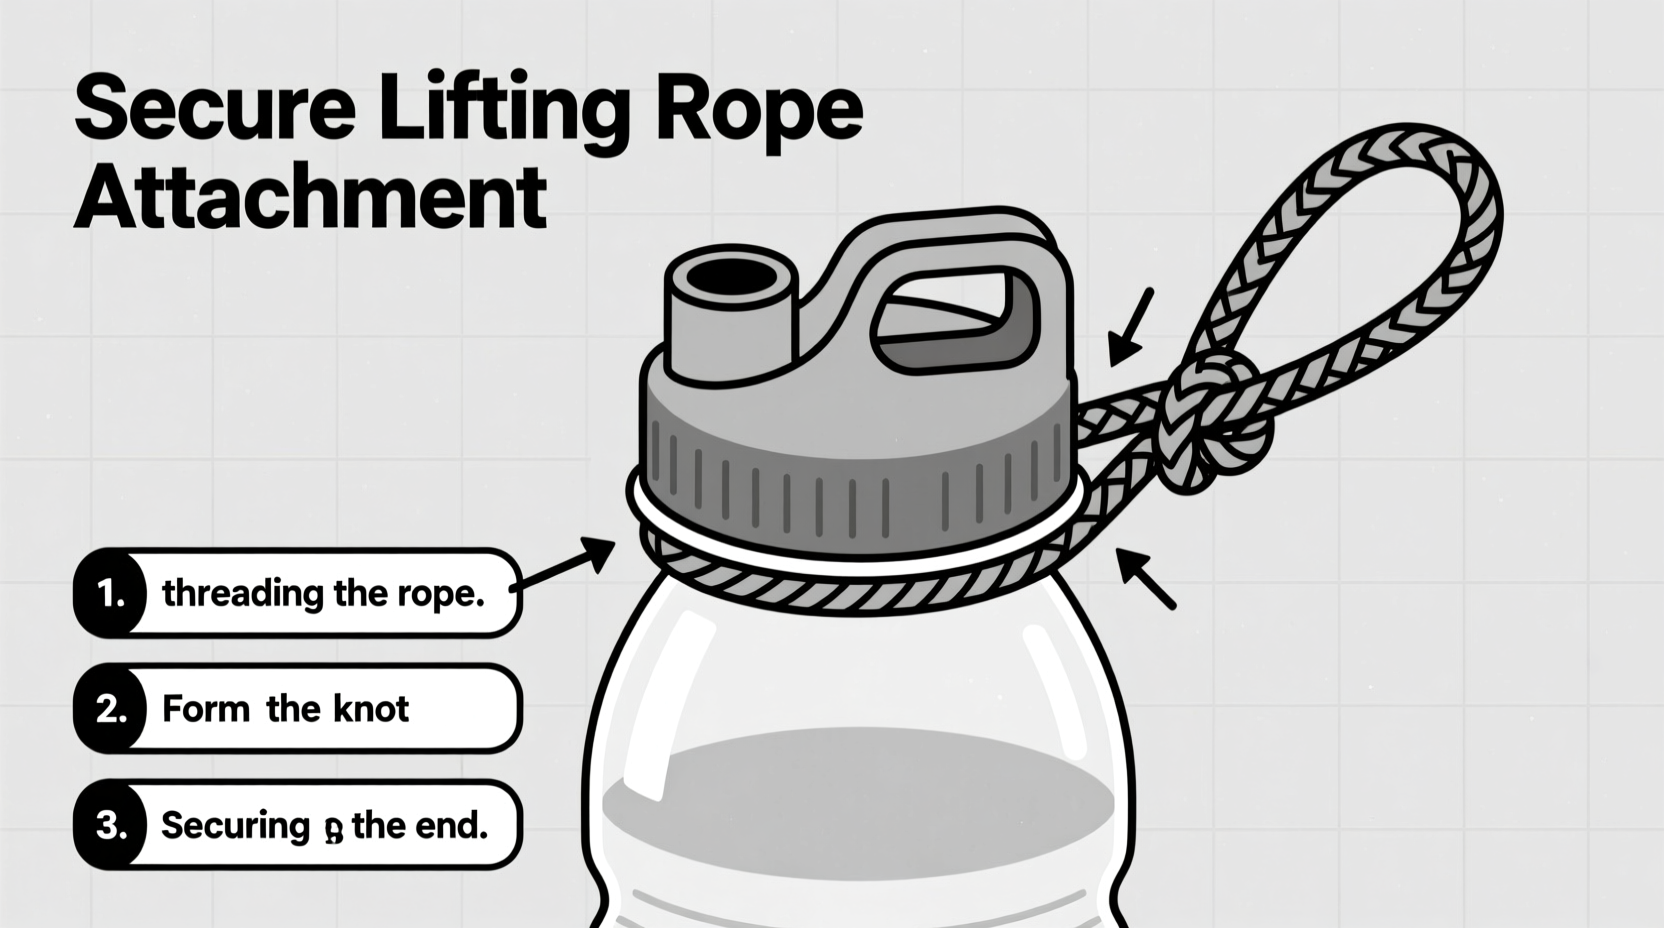
Step-by-Step Guide: 3 Proven Methods
Method 1: The Barrel Wrap (Best for Lifting & Carrying)
This method encircles the widest part of the bottle, using the natural shape to lock the rope in place. Ideal for lifting vertically or carrying multiple bottles in a bundle.
- Lay the rope horizontally across the center of the bottle.
- Wrap both ends around the bottle in opposite directions, crossing over the top.
- Bring the ends under and up through the center intersection, forming a cinch.
- Pull tight to snug the wrap against the bottle’s curvature.
- Tie a secure knot (e.g., square knot) above the bottle to join the ends.
- Add a bowline at the top loop to connect to a carabiner or main line.
This creates a stable sling that resists slipping and keeps the bottle upright during transport.
Method 2: The Handle Reinforcement Loop (For Bottles With Built-In Handles)
Many sports bottles come with molded handles. While convenient, they’re often brittle and not load-rated. This technique reinforces the handle without stressing the plastic directly.
- Cut a short length of webbing or strong cord (about 6 inches).
- Thread it through the handle from front to back.
- Tie a double fisherman’s knot to form a permanent loop.
- Attach your lifting rope to this loop using a carabiner or bowline.
By transferring the load to external hardware, you preserve the handle’s integrity and allow for quick detachment.
Method 3: The Neck Harness (For Lightweight Suspension)
Suitable only for light-duty applications like hanging a bottle from a backpack frame or shelter ridge line.
- Cut a piece of paracord about 18 inches long.
- Fold it in half and pass the bight through the bottle’s neck, below the cap.
- Pull the ends through the bight to create a girth hitch around the shoulder of the bottle.
- Tie a clove hitch on the standing part above the bottle to prevent slippage.
- Secure the free end with a stopper knot.
This method works best with bottles that have a defined shoulder taper. Never use it for heavy loads or dynamic motion.
Do’s and Don’ts: Quick Reference Table
| Do’s | Don’ts |
|---|---|
| Use high-strength rope (minimum 50 lb test) | Use old, worn, or knotted rope with reduced tensile strength |
| Distribute load across the bottle body | Hang solely by the cap or cap loop |
| Reinforce weak points with webbing or metal rings | Apply sudden jerking motions without testing first |
| Inspect regularly for wear or deformation | Leave bottles exposed to UV light or extreme heat for long periods |
| Freeze water to add stability and reduce sloshing | Overfill bottles—leave headspace to prevent pressure buildup |
Real-World Example: Backpacker’s Hydration Hack
Jamal, an experienced hiker in the Sierra Nevada, needed a way to keep his water accessible while cooking at camp. Bears were active, so leaving bottles on the ground wasn’t safe. He used Method 2 with a Nalgene-style bottle that had a small handle. He attached a 12-inch nylon strap through the handle, tied it off with a barrel knot, then clipped a lightweight carabiner to the loop. From there, he connected a 10-foot dyneema cord to hang the bottle from a tree limb 10 feet up. The system held for three days, surviving wind and occasional bumps. By not relying on the plastic handle alone, he avoided breakage and kept his water clean and secure.
“In field improvisation, redundancy saves gear—and sometimes safety. Always back up plastic components with stronger materials.” — Dr. Lena Torres, Outdoor Safety Instructor, National Wilderness Training Center
Checklist: Secure Rope-to-Bottle Setup
- ✅ Choose a sturdy, undamaged water bottle with thick walls
- ✅ Select appropriate rope (paracord, nylon, or polyester; 4–6 mm diameter)
- ✅ Identify the strongest attachment zone (body, handle base, or shoulder)
- ✅ Apply one of the three methods based on intended use
- ✅ Tie all knots properly and dress them tightly
- ✅ Test the setup with gradual force before full deployment
- ✅ Inspect daily for signs of wear, especially in outdoor conditions
Frequently Asked Questions
Can I reuse the same bottle after repeated lifting?
Yes, but inspect it closely each time. Repeated stress can cause micro-cracks near attachment points, especially around the neck or base. If the bottle shows clouding, warping, or brittleness, replace it immediately.
Is it safe to swing a water bottle on a rope for exercise?
Only if using a robust method like the barrel wrap and a durable bottle (e.g., thick PET or HDPE). Avoid thin disposable bottles. Start with partial fills and controlled movements to minimize centrifugal force. Supervise closely to prevent accidents.
What’s the strongest knot for connecting rope to itself above the bottle?
The bowline is ideal for creating a fixed loop that won’t slip under load. For adjustable tension, pair a taut-line hitch with a stopper knot. Avoid slipknots or granny knots, which can loosen unexpectedly.
Final Thoughts: Strength Through Simplicity
Securing a lifting rope to a water bottle doesn’t require specialized tools or advanced skills—just attention to detail and respect for material limits. The simplest methods often prove the most reliable when executed correctly. Whether you're building a DIY gym, organizing a survival kit, or solving a logistical challenge outdoors, a well-attached rope turns an everyday object into a functional tool. Durability comes not from brute force, but from smart design: distributing load, choosing the right materials, and verifying performance before relying on it.


 浙公网安备
33010002000092号
浙公网安备
33010002000092号 浙B2-20120091-4
Comments
No comments yet. Why don't you start the discussion?